
Introduction
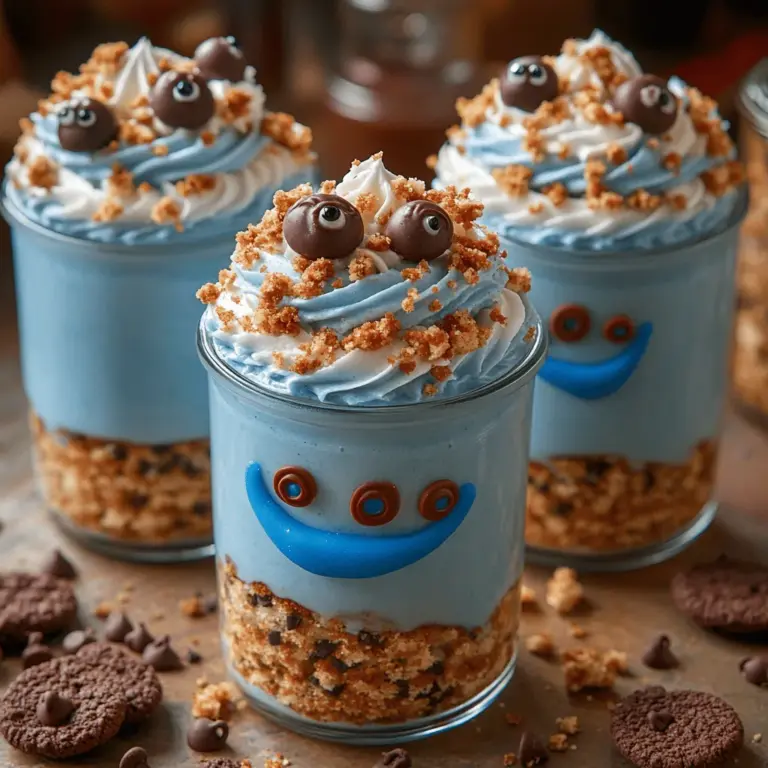
Welcome to a delightful journey into the world of whimsical desserts with our Cookie Monster Cake Jars recipe! These charming, layered treats capture the essence of childhood nostalgia while appealing to the sweet tooth of adults. Imagine a dessert that combines the fun of cookies and cake, all served in a cute, portable jar. These cake jars are not only a feast for the taste buds but also a visual treat, bringing a pop of color and whimsy to any celebration.
The appeal of Cookie Monster Cake Jars lies in their playful presentation and the joy they evoke. Perfect for birthday parties, family gatherings, or even as a unique dessert at a casual get-together, these jars allow for individual servings that make sharing easy and fun. The combination of textures—from the creamy frosting to the crunchy cookie crumble—ensures that each spoonful is a delightful experience. The bright blue layers and cookie-themed decorations will undoubtedly spark smiles and laughter, making them a hit with kids and adults alike.
In an era where themed desserts have taken center stage, the Cookie Monster Cake Jar stands out as a creative option that goes beyond the standard cake or cupcake. They embody the spirit of celebration, inviting everyone to indulge in a sweet treat that’s as entertaining to look at as it is to eat. Whether you’re a parent looking to surprise your little ones or an adult wanting to relive those carefree childhood moments, these cake jars are sure to bring joy to any occasion.
The Inspiration Behind Cookie Monster Cake Jars
The inspiration for Cookie Monster Cake Jars stems from the enduring popularity of cookie-themed desserts. Cookies have always held a special place in our hearts, and when combined with the whimsical charm of the beloved Sesame Street character Cookie Monster, they create an irresistible treat. This character, known for his love of cookies and his humorous antics, has influenced food trends, inspiring bakers and dessert creators to craft cookie-themed desserts that echo his playful spirit.
The nostalgic connection many of us have with Cookie Monster adds to the allure of these cake jars. As children, we delighted in his antics on television, and now, through these desserts, we can relive those moments of joy. The Cookie Monster Cake Jar is not just a dessert; it’s a celebration of our childhood favorites, making it a perfect addition to birthday parties or family gatherings. They bring back fond memories while creating new ones, bridging generations through the universal language of sweet treats.
By incorporating elements of nostalgia into modern baking, Cookie Monster Cake Jars resonate with a wide audience. The whimsical theme engages children, while the sophisticated flavors and textures appeal to adults, making them a versatile dessert option. Whether you’re hosting a kids’ party or an adult gathering, these jars are guaranteed to be a hit, sparking conversations and laughter among guests.
Understanding the Ingredients
Creating the perfect Cookie Monster Cake Jars starts with understanding the essential ingredients that contribute to their delightful flavor and texture. The main components include Cookie Crumble, Blue Vanilla Cake, Frosting, and thoughtful Garnish. Each element plays a critical role in ensuring the end product is a visual and culinary delight.
1. Cookie Crumble: This component serves as the base layer of the cake jars, providing a satisfying crunch that contrasts beautifully with the soft cake layers. The cookie crumble is typically made from crushed cookies, which can include chocolate chip or any favorite variety, adding a rich flavor to the dessert.
2. Blue Vanilla Cake: The star of the show, this cake is not only vibrant in color but also light and fluffy. The blue hue is achieved through a combination of food coloring and the right ingredients, creating an eye-catching layer that captures the essence of Cookie Monster.
3. Frosting: A creamy frosting binds the layers together, adding richness and sweetness. A classic vanilla buttercream or a blue-tinted frosting enhances the visual appeal while providing a smooth texture that complements the crunch of the cookie crumble.
4. Garnish: To top it all off, fun garnishes like mini chocolate chip cookies or edible eyes add the finishing touches that transform these jars into whimsical delights. These accents not only enhance the look of the dessert but also provide additional flavors and textures.
When it comes to baking, the quality of ingredients can significantly impact the final product. Using fresh, high-quality ingredients ensures vibrant flavors and the best texture. For those with dietary preferences or restrictions, there are simple substitutions that can be made. For example, gluten-free cookies can be used for the crumble, and gluten-free flour can replace all-purpose flour in the cake recipe. Additionally, dairy-free butter and milk can be utilized to make the frosting suitable for those with lactose intolerance.
Creating the Cookie Crumble
Now that we understand the delicious components that come together in the Cookie Monster Cake Jars, it’s time to dive into the first step: creating the cookie crumble. This layer is essential for adding texture and flavor, and achieving the perfect crumble is crucial for the overall success of the dessert.
Detailed Instructions for Making the Cookie Crumble
1. Gather Your Ingredients: To make the cookie crumble, you will need:
– 1 cup of chocolate chip cookies (or your favorite cookie variety)
– 2 tablespoons of melted butter (optional for additional richness)
2. Crush the Cookies: Place the cookies in a food processor and pulse until they reach a fine crumb consistency. If you don’t have a food processor, you can place the cookies in a resealable plastic bag and crush them with a rolling pin until finely crumbled.
3. Mix with Butter: If you choose to use melted butter, combine it with the crushed cookies in a mixing bowl. The butter will help the crumbs hold together slightly better, creating a more cohesive layer when assembled in the jars.
4. Check the Texture: The cookie crumble should have a slightly coarse texture, not too fine, as this will provide the desired crunch. If it’s too crumbly, you can add a little more melted butter to achieve the right consistency.
Importance of Texture and Flavor Balance
The cookie crumble layer is essential for providing a contrast to the soft vanilla cake and creamy frosting. A well-balanced cookie crumble not only enhances the texture of the dessert but also adds depth to the flavor profile. The richness of the cookies contrasts nicely with the sweetness of the cake and frosting, creating a delightful balance in each bite.
Tips for Achieving the Perfect Crumble
– Use Fresh Cookies: For the best flavor, use freshly baked cookies or high-quality store-bought varieties. Stale cookies will not yield the desired texture.
– Experiment with Flavors: Feel free to experiment with different cookie flavors for the crumble. Oatmeal cookies, peanut butter cookies, or even snickerdoodles can add unique flavors to the dessert.
– Avoid Overmixing: When mixing the cookie crumbs with butter, be careful not to overmix. You want the crumbs to remain slightly coarse for that perfect crunch.
Baking Tips to Ensure an Even Bake and Optimal Cooling
Once your cookie crumble is ready, it’s time to prepare the next component of the Cookie Monster Cake Jars: the blue vanilla cake. However, before diving into baking, here are a few tips to ensure that your cookie crumble bakes evenly and cools properly:
– Spread Evenly: If you decide to bake the cookie crumble (for added crispness), spread it evenly on a baking sheet lined with parchment paper to ensure even baking.
– Monitor Baking Time: Bake the crumble at a low temperature (around 350°F or 175°C) for about 10-15 minutes, or until lightly golden. Keep an eye on it to avoid burning.
– Cool Completely: Allow the cookie crumble to cool completely before incorporating it into your cake jars. This will help maintain its crunchy texture.
Baking the Blue Vanilla Cake
With the cookie crumble ready, we can now focus on baking the star of the dessert: the blue vanilla cake. This cake serves as the foundation of the cake jars, and its light, fluffy texture is essential for creating the perfect layered dessert.
Step-by-Step Guide to Preparing the Blue Vanilla Cake
1. Gather Your Ingredients: For the blue vanilla cake, you will need:
– 1 ½ cups all-purpose flour
– 1 cup granulated sugar
– ½ cup unsalted butter, softened
– 2 large eggs
– 1 teaspoon vanilla extract
– 1 cup buttermilk (or milk with a splash of vinegar)
– 1 ½ teaspoons baking powder
– ½ teaspoon baking soda
– ¼ teaspoon salt
– Blue food coloring
2. Preheat the Oven: Start by preheating your oven to 350°F (175°C). Grease and flour two 8-inch round cake pans or line them with parchment paper for easy removal.
3. Cream the Butter and Sugar: In a mixing bowl, beat the softened butter and granulated sugar together until light and fluffy, about 3-4 minutes. This step is crucial as it incorporates air into the mixture, leading to a lighter cake.
4. Add the Eggs and Vanilla: Add the eggs, one at a time, mixing well after each addition. Then, stir in the vanilla extract. This will add flavor to your cake and contribute to a moist texture.
5. Combine Dry Ingredients: In a separate bowl, whisk together the flour, baking powder, baking soda, and salt. This ensures that the leavening agents are evenly distributed throughout the flour.
6. Alternate Adding Dry Ingredients and Buttermilk: Gradually add the dry mixture to the butter mixture, alternating with the buttermilk. Start and end with the dry ingredients, mixing until just combined. Be careful not to overmix, as this can lead to a dense cake.
7. Add Food Coloring: Finally, add blue food coloring to the batter, adjusting the amount until you achieve your desired shade of blue. Mix gently to incorporate the color evenly.
Explanation of the Creaming Method and Its Significance in Cake-Making
The creaming method is a fundamental technique in baking that involves beating together butter and sugar until light and fluffy. This process is crucial in cake-making as it helps to incorporate air into the batter, resulting in a light and tender cake. The air trapped in the mixture expands during baking, giving the cake its rise and fluffy texture.
By properly creaming the butter and sugar, you set a solid foundation for a successful cake. Skipping this step or not cream enough can lead to a dense, heavy texture, which is not ideal for layered desserts like the Cookie Monster Cake Jars.
Importance of Incorporating Air into the Batter for Fluffiness
When following the creaming method, incorporating air is key to achieving a fluffy cake. This happens as the sugar crystals create tiny pockets within the butter, which expand when baked. Therefore, it’s essential to beat the mixture for the recommended time. Keep an eye on it, though; overmixing after adding the dry ingredients can deflate the batter and result in a denser cake.
Tips on Achieving the Desired Shade of Blue and How to Avoid Overmixing
To achieve the perfect blue hue for your cake, consider the following tips:
– Start with a Small Amount: It’s easier to add more food coloring than to fix an overly dark shade. Start with a few drops and gradually increase until you reach the desired color.
– Use Gel Food Coloring: Gel food coloring is often more vibrant than liquid versions and requires less product to achieve the same intensity.
– Fold Gently: When incorporating the dry ingredients into the wet mixture, use a gentle folding motion rather than vigorous stirring. This helps maintain the airiness of the batter, ensuring your cake remains light and fluffy.
With the cookie crumble and blue vanilla cake ready, we are now set to assemble our Cookie Monster Cake Jars in the next section, where we’ll explore the frosting and garnishing techniques that bring this whimsical dessert to life!
Crafting the Perfect Frosting
To create a truly whimsical Cookie Monster Cake Jar, the frosting must be as delightful as the cake itself. A rich, creamy frosting can elevate the overall experience, so let’s dive into the detailed process for making it.
1. Making the Frosting
Start by gathering your ingredients for the frosting, which typically includes room-temperature unsalted butter, powdered sugar, vanilla extract, and heavy cream or milk. The key to achieving a creamy texture lies in the butter; it should be softened to room temperature, allowing it to blend seamlessly with the powdered sugar. This will help you avoid any lumps and ensure a smooth frosting that spreads easily.
Begin by beating the room-temperature butter in a mixing bowl with an electric mixer until it’s light and fluffy, which usually takes about 2-3 minutes. Gradually add in the powdered sugar, mixing on low speed to prevent a sugary cloud from forming. Once incorporated, increase the mixer speed and add the vanilla extract. For a creamier consistency, slowly add heavy cream or milk until you reach your desired consistency. The frosting should be thick enough to hold its shape but soft enough to spread easily.
2. Achieving the Right Consistency
The ideal frosting for your Cookie Monster Cake Jars should be versatile enough for both spreading and piping. If you plan to create decorative swirls or designs on top of the jars, ensure the frosting is slightly stiffer by adding more powdered sugar. For a smoother, more spreadable frosting, incorporate a little more cream or milk. Remember to test the consistency; it should hold its shape without being overly stiff.
3. Color Mixing for Decorative Purposes
Since the Cookie Monster theme is tied closely to its iconic blue color, using gel food coloring is your best option for achieving vibrant hues without altering the frosting’s consistency. Start with a small amount of blue gel color and mix it in until you reach your desired shade. If you want to create a gradient effect, consider mixing in a bit of white frosting with your blue to lighten it. The color mixing process is not only fun but also adds an artistic touch to your cake jars.
Assembling Your Cookie Monster Cake Jars
Once your frosting is prepared, it’s time to assemble your Cookie Monster Cake Jars. This process is essential not only for taste but also for presentation.
1. Layering the Cake Jars
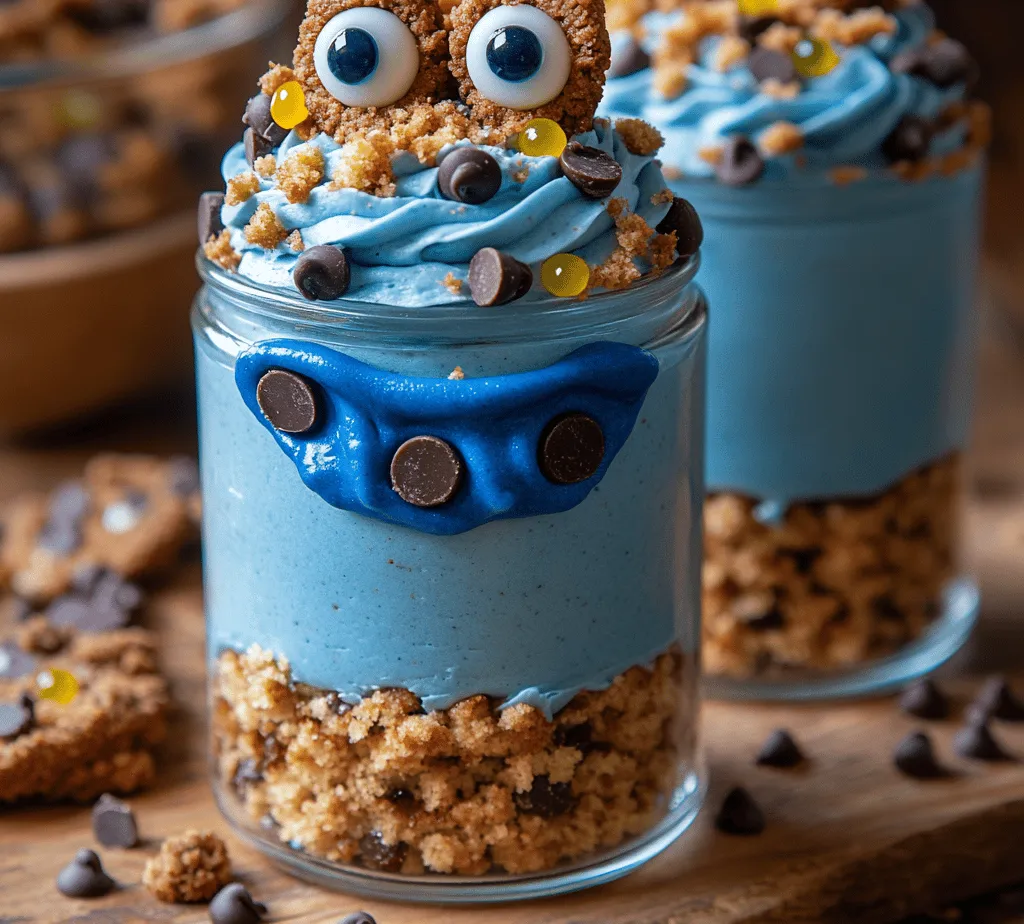
Begin by selecting the jar size you want to use. Smaller jars (4-6 ounces) are perfect for individual servings, while larger jars (8-12 ounces) can be shared. Start with a layer of crumbled cookie or cake at the bottom of each jar. Next, add a layer of frosting, followed by another layer of cake or crumbles. Repeat this process, ensuring that each layer is even and well-distributed.
2. Importance of Presentation
Presentation plays a vital role in the appeal of your dessert. Aim for contrasting colors and textures in each layer to create visual interest. The bright blue frosting against the dark chocolate cake or cookie crumbs will attract attention and excite your guests.
3. Tips for Balanced Layers
When layering, it’s important to balance the amounts of cake, crumble, and frosting. Too much frosting can overpower the cake, while too little can make the dessert dry. A good rule of thumb is to maintain equal parts of each component, adjusting based on personal preference. Use a small spatula to smooth out the frosting layers, creating a clean and polished look.
Decorating the Cake Jars
The decorative process is where your creativity can truly shine. Here’s how to elevate your Cake Jars with eye-catching designs.
1. Applying Decorative Elements
Once your jars are assembled, it’s time to decorate! Using a piping bag fitted with a star tip, pipe the frosting onto the top layer of each jar. Start from the outer edge and work your way inward, finishing with a swirl in the center. This technique not only looks professional but also adds height and dimension to your jars.
2. Creative Garnishing Ideas
Beyond just frosting, consider adding creative garnishes to enhance the visual appeal. Crushed cookies, chocolate chips, or sprinkles can be scattered on top for added texture. For a whimsical touch, you can also place a small cookie monster figure or edible eyes on top of the frosting to give the jars character.
3. Importance of Visual Appeal
Visual appeal significantly enhances the dessert experience. Guests are more likely to indulge in a treat that looks attractive. Take your time with the decorating process to ensure each jar is a mini masterpiece that will delight both kids and adults alike.
Serving Suggestions and Storage Tips
Now that your Cookie Monster Cake Jars are beautifully decorated, let’s discuss how to serve and store them for the best experience.
1. Recommendations for Serving
These cake jars make excellent treats for parties, celebrations, or even as gifts. Present them in a decorative box or on a vibrant platter to draw attention. If you’re serving them at a birthday party, consider placing them at each guest’s seat for a personalized touch.
2. Storing Leftover Cake Jars
If you have leftovers (though they might be hard to resist), proper storage is key to maintaining freshness. Seal each jar with a lid or plastic wrap and store them in the refrigerator. They should be consumed within 3-5 days for the best flavor and texture.
3. Ideal Chilling Times for Flavor Development
Allowing the cake jars to chill in the refrigerator for a few hours or overnight can enhance the flavors as the ingredients meld together. This chilling time also helps the frosting set, making it easier to eat.
Conclusion
Creating Cookie Monster Cake Jars is not just about the recipe; it’s about the joy of crafting a whimsical dessert that brings smiles to faces. The playful colors, delightful textures, and delicious flavors combine to create an unforgettable treat that is perfect for any occasion.
Don’t be afraid to experiment with different flavors and decorations to make these jars uniquely yours. Whether you opt for a classic chocolate cookie base or venture into red velvet or funfetti, the possibilities are endless. Each jar can reflect your personal touch, making them not only a treat for the taste buds but also a feast for the eyes.
The delight these jars bring to any dessert table is unmatched, encouraging creativity and fun both in the kitchen and at the table. So gather your ingredients, unleash your inner baker, and enjoy the whimsical world of Cookie Monster Cake Jars!
