Introduction
There’s something undeniably gratifying about the smell of freshly baked bread wafting through your home. The allure of homemade rolls is not just in their warm, comforting aroma, but also in the sense of accomplishment that comes from creating something delicious from scratch. Among the myriad of bread recipes, Toasty Garlic Knotted Rolls stand out, offering a perfect blend of flavors and textures that can elevate any meal or occasion.
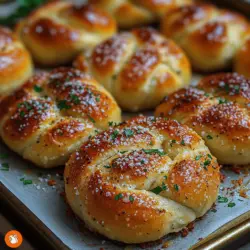
Toasty Garlic Knotted Rolls are a delightful fusion of soft, airy dough intertwined with rich garlic butter, creating a savory experience that’s hard to resist. These rolls are not merely a side dish; they are a centerpiece in their own right, complementing everything from a cozy family dinner to festive gatherings. The gentle pull of the knotted dough, combined with the buttery, garlicky goodness, makes these rolls a beloved addition to any table.
Garlic, a key ingredient in this recipe, is renowned not only for its robust flavor but also for its numerous health benefits. Rich in antioxidants and possessing anti-inflammatory properties, garlic has been celebrated in culinary traditions around the world for centuries. Incorporating garlic into your cooking not only enhances the taste of your dishes but also contributes to overall wellness, making it a star ingredient in these rolls.
Whether served alongside a hearty pasta dish, as a companion to soups, or simply enjoyed on their own, Toasty Garlic Knotted Rolls are versatile enough to fit seamlessly into various meals. Their unique shape and texture make them a conversation starter, inviting guests to savor the experience of pulling apart each knotted roll, revealing the tender interior infused with garlicky goodness.
Understanding the Ingredients
To create the perfect Toasty Garlic Knotted Rolls, it’s essential to understand the role of each ingredient in the recipe. The foundation of any good bread lies in its flour, and for these rolls, all-purpose flour is the ideal choice. All-purpose flour strikes a balance between protein content and versatility, allowing for a dough that is both soft and sturdy. This flour provides the necessary structure for the rolls, ensuring they rise beautifully while maintaining a tender interior.
The magic of bread-making largely hinges on yeast, specifically active dry yeast in this recipe. Yeast is a living organism that ferments sugars, producing carbon dioxide and alcohol, which causes the dough to rise. To activate the yeast effectively, it must be combined with warm milk and a touch of sugar. The warmth encourages the yeast to awaken and start its fermentation process, while sugar serves as food for the yeast, leading to a more robust rise and flavor.
Unsalted butter plays a dual role in this recipe, adding both flavor and moisture to the dough. Its creamy richness enhances the overall taste of the rolls, making each bite a satisfying experience. The butter also contributes to the rolls’ soft texture, ensuring they remain tender and fluffy after baking.
Eggs are another crucial ingredient in achieving the perfect dough structure. They provide richness and moisture, while the proteins in the eggs help to bind the dough together, resulting in a cohesive and elastic texture. This elasticity is vital for creating the knotted shape of the rolls, allowing them to hold their form while baking.
To elevate the flavor profile of the rolls, minced garlic and fresh parsley are incorporated into the dough. Garlic infuses each roll with its signature taste, while parsley adds a fresh, herbal note that balances the richness of the butter. For those who enjoy a bit of heat, red pepper flakes can be added for an optional kick, enhancing the overall flavor complexity of the rolls.
Finally, a sprinkle of Parmesan cheese on top of the rolls contributes a savory crust that beautifully contrasts with the soft interior. The cheese melts during baking, forming a golden, crispy layer that adds to the rolls’ visual appeal and flavor.
Step-by-Step Guide to Making Toasty Garlic Knotted Rolls
Activating the Yeast
The first step in making Toasty Garlic Knotted Rolls is to activate the yeast, a crucial process that sets the stage for the dough to rise. Begin by measuring out your warm milk—ideally around 110°F (43°C)—which is warm to the touch but not hot. If the milk is too hot, it can kill the yeast, while milk that is too cold will not activate it properly. Once the milk is at the right temperature, sprinkle the active dry yeast over the surface and let it sit for about five minutes. You should see the yeast begin to bubble and foam, indicating that it is alive and ready to work its magic.
Making the Dough
Once your yeast is activated, it’s time to make the dough. In a large mixing bowl, combine the activated yeast mixture with all-purpose flour, sugar, salt, unsalted butter, and the beaten egg. Using a wooden spoon or a dough whisk, mix the ingredients until they start to come together. The dough should be slightly sticky but manageable. If it feels too wet, gradually add more flour, a tablespoon at a time, until you achieve the right consistency.
Kneading the Dough
Kneading is a vital step in bread-making as it helps develop the gluten structure that gives the rolls their chewy texture. Once your dough is combined, transfer it to a lightly floured surface. Knead the dough for about 8 to 10 minutes, folding and pushing it with the palms of your hands. As you knead, you’ll notice the dough becoming smoother and more elastic. This is a sign that the gluten is developing, which is crucial for the final texture of your rolls.
First Rise
After kneading, place the dough in a greased bowl and cover it with a clean kitchen towel or plastic wrap. The dough needs to rise in a warm, draft-free environment until it has doubled in size, which usually takes about 1 to 1.5 hours. To create an ideal rising environment, you can preheat your oven to its lowest setting, then turn it off and place the dough inside with the door slightly ajar. This provides a warm atmosphere that encourages the yeast to work effectively.
Creating the Garlic Butter Mixture
While the dough is rising, you can prepare the garlic butter mixture that will coat the rolls before baking. In a small saucepan over low heat, melt unsalted butter and add minced garlic, allowing it to infuse the butter with its aromatic flavor. Be careful not to let the garlic brown, as burnt garlic can impart a bitter taste to the rolls. Once the butter is melted and the garlic is fragrant, remove the saucepan from the heat. Stir in chopped fresh parsley and, if desired, a pinch of red pepper flakes to add a hint of spice. This garlic butter mixture will be brushed over the rolls before baking, enhancing their flavor and creating a golden, savory crust.
As you embark on the journey of creating Toasty Garlic Knotted Rolls, the delightful scents and textures will transform your kitchen into a haven of warmth and flavor. Stay tuned for the next part of this recipe, where we’ll delve into shaping the rolls, their second rise, and the baking process that brings these delectable creations to life.
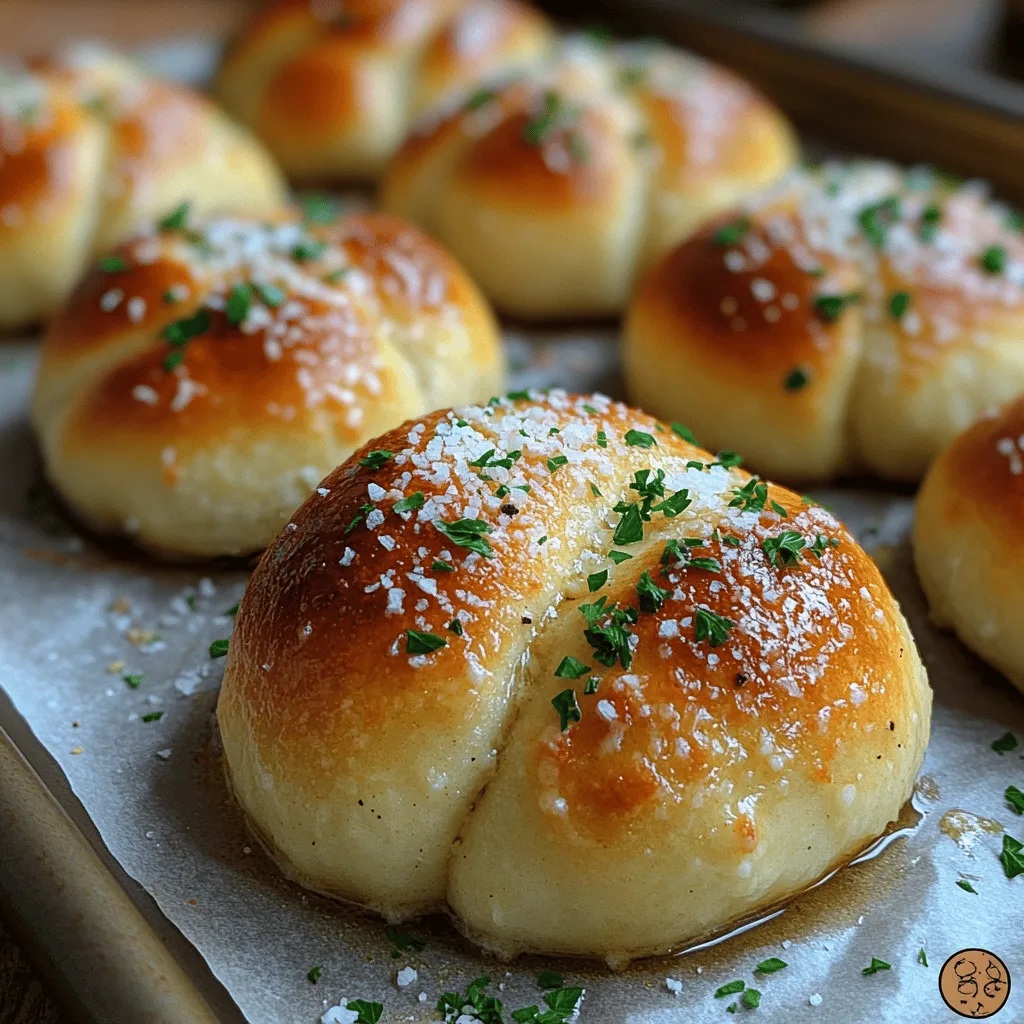
Toasty garlic knotted rolls are a delightful addition to any meal, bringing warmth and flavor to your table. These rolls are not just about the dough; it’s the garlic butter that elevates them to another level. The rich, aromatic butter infuses each roll with a savory taste that perfectly complements the fluffy texture. Fresh herbs also play a crucial role in enhancing the overall flavor profile, making each bite a burst of freshness.
Shaping the Rolls
Step-by-Step Instructions for Shaping the Knotted Rolls
Shaping your rolls might seem daunting at first, but with our step-by-step instructions, you’ll be creating beautiful knotted rolls in no time.
1. Prepare Your Dough: After the first rise, punch down the dough gently to release excess air. Lightly flour your work surface and transfer the dough onto it.
2. Divide the Dough: Use a bench scraper or knife to divide the dough into equal pieces. Aim for about 12 pieces, each weighing around 2 to 3 ounces.
3. Roll into Strands: Take a piece of dough and roll it into a long rope, approximately 8-10 inches in length. The dough should be uniform in thickness to ensure even baking.
4. Create the Knot: Form a loop with the dough strand, then take the end and tuck it through the loop. Pull gently to tighten the knot, ensuring it remains loose enough to allow for expansion during the second rise.
5. Place on Baking Sheet: Arrange the knotted rolls on a parchment-lined baking sheet, leaving enough space between each roll to allow for expansion.
6. Repeat: Continue this process with the remaining pieces of dough until all rolls are shaped and placed on the sheet.
Tips for Creating Uniform Knots and Ensuring Even Baking
– Consistent Size: To achieve uniformity, weigh each piece of dough before rolling. This ensures that all rolls bake at the same rate.
– Gentle Handling: Be gentle when shaping the dough. Overworking can lead to tough rolls. Aim for a light touch to keep the rolls fluffy.
– Spacing Matters: Make sure to leave enough space between the rolls on the baking sheet. This allows them to rise and expand properly without sticking together.
Second Rise and Preparing for Baking
Importance of the Second Rise
The second rise is crucial for developing the rolls’ texture and flavor. This stage allows the gluten to relax, resulting in a softer, more tender roll. The yeast continues to ferment, creating air pockets that contribute to the lightness of the finished rolls.
Preheating the Oven: Why Temperature Matters in Bread Baking
Preheating your oven is a non-negotiable step in baking. An adequately heated oven ensures that the rolls rise quickly when they hit the heat, leading to a desirable texture. Aim for 375°F (190°C) for the best results with these rolls. This temperature allows the rolls to bake thoroughly while achieving a golden-brown crust.
Brushing with Garlic Butter: Techniques for Even Coverage
Brushing the rolls with garlic butter before baking not only adds flavor but also aids in browning. Here’s how to do it effectively:
– Melt the Butter: In a small saucepan, melt unsalted butter and add minced garlic and chopped fresh herbs. Allow the mixture to simmer for a minute to infuse the flavors.
– Brush Generously: Use a pastry brush to apply the garlic butter evenly over each roll. Make sure to cover the top and sides for the best flavor.
– Reserve Some Butter: Save a bit of the garlic butter for brushing the rolls again right after they come out of the oven for an extra burst of flavor.
Baking to Perfection
Ideal Baking Temperature and Time
For toasty garlic knotted rolls, the ideal baking temperature is 375°F (190°C). Bake the rolls for 15-20 minutes, or until they are golden brown. The rolls should be puffed up and lightly browned on the top.
Visual Indicators of Doneness
To determine if your rolls are ready, look for these visual cues:
– Color: The tops should be golden brown, indicating a well-cooked exterior.
– Sound: When gently tapped on the bottom, the rolls should sound hollow.
– Texture: The rolls should feel light and airy when touched.
Serving Suggestions
Best Occasions for Serving Toasty Garlic Knotted Rolls
Toasty garlic knotted rolls are incredibly versatile and can enhance various occasions, from casual family dinners to festive gatherings. Here are a few occasions where these rolls shine:
– Family Dinners: Pair them with a hearty pasta dish or a comforting soup for a complete meal.
– Holidays: Serve them alongside your holiday feast, as they complement roasted meats and vegetable sides beautifully.
– Potlucks: These rolls are perfect for sharing; they’re easy to transport and a guaranteed crowd-pleaser.
Pairing Ideas: What Dishes Complement These Rolls Well
These garlic rolls pair wonderfully with a variety of dishes:
– Italian Cuisine: Serve them with marinara sauce, fettuccine Alfredo, or alongside a rich lasagna.
– Soups and Stews: They are the perfect accompaniment to creamy soups like tomato basil or hearty beef stew.
– Salads: Pair with a fresh garden salad or a Caesar salad for a balanced meal.
Creative Serving Options: How to Present for Gatherings
Presentation is key when serving your rolls. Here are some creative ideas to make your serving stand out:
– Bread Basket: Place the rolls in a warm, rustic bread basket lined with a clean cloth to keep them warm.
– Garnish: Sprinkle fresh herbs over the top of the rolls or serve with a side of extra garlic butter for dipping.
– Themed Platters: Create a charcuterie-style platter with the rolls, artisan cheeses, olives, and cured meats for a delightful appetizer spread.
Health Benefits of Ingredients
Nutritional Highlights of Garlic and Its Benefits for Health
Garlic is not only a flavorful addition to these rolls but also offers numerous health benefits. It is known for its ability to boost the immune system, thanks to its rich content of antioxidants. Additionally, garlic has been linked to heart health, as it can help lower blood pressure and cholesterol levels. Including garlic in your diet can support overall wellness while adding depth to your culinary creations.
Exploring the Balance of Indulgence and Nutrition in Homemade Rolls
While toasty garlic knotted rolls are undeniably indulgent, you can balance taste with nutrition. Using whole wheat flour instead of all-purpose flour can add fiber and nutrients. Additionally, incorporating herbs and spices can enhance flavor without adding extra calories. Baking at home also allows you to control the ingredients, making it easier to create a tasty yet healthier version of this classic roll.
Conclusion
Baking homemade rolls is a joyful experience that combines the art of cooking with the satisfaction of sharing delicious food with loved ones. Toasty garlic knotted rolls are not only a treat for the taste buds but also a way to bring family and friends together around the dining table.
As you embark on your baking journey, don’t hesitate to experiment with the recipe. Try different herbs, adjust the garlic levels, or even add cheese for a twist. The joy of baking lies in creativity, so make this recipe your own. The best part? Sharing these delightful rolls with your family and friends, creating memories that will last a lifetime. Enjoy the process, and happy baking!