Introduction
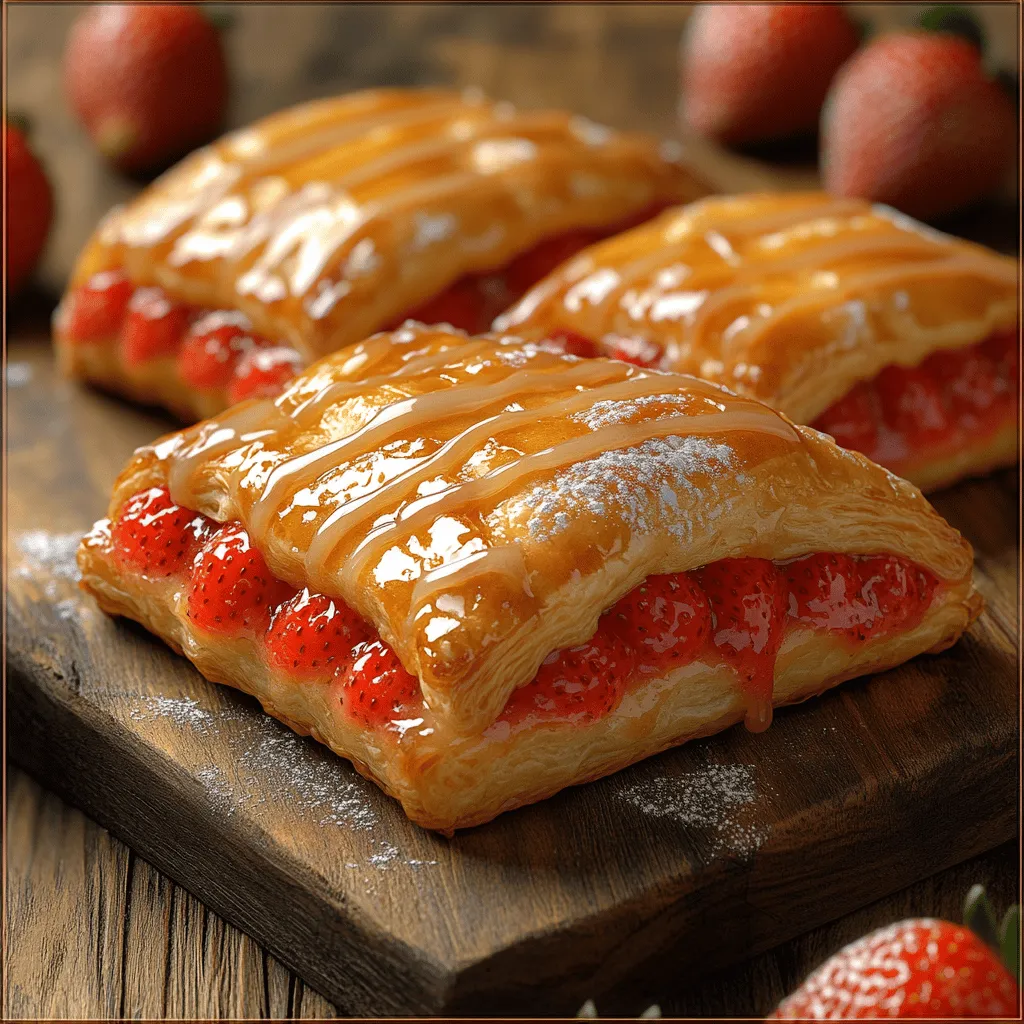
Indulging in a freshly baked pastry is a simple joy that transcends culinary skill levels, and the Sweet Strawberry Bliss Danish pastry is a quintessential treat that embodies this sentiment. This delightful combination of flaky pastry enveloping a luscious strawberry filling is not only a feast for the taste buds but also a visual delight. Inspired by classic European baking traditions, this recipe marries the light, airy texture of Danish pastry with the sweet, vibrant flavor of strawberries, making it a must-try for both casual bakers and seasoned culinary enthusiasts.
The allure of the Sweet Strawberry Bliss pastry lies in its versatility. While the star of the show is undoubtedly the fresh strawberry filling, the Danish pastry itself is a canvas that can be customized with a variety of fillings to suit different tastes and occasions. Whether you’re celebrating a special event, hosting brunch, or simply treating yourself to a delightful afternoon snack, these pastries are sure to impress.
The beauty of the Sweet Strawberry Bliss Danish pastry is not just in its taste but also in its preparation. This recipe provides an opportunity to hone your baking skills while also allowing for creativity. With a few key ingredients and a bit of patience, you can create a delightful batch of pastries that will elevate any occasion.
Understanding the Basics of Danish Pastry
Before diving into the Sweet Strawberry Bliss recipe, it’s essential to understand what makes Danish pastry unique. Originating from Denmark, this pastry is a beloved staple in European baking, known for its rich history and delightful texture. The technique of creating Danish pastry involves a process known as lamination, where layers of dough and butter are rolled together to achieve that signature flaky texture.
One of the defining characteristics of Danish pastry is its buttery flavor, which comes from the generous use of cold butter during the lamination process. This technique creates multiple layers that puff up during baking, resulting in a light and airy pastry that melts in your mouth. The distinct flavor and texture of Danish pastry make it an ideal base for both sweet and savory fillings, allowing for endless culinary creativity.
The Sweet Strawberry Bliss Danish pastry showcases the pastry’s unique qualities beautifully. Its flaky texture contrasts wonderfully with the smooth, sweet strawberry filling, creating a delightful balance of flavors. Understanding the fundamentals of Danish pastry will not only help you appreciate this recipe more but will also empower you to experiment with other fillings and flavor combinations in the future.
The Ingredients: A Closer Look
Creating the Sweet Strawberry Bliss pastry requires a selection of key ingredients that contribute to its signature taste and texture. Let’s break down these ingredients into their respective categories:
Danish Pastry Ingredients
– All-purpose flour: This versatile ingredient serves as the foundation of the pastry dough. All-purpose flour provides the necessary structure and strength to hold the layers together while allowing for a soft, tender crumb once baked.
– Sugar: A touch of sugar is essential in the dough, balancing the flavors and aiding in the browning process during baking. It enhances the overall sweetness of the pastry, complementing the strawberry filling beautifully.
– Yeast: The leavening agent in this recipe, yeast is vital for creating a light and airy texture. As it ferments, it produces carbon dioxide, causing the dough to rise and develop its characteristic fluffiness.
– Cold butter: The use of cold butter is crucial for achieving that desired flakiness. When incorporated into the dough, it forms layers that create steam during baking, resulting in a beautifully puffed and flaky pastry.
– Milk, egg, and vanilla extract: These ingredients contribute to the overall flavor and texture of the pastry. Milk hydrates the dough, while the egg adds richness and helps with binding. Vanilla extract provides a subtle, aromatic flavor that enhances the sweetness of the pastry.
Strawberry Filling Ingredients
– Fresh strawberries: The star ingredient of this recipe, fresh strawberries bring a burst of flavor and a vibrant color to the pastries. Their seasonal nature makes them a delightful choice for summer baking, and they are packed with vitamins and antioxidants, making them a healthy addition to your treats.
– Sugar and cornstarch: Sugar is used to sweeten the filling, while cornstarch acts as a thickening agent. Together, they create a luscious filling that holds its shape without becoming runny.
– Lemon juice and vanilla extract: A splash of lemon juice brightens the flavor of the strawberries, adding a refreshing tartness that balances the overall sweetness. Vanilla extract enhances the flavor complexity, making the filling even more delightful.
Glaze Ingredients
– Powdered sugar and milk: The glaze is made from powdered sugar and a dash of milk, creating a smooth and sweet finish that adds an extra layer of indulgence to the pastries. The glaze also gives the Sweet Strawberry Bliss a visually appealing shine.
– Vanilla extract: Just like in the pastry dough, vanilla extract plays a critical role in flavoring the glaze, tying the entire pastry experience together with its sweet, aromatic notes.
Step-by-Step Instructions for Preparing Sweet Strawberry Bliss
With a solid understanding of the ingredients, it’s time to dive into the preparation of the Sweet Strawberry Bliss Danish pastry. Below are the step-by-step instructions that will guide you through the process, ensuring clarity and ease of understanding.
Step 1: Prepare the Danish Pastry Dough
1. In a large mixing bowl, combine the all-purpose flour, sugar, and yeast. Mix well to ensure that the yeast is evenly distributed throughout the flour.
2. In a separate bowl, whisk together the milk, egg, and vanilla extract until fully combined. Gradually add this mixture to the flour mixture, stirring until a dough begins to form.
3. Once the dough starts to come together, turn it out onto a lightly floured surface. Knead the dough gently for about 5 minutes, until it becomes smooth and elastic.
4. Shape the dough into a rectangle, wrap it in plastic wrap, and refrigerate for at least 30 minutes. This chilling step is essential for allowing the gluten to relax, making it easier to roll out later.
Step 2: Prepare the Butter Block
1. While the dough is chilling, prepare your butter block. Take cold butter and cut it into small cubes. Place the cubes between two sheets of parchment paper.
2. Using a rolling pin, pound the butter into a flat rectangle, approximately 1/2 inch thick. The goal is to create a uniform layer of butter that can be incorporated into the dough.
3. Once flattened, refrigerate the butter block until the dough is ready.
Step 3: Laminate the Dough
1. After the resting period, remove the dough from the refrigerator and roll it out on a lightly floured surface into a rectangle, about twice the size of the butter block.
2. Place the chilled butter block in the center of the dough rectangle. Fold the edges of the dough over the butter, encasing it completely.
3. Roll the dough out again into a larger rectangle, then fold it into thirds, like a letter. This process creates layers of dough and butter essential for the flaky texture.
4. Wrap the laminated dough in plastic wrap and refrigerate for at least 30 minutes. Repeat the rolling and folding process two more times, chilling in between, to create multiple layers.
Step 4: Prepare the Strawberry Filling
1. While the dough is chilling, wash and hull the fresh strawberries. Cut them into small pieces and place them in a mixing bowl.
2. Add sugar, cornstarch, lemon juice, and vanilla extract to the strawberries. Gently toss to combine, ensuring that the strawberries are evenly coated with the mixture.
3. Set the filling aside to allow the flavors to meld while you finish preparing the dough.
Step 5: Shape the Danish Pastries
1. Once the dough has completed the lamination process, remove it from the refrigerator and roll it out into a large rectangle, about 1/4 inch thick.
2. Cut the dough into squares or triangles, depending on your desired shape for the pastries.
3. Place a generous spoonful of the strawberry filling in the center of each square or triangle.
4. Fold the corners of the dough over the filling, pinching to seal and create a pocket, or twist the dough to form a more intricate shape.
5. Place the shaped pastries on a baking sheet lined with parchment paper, leaving space between each one for expansion.
Step 6: Final Rise and Baking
1. Cover the pastries loosely with a clean kitchen towel and allow them to rise in a warm, draft-free area for about 30 minutes. This final rise will help the pastries become light and airy when baked.
2. Preheat your oven to 375°F (190°C). Once the pastries have risen, brush the tops with an egg wash made from a beaten egg mixed with a splash of milk for a golden finish.
3. Bake the pastries in the preheated oven for 20-25 minutes, or until they are golden brown and puffed up. The aroma of baking strawberries and buttery pastry will fill your kitchen, creating an irresistible atmosphere.
Step 7: Glaze the Pastries
1. While the pastries are baking, prepare the glaze by combining powdered sugar, milk, and vanilla extract in a bowl. Whisk until smooth and creamy.
2. Once the pastries are out of the oven and have cooled slightly, drizzle the glaze over the top of each pastry for a sweet finish.
By following these steps, you will have created a batch of Sweet Strawberry Bliss Danish pastries that are not only visually appealing but also bursting with flavor. The combination of flaky pastry and sweet strawberry filling is sure to please anyone who takes a bite.
As you embark on this baking adventure, remember that practice makes perfect. Each time you make the Sweet Strawberry Bliss, you’ll refine your technique and add your unique touch to this classic recipe. Stay tuned for the next part of this article, where we will delve deeper into tips for achieving the best results and address common questions related to this delightful pastry.
Preparing the Dough
The journey to crafting irresistible Sweet Strawberry Bliss begins with the dough. The yeast is the heart of the pastry, and it’s crucial to activate it correctly. Start by dissolving the yeast in warm milk, ensuring the temperature is around 110°F (43°C). This warmth is essential; it activates the yeast, allowing it to foam and bubble, which indicates that it’s alive and ready to work its magic. The foaming process typically takes about 5 to 10 minutes. If your yeast doesn’t foam, it may be inactive, and you’ll need to start over with fresh yeast.
Once your yeast is ready, combine it with flour, sugar, salt, and eggs in a mixing bowl. The next step is kneading the dough. Kneading is a vital process that develops gluten, giving the dough its structure and elasticity. You can knead by hand for about 10 minutes or use a stand mixer fitted with a dough hook for approximately 5 to 7 minutes. The dough should become smooth and elastic. After kneading, place the dough in a lightly greased bowl, cover it with a damp cloth, and let it rise in a warm place until it has doubled in size, usually about 1 to 2 hours. This rising period is crucial, as it allows the dough to develop flavor and texture.
Incorporating the Butter
Once your dough has risen beautifully, it’s time to introduce the butter, which is key to achieving that signature flakiness characteristic of Danish pastries. The lamination process involves encasing a slab of cold, unsalted butter in the dough, then rolling it out and folding it repeatedly to create layers. This technique is what allows steam to form during baking, which puffs up the layers and creates a light, flaky texture.
To start, roll the dough into a rectangle on a lightly floured surface, then place a cold, flattened piece of butter in the center. Fold the dough over the butter, sealing the edges to prevent it from escaping. Roll the dough out again into a large rectangle, then perform a series of folds—three folds known as a letter fold. After each fold, chill the dough in the refrigerator for at least 30 minutes to maintain the integrity of the butter. This chilling is essential; it ensures the butter remains solid and distinct from the dough, promoting the flakiness we desire in the final product.
Making the Strawberry Filling
While the dough is chilling, it’s time to prepare the strawberry filling, which is the star of our Sweet Strawberry Bliss. When selecting strawberries, look for ripe, juicy berries with a deep red color and fragrant aroma. Fresh strawberries will yield the best flavor, but frozen strawberries can also work if fresh ones are out of season.
To make the filling, wash and hull the strawberries, then chop them into small pieces. In a saucepan over medium heat, combine the chopped strawberries with sugar and a splash of lemon juice. Cook the mixture until the strawberries break down and the juices release, about 5 to 10 minutes. To thicken the filling, stir in a cornstarch slurry (cornstarch mixed with a bit of cold water) and cook for an additional couple of minutes until the mixture thickens. Allow the filling to cool completely before using it in the pastries. This step is vital, as a hot filling can melt the butter in the dough, compromising the flaky texture.
Shaping the Danish
Now that your dough and filling are ready, it’s time to shape the Danishes. Roll out the chilled dough into a large rectangle once more, about 1/4-inch thick. Using a sharp knife or a pizza cutter, cut the dough into squares or triangles, depending on your desired shape.
To create the classic Danish shape, take a square piece of dough and make a small cut from each corner toward the center, stopping about an inch from the middle. Gently fold every other corner toward the center, overlapping them slightly, and pinch them to seal in the filling. This technique not only looks impressive but also allows for a beautiful presentation of the filling once baked.
Don’t forget to add a generous spoonful of your cooled strawberry filling in the center before sealing. Ensuring the corners are well-sealed is crucial; this prevents the filling from leaking out during baking, ensuring each bite is filled with that delightful strawberry goodness.
Baking the Danishes
With the pastries shaped, it’s time to bake! Preheat your oven to 375°F (190°C) and line a baking sheet with parchment paper. Before placing the Danishes in the oven, brush the tops with an egg wash made from a whisked egg combined with a splash of milk. This egg wash is essential as it provides a beautiful golden color and glossy shine to your pastries.
Bake the Danishes for about 20 to 25 minutes, or until they are puffed and golden brown. To check for doneness, look for a deep golden hue and a slight puffiness; the pastries should sound hollow when tapped on the bottom. If you want to ensure optimal baking, rotate the baking sheet halfway through the baking time for even browning.
Preparing and Drizzling the Glaze
While the Danish pastries are baking, you can prepare a simple glaze to drizzle over the top once they are cooled. In a small bowl, whisk together powdered sugar and a little milk until you achieve a smooth, pourable consistency. The glaze should be thick enough to coat the back of a spoon but not so thick that it won’t drizzle. If it’s too thick, gradually add more milk; if too thin, add more powdered sugar.
Once the Danishes have cooled slightly after baking, drizzle the glaze generously over the top. This final touch not only adds sweetness but also enhances the visual appeal of your Sweet Strawberry Bliss pastries.
Serving Suggestions and Pairings
Sweet Strawberry Bliss Danishes make a perfect addition to any occasion. For breakfast or brunch, serve them warm alongside a cup of freshly brewed coffee or a delicate herbal tea. The fruity sweetness of the strawberry filling pairs beautifully with the rich flavors of your favorite hot beverages.
These pastries are also ideal for picnics or as a sweet treat at gatherings. They can be elegantly displayed on a platter, making them a stunning centerpiece for dessert tables. For an added touch, consider serving them with a side of fresh fruit compote or whipped cream that guests can drizzle over their pastries.
Storage and Reheating Tips
If you find yourself with leftover Danishes (though they’re sure to disappear quickly), proper storage is key to maintaining their freshness. Store them in an airtight container at room temperature for up to 2 days. If you want to keep them for longer, consider freezing them. Place the cooled pastries in a freezer-safe container or bag, and they can be frozen for up to 2 months.
To reheat, simply bake them in a preheated oven at 350°F (175°C) for 5 to 10 minutes. This method will help restore their flakiness and warmth, making them taste as fresh as the day they were baked.
Conclusion
Creating Sweet Strawberry Bliss Danish pastries is not just about following a recipe; it’s about the joy of baking from scratch and the satisfaction that comes from sharing delicious treats with family and friends. The aroma of freshly baked pastries wafting through your kitchen is a delightful experience that evokes warmth and comfort.
As you embark on this culinary adventure, remember that the beauty of this recipe lies in its versatility. While strawberries steal the spotlight, feel free to experiment with other fillings, such as blueberries, raspberries, or even a cream cheese mixture. Each variation invites creativity and allows you to personalize your baking experience.
So gather your ingredients, roll up your sleeves, and dive into the delightful process of making Sweet Strawberry Bliss pastries. You’ll not only create a treat that’s sure to impress but also build cherished memories in the kitchen. Happy baking!