
Introduction
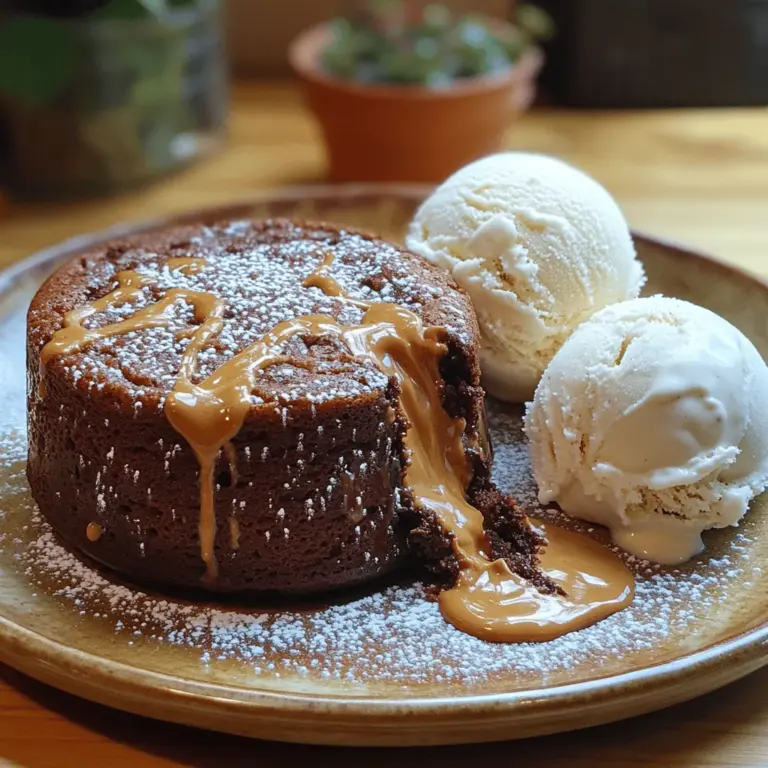
When it comes to indulgent desserts, few can rival the allure of a rich and gooey chocolate peanut butter lava cake. This decadent treat perfectly marries the deep, intense flavor of chocolate with the creamy, nutty goodness of peanut butter, creating a dessert that tantalizes the taste buds and leaves a lasting impression. Imagine cutting into a warm cake only to have molten chocolate and peanut butter flow out, creating a blissful combination that is both comforting and luxurious.
Desserts hold a special place in culinary culture, often serving as the grand finale of a meal and a way to celebrate life’s sweetest moments. From birthdays to anniversaries, a rich dessert like this lava cake can elevate any occasion, making it memorable. The combination of chocolate and peanut butter is not only a classic pairing but also a favorite among dessert enthusiasts, ensuring that this cake will be a crowd-pleaser.
In this article, we will delve into the details of creating your own rich and gooey chocolate peanut butter lava cake, exploring its intriguing background, key ingredients, and the preparation process that will guide you to dessert perfection.
Understanding Lava Cake
Lava cake, also known as molten chocolate cake, is a dessert that has captured the hearts of chocolate lovers since its creation in the late 1980s. The origin of this delightful dish is often attributed to renowned French chef Jean-Georges Vongerichten, who ingeniously combined the concepts of a flourless chocolate cake and a soufflé, resulting in a dessert with a soft exterior and a warm, flowing center. This innovative treat quickly gained popularity in upscale restaurants and has since become a staple on dessert menus worldwide.
The science behind the gooey center of a lava cake is quite fascinating. The key lies in the careful balance of baking time and temperature. When baked, the outer layer of the cake sets, while the interior remains molten due to the high fat content from butter and chocolate. This unique baking method creates the signature “lava” effect, which is both visually appealing and incredibly delicious.
Lava cakes have inspired a variety of adaptations across the globe, with different flavors and fillings that cater to diverse palates. From classic chocolate to fruity variations featuring berries or citrus, the possibilities are endless. However, the combination of chocolate and peanut butter remains one of the most beloved, as it encapsulates the essence of comfort food while delivering a gourmet experience.
Key Ingredients Breakdown
To create a rich and gooey chocolate peanut butter lava cake, it’s essential to use high-quality ingredients that contribute to the overall flavor and texture of the dessert. Here’s a breakdown of the key components that make this cake irresistible:
Unsalted Butter
Unsalted butter is a crucial component in this recipe, providing richness and moisture to the cake. It enhances the flavor profile, allowing the chocolate and peanut butter to shine without the interference of added salt. Using unsalted butter gives you control over the overall saltiness of the cake, allowing for a well-balanced dessert.
Semi-Sweet Chocolate Chips
Selecting the right chocolate is vital for a successful lava cake. Semi-sweet chocolate chips offer the perfect balance of sweetness and bitterness, making them an ideal choice for this recipe. They melt beautifully, creating a luscious, velvety texture that is key to achieving the molten center. For an even richer flavor, consider using high-quality chocolate bars rather than standard chips, as they often contain a higher cocoa content.
Eggs and Egg Yolks
Eggs play a significant role in providing structure and richness to the lava cake. The combination of whole eggs and extra egg yolks contributes to a creamy texture and ensures that the cake holds its shape while still maintaining that gooey center. The proteins in the eggs coagulate during baking, creating a delicate balance between a set exterior and a runny interior.
Granulated Sugar
Granulated sugar is essential for balancing the flavors in desserts. In this recipe, it adds the necessary sweetness to complement the rich chocolate and salty peanut butter. The sugar also helps to stabilize the cake structure, allowing it to rise and achieve a tender crumb.
All-Purpose Flour
While lava cakes are known for their gooey centers, all-purpose flour is still needed to give the cake structure. The small amount of flour used in this recipe allows for a tender yet stable cake that can hold its shape while still achieving that desired molten center. It’s essential not to overmix the batter, as this can lead to a denser cake.
Vanilla Extract
Vanilla extract enhances the overall flavor profile of the cake, adding a subtle depth that complements the chocolate and peanut butter. Using pure vanilla extract is recommended for the best flavor; it elevates the dessert from ordinary to extraordinary.
Salt
Though it may seem counterintuitive, a pinch of salt is vital in dessert recipes. It amplifies sweetness and balances the flavors, ensuring that the rich chocolate and peanut butter do not become overwhelming. A small amount of salt can make a significant difference in the overall taste of the cake.
Creamy Peanut Butter
The star of this dessert is undoubtedly the creamy peanut butter. It adds a delightful, nutty flavor that pairs beautifully with chocolate, creating a harmonious blend that appeals to both chocolate and peanut butter lovers. Using a smooth, high-quality peanut butter ensures that it melts evenly and integrates seamlessly into the cake batter, contributing to that luxurious molten center.
Optional Toppings
While the chocolate peanut butter lava cake is delectable on its own, optional toppings can elevate the dessert even further. A scoop of vanilla ice cream or a dollop of whipped cream can add a refreshing contrast to the warm cake, while a drizzle of chocolate or caramel sauce enhances the indulgence. Crushed peanuts or a sprinkle of sea salt can also provide an added layer of texture and flavor.
Preparation Steps
Now that we have a thorough understanding of the key ingredients that make up the rich and gooey chocolate peanut butter lava cake, it’s time to dive into the preparation process. The steps outlined below will guide you through creating this decadent dessert, ensuring that you achieve that perfect molten center.
Step 1: Preheat Your Oven
Begin by preheating your oven to 425°F (220°C). Preheating is essential for achieving the desired texture of the cake, as it ensures that the cakes rise properly and develop that signature gooey center.
Step 2: Prepare Your Ramekins
Next, prepare four ramekins (6-ounce size) by greasing them thoroughly with butter or non-stick cooking spray. This step is crucial to prevent the cakes from sticking, allowing for easy removal once they are baked. For an extra layer of protection, you can also dust the insides of the ramekins with cocoa powder, which will give the cakes a beautiful finish.
Step 3: Melt the Chocolate and Butter
In a medium-sized microwave-safe bowl, combine the semi-sweet chocolate chips and unsalted butter. Heat the mixture in the microwave in 30-second intervals, stirring in between until the chocolate and butter are completely melted and smooth. This method ensures that the chocolate does not burn, which can lead to a bitter taste. Alternatively, you can melt the chocolate and butter together in a double boiler over simmering water for more precise control.
Step 4: Whisk Together the Eggs and Sugar
In a separate mixing bowl, whisk together the eggs, egg yolks, and granulated sugar until the mixture is pale and slightly thickened. This process incorporates air into the eggs, which will help the cake rise and create a light texture.
Step 5: Combine the Mixtures
Once the chocolate and butter mixture has cooled slightly, pour it into the bowl with the egg mixture, whisking continuously to combine. This step is vital to ensure that the heat from the chocolate does not cook the eggs, which would result in a scrambled texture.
Step 6: Add the Dry Ingredients
Gently fold in the all-purpose flour, vanilla extract, and salt using a rubber spatula. Be careful not to overmix the batter; just combine the ingredients until no flour streaks remain. The batter should be thick and glossy, ready to be transformed into the rich and gooey lava cakes.
Step 7: Incorporate the Peanut Butter
Spoon half of the batter into the prepared ramekins, filling them about halfway. Next, add a generous tablespoon of creamy peanut butter into the center of each ramekin. This will create that delightful molten core that makes the lava cake so special. Top the peanut butter layer with the remaining batter, ensuring that the peanut butter is fully enclosed.
Step 8: Bake the Lava Cakes
Place the filled ramekins on a baking sheet and transfer them to the preheated oven. Bake for about 12-14 minutes, or until the edges are set but the center remains soft. It’s important to keep a close eye on the cakes as they bake, as over-baking will result in a less gooey center.
Step 9: Let Them Rest
Once baked, remove the lava cakes from the oven and let them rest for 1-2 minutes. This brief cooling period allows the cakes to firm up slightly and makes them easier to unmold.
Step 10: Serve and Enjoy
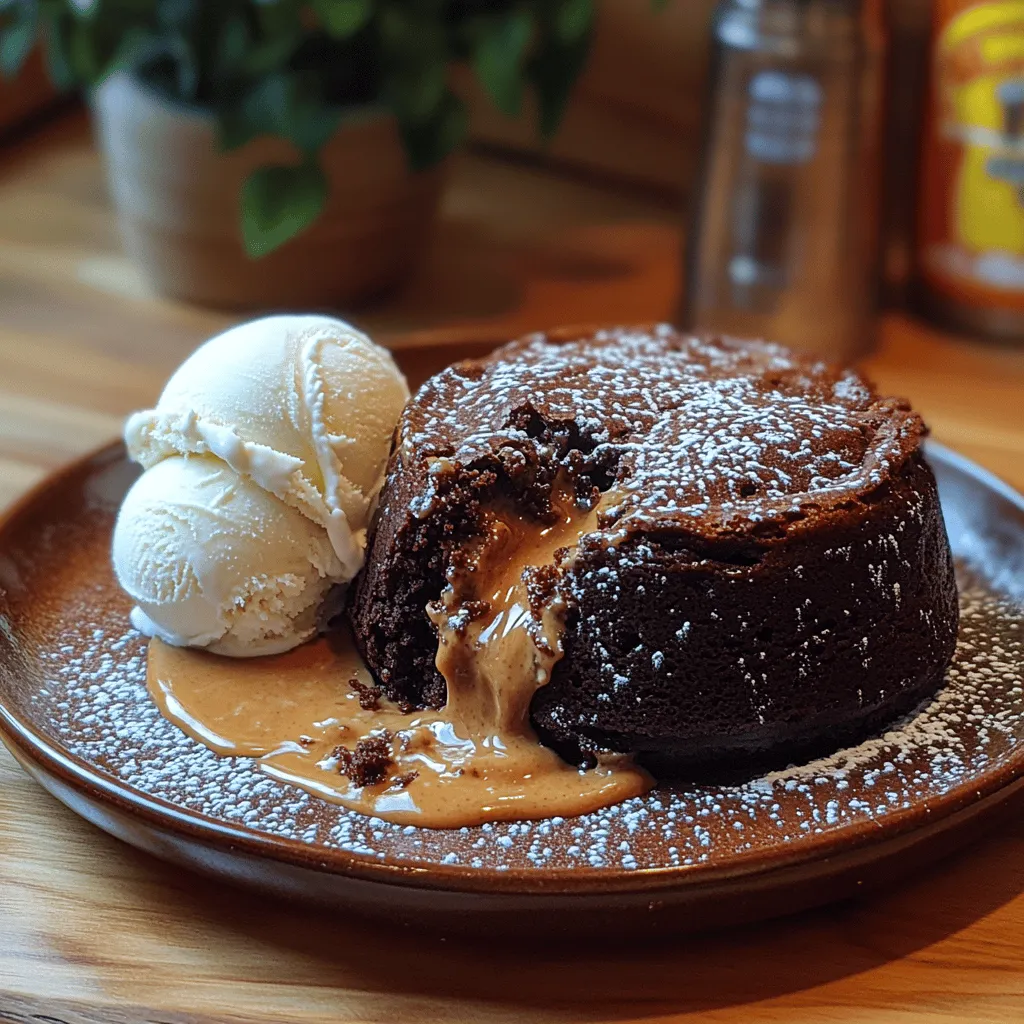
To serve, carefully invert each ramekin onto a dessert plate and gently lift it off. The cake should release easily, revealing a perfectly formed lava cake with a gooey center. For an extra touch of indulgence, serve with a scoop of ice cream or a drizzle of chocolate sauce, and enjoy the rich, gooey delight that is your chocolate peanut butter lava cake.
In the following section, we will explore additional tips for achieving the best results with this recipe, as well as address some common questions that may arise during the preparation process. Stay tuned for more delicious insights into creating this show-stopping dessert!
Prepping the Ramekins: Importance of Greasing and Dusting
The first step in crafting your Rich & Gooey Chocolate Peanut Butter Lava Cakes is to properly prepare your ramekins. This step is crucial as it ensures that your cakes release effortlessly after baking and maintain their perfect form. Start by greasing each ramekin with a generous amount of unsalted butter, making sure to cover the bottom and sides thoroughly.
Once greased, dust the inside of each ramekin with a light coating of cocoa powder. This not only helps with the release but also enhances the chocolate flavor of your lava cakes. Tap out any excess cocoa powder, ensuring an even coating. Properly prepped ramekins make all the difference in achieving that stunning presentation and delightful molten center.
Melting Chocolate and Butter: Techniques for Best Results
The next step involves melting the chocolate and butter, a process that should be approached with care to prevent burning. For the best results, use a double boiler method. Fill a pot with a couple of inches of water and bring it to a gentle simmer. Place a heatproof bowl over the pot, ensuring the bottom of the bowl doesn’t touch the water. This gentle heat will melt the chocolate and butter evenly without scorching.
Break your high-quality dark chocolate into small pieces and add them to the bowl along with the butter. Stir occasionally until melted and smooth. If you prefer, you can also melt the chocolate and butter in the microwave. Use short bursts of 20-30 seconds and stir in between to ensure even melting. Once melted, allow the mixture to cool slightly before incorporating it into the egg and sugar mixture.
Whisking Eggs and Sugar: Achieving the Right Consistency
While your chocolate and butter mixture is cooling, it’s time to whisk together the eggs and sugar. In a separate mixing bowl, crack four large eggs and add half a cup of granulated sugar. Using a whisk or an electric mixer, beat the mixture until it becomes pale and slightly thickened, which should take about 3-5 minutes. This aeration is key to achieving a light texture in your lava cakes.
The goal is to create a frothy, pale mixture that has increased in volume. This step ensures that your cakes will rise beautifully and have a delightful texture that contrasts with the gooey center. Once the egg and sugar mixture is ready, gently fold in the cooled chocolate and butter mixture until just combined.
Combining Mixtures: Tips for Folding Without Over-Mixing
When it comes to combining the mixtures, gentle is the name of the game. Using a rubber spatula, carefully fold the chocolate mixture into the egg and sugar mixture. The technique of folding involves moving the spatula under the batter and gently bringing it over the top, turning the bowl as you go. This method minimizes the risk of deflating the air you’ve incorporated into the egg mixture.
Once you see no more streaks of egg or sugar, it’s time to stop mixing. Over-mixing can lead to denser cakes instead of the light, fluffy texture you want. Remember, a few small lumps are perfectly acceptable.
Assembling the Lava Cakes: Layering the Batter and Peanut Butter
Now that your batter is ready, it’s time to assemble the lava cakes. Start by dividing the chocolate batter evenly among the prepared ramekins, filling each about halfway. Next, take your creamy peanut butter (it can be smooth or crunchy depending on your preference) and add about a tablespoon to the center of each filled ramekin. Finally, top off with the remaining chocolate batter, ensuring the peanut butter is completely covered.
This layering technique is what creates that delicious molten center we crave in a lava cake. The peanut butter will melt and blend with the chocolate as it bakes, resulting in a rich and satisfying surprise with every bite.
Baking the Cakes: Timing and Temperature for Perfect Results
Preheat your oven to 425°F (220°C). Once your lava cakes are assembled, place them on a baking sheet to catch any potential overflow during baking. Bake the cakes for approximately 12-14 minutes. The outer edges should look set while the center remains soft and jiggly.
Keep a close eye on the cakes, as oven temperatures can vary. The key is to underbake slightly to achieve that signature lava effect. When they are done, remove them from the oven and let them sit for about 1-2 minutes. This brief cooling period makes it easier to invert them without breaking.
Cooling and Inverting: Techniques for Presentation
To serve your lava cakes, you’ll need to invert them onto dessert plates. Carefully run a knife around the edge of each ramekin to loosen the cake. Place a plate on top of the ramekin and quickly flip it over, allowing the cake to gently fall onto the plate. If greased and dusted properly, the cakes should release easily, showcasing their luscious, gooey centers.
For an added touch, you can dust the top with powdered sugar or cocoa powder for a beautiful presentation. Alternatively, consider adding a sprig of mint or a few berries for color and freshness.
Serving Suggestions
Presentation Ideas for Serving
Presenting your Rich & Gooey Chocolate Peanut Butter Lava Cake can elevate your dessert experience. Consider serving the cakes warm, straight from the oven, topped with a scoop of vanilla ice cream or a dollop of whipped cream. You can also drizzle some chocolate or caramel sauce over the top to enhance the visual appeal and flavor profile.
To create a more upscale presentation, serve your lava cakes on elegant dessert plates with a side of fresh fruit or a small portion of chocolate sauce. This not only looks appealing but also allows your guests to customize their dessert experience.
Pairing with Ice Cream or Whipped Cream: Enhancing the Experience
Pairing your lava cake with ice cream or whipped cream can elevate the tasting experience. The cold creaminess of vanilla ice cream perfectly complements the warm, rich chocolate peanut butter cake, creating a delightful contrast in temperatures and textures.
For an interesting twist, try pairing with salted caramel ice cream or peanut butter swirl ice cream for a flavor explosion. If you prefer whipped cream, consider flavoring it with a touch of vanilla extract or even a sprinkle of cocoa powder to make it more indulgent.
Flavor Pairings with Beverages
To enhance the overall dessert experience, consider pairing your lava cake with complementary beverages. A robust cup of coffee can cut through the richness of the cake, providing a balance of flavors. Alternatively, a dessert wine, such as Port or a sweet Riesling, can complement the chocolate and peanut butter flavors beautifully, making for a delightful pairing.
For a non-alcoholic option, a rich hot chocolate or a chai latte can also be an excellent choice, deepening the chocolate experience and providing warmth.
Nutritional Information
Overview of Calories and Nutritional Aspects per Serving
While Rich & Gooey Chocolate Peanut Butter Lava Cake is certainly a decadent treat, it’s helpful to be aware of the nutritional content. Each lava cake contains approximately 350-400 calories, depending on the specific ingredients used and portion sizes. They are rich in sugars and fats, primarily due to the chocolate and peanut butter.
However, these cakes can be enjoyed in moderation as part of a balanced diet. The use of high-quality ingredients, such as dark chocolate and natural peanut butter, can also provide some nutritional benefits, including antioxidants from chocolate and protein from peanut butter.
Discussion on Indulgence and Moderation in Dessert Consumption
Desserts like lava cake are meant to be indulgent, and enjoying them occasionally is part of a healthy lifestyle. It’s all about balance—allowing yourself to savor these delicious treats while being mindful of portion sizes and frequency. Remember, the joy of dessert lies in the experience, so take your time to appreciate every bite.
Popular Occasions for Chocolate Peanut Butter Lava Cake
Celebratory Desserts: Birthdays, Anniversaries, and Special Occasions
Rich & Gooey Chocolate Peanut Butter Lava Cake is the perfect dessert for celebrations. Whether for a birthday, anniversary, or any special occasion, this dessert provides a touch of elegance and indulgence. Its impressive presentation and delightful flavor make it an instant hit among guests.
Romantic Dinners: Setting the Mood with a Decadent Dessert
Looking to impress a loved one? This lava cake is an ideal choice for a romantic dinner. The warm, gooey center and rich flavors create a cozy atmosphere, perfect for sharing. Pair it with candlelight and soft music for an unforgettable evening.
Family Gatherings: Sharing a Delightful Treat with Loved Ones
Family gatherings are another great opportunity to serve up this delicious dessert. It’s a treat that appeals to both adults and children alike, making it a versatile option for any family event. The joy of sharing a warm, gooey cake with loved ones creates lasting memories.
Conclusion
In summary, the Rich & Gooey Chocolate Peanut Butter Lava Cake is a dessert that effortlessly combines indulgence with simplicity. With just a few key techniques, you can create a stunning and delicious lava cake that will impress anyone fortunate enough to try it.
From the rich chocolate and creamy peanut butter to the delightful gooey center, each bite is a celebration of flavor. Embrace the experience of preparing this dessert, and don’t hesitate to explore your variations and personal touches.
Whether you’re serving it at a special occasion, a romantic dinner, or simply indulging yourself, the warm, gooey delight of this cake is sure to satisfy. So gather your ingredients, follow the steps, and enjoy the divine pleasure of chocolate and peanut butter in every decadent bite.
