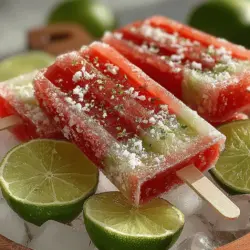
Refreshing Watermelon Lime Bliss Popsicles
As the sun blazes overhead and temperatures soar, there’s nothing quite like a homemade popsicle to cool you down. These Refreshing Watermelon Lime Bliss Popsicles are not only a delightful treat but also an easy way to enjoy the flavors of summer right at home. Simple to prepare and bursting with juicy goodness, they are perfect for both adults and children alike. With just a few fresh ingredients, you can whip up a batch of these blissful pops that capture the essence of summer in every bite.
The Health Benefits of Watermelon and Lime
Before diving into the recipe, it’s worth noting the impressive health benefits of the star ingredients: watermelon and lime.
Watermelon, often hailed as a summertime staple, is composed of about 92% water, making it one of the most hydrating fruits available. It is low in calories and rich in vitamins A and C, which are essential for maintaining healthy skin and boosting your immune system. Additionally, watermelon contains antioxidants like lycopene, which has been linked to heart health and may even help reduce the risk of certain cancers. With its sweet, refreshing flavor and hydrating properties, watermelon is a fantastic choice for hot summer days.
Lime, on the other hand, adds a zesty kick to this popsicle recipe while also contributing significant health benefits. A great source of vitamin C, lime plays a crucial role in enhancing the immune system and promoting healthy skin. Beyond its vitamin content, lime is known for its digestive benefits. The acidity can help stimulate the production of digestive juices and may aid in reducing bloating. When combined with watermelon, lime not only enhances the flavor profile but also amplifies the health benefits, making these popsicles a guilt-free indulgence.
Gathering Ingredients for Watermelon Lime Bliss Popsicles
To create these Refreshing Watermelon Lime Bliss Popsicles, you’ll need a few simple ingredients. Here’s what you’ll require:
Ingredients:
– 4 cups of ripe watermelon, cubed
– Juice of 2 fresh limes
– 2-4 tablespoons of honey or agave syrup (adjust based on your sweetness preference)
– Optional: Mint leaves for garnish, lime zest for added flavor
When selecting a watermelon, look for one that feels heavy for its size and has a uniform shape. The skin should be smooth and free from blemishes or soft spots. A ripe watermelon will have a creamy yellow spot, indicating it has ripened on the ground, which is a good sign of sweetness.
For limes, choose those that are firm and slightly soft to the touch. The color should be vibrant green, and the juice content is often higher in limes that are slightly heavier for their size. Fresh ingredients will yield the best flavors in your popsicles.
Now let’s talk about the sweeteners. Honey offers a natural sweetness and a slightly floral note, while agave syrup is a great vegan alternative with a milder taste. Depending on dietary preferences, you can choose one over the other. If you prefer a sugar-free option, consider using a natural sweetener like stevia or monk fruit.
Step-by-Step Instructions for Making Popsicles
Preparing the Watermelon
Once you’ve gathered your ingredients, it’s time to prepare the watermelon. Begin by carefully slicing the watermelon in half. Using a sharp knife, cut the flesh away from the rind, ensuring you remove any seeds. Next, cut the watermelon into manageable cubes. When selecting your watermelon, aim for a piece that is well-ripened, as this ensures maximum flavor and sweetness in your popsicles.
After cubing the watermelon, place it in a blender. For an extra touch, consider reserving a few small cubes to add to the popsicles later for added texture.
Blending the Ingredients
With the watermelon cubes loaded into the blender, it’s time to blend. Start by adding the lime juice and your chosen sweetener. Blend on high until the mixture is completely smooth and free of any chunks. The goal here is to achieve a silky consistency that will freeze perfectly.
Once blended, taste the mixture. This is your chance to adjust the sweetness to your liking. If you prefer a sweeter popsicle, add more honey or agave syrup and blend again. If you enjoy a more tart flavor, feel free to add a bit more lime juice. The beauty of this recipe lies in its simplicity and flexibility, allowing you to cater it to your taste preferences.
After achieving the desired flavor, you’re ready to pour your mixture into popsicle molds. For a fun twist, consider adding some mint leaves or lime zest into the molds before filling them. This not only enhances the flavor but also adds visual appeal to your popsicles.
Now that you’ve prepared the mixture and filled your molds, the next steps will involve freezing and enjoying your Refreshing Watermelon Lime Bliss Popsicles, which we will cover in the next part of the article.
Pouring and Freezing
Once you’ve blended your watermelon and lime mixture to perfection, it’s time to pour it into your popsicle molds. A few best practices will ensure the best results:
1. Choosing the Right Molds: Select popsicle molds that suit your needs. Silicone molds are particularly user-friendly because they make removing the popsicles easier once they’re frozen.
2. Leave Space for Expansion: When pouring the mixture, fill the molds only about three-quarters full. This space allows for the expansion of the mixture as it freezes, preventing spills and ensuring that your popsicles maintain their shape.
3. Inserting Sticks: If your molds require sticks, insert them into the mixture after it has been poured but before freezing. Allow the mixture to sit for about 30-60 minutes in the freezer until it begins to set around the edges before inserting the sticks completely. This will help keep the sticks centered during freezing.
4. Freezing Process: Freeze your popsicles for a minimum of 4-6 hours, or until they are completely solid. If you’re in a hurry, you can check them after four hours, but it’s best to leave them to freeze overnight for the most satisfying results.
5. Troubleshooting Common Issues: If your popsicles are difficult to remove, it could be due to incomplete freezing. If they seem too soft, give them additional time in the freezer. If your popsicles don’t come out easily, run warm water over the outside of the molds for a few seconds to help release them.
Unmolding and Serving
Successfully unmolding your popsicles is a rewarding moment! Here are some techniques to ensure they come out perfectly:
1. Gentle Removal: To remove the popsicles from the molds without breaking them, gently twist the mold or pull on the stick while applying a slight upward force. If they stick, dip the molds in warm water for a few seconds to loosen the mixture.
2. Serving Ideas: There are countless ways to enhance your popsicle experience:
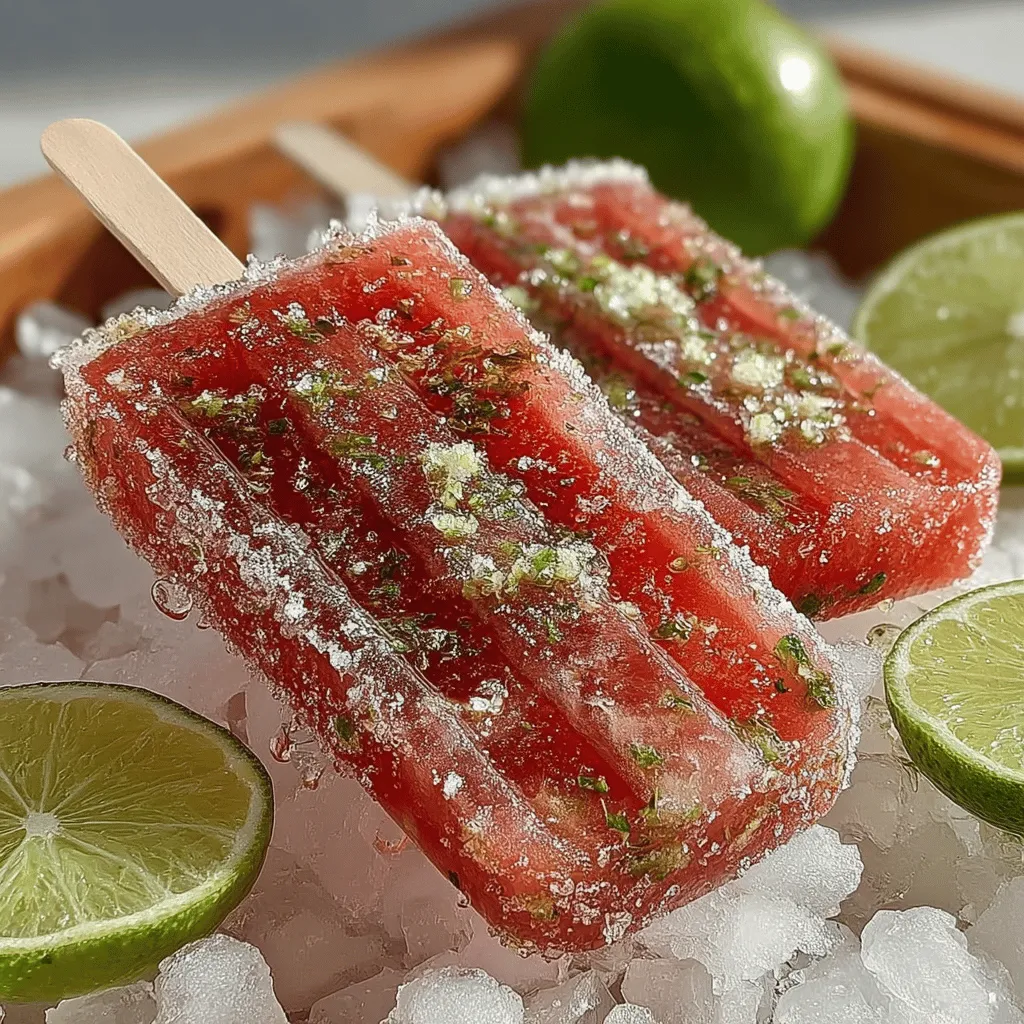
– Serve your Watermelon Lime Bliss Popsicles alongside fresh mint leaves for a refreshing garnish that complements the flavors beautifully.
– For a unique twist, consider sprinkling a small pinch of sea salt on the popsicles before serving. This will elevate the sweetness of the watermelon and balance the tartness of the lime.
– Pair these popsicles with a light summer salad or a refreshing beverage, such as iced tea or lemonade, for a delightful summertime snack.
Creative Variations on Watermelon Lime Popsicles
The beauty of homemade popsicles lies in their versatility. Here are some creative variations to inspire your next batch:
1. Minty Fresh Addition: Adding fresh mint leaves to your watermelon-lime mixture can provide an invigorating twist. Blend a handful of mint leaves with the watermelon and lime for a refreshing flavor boost.
2. Berry Bliss: Incorporate other fruits like strawberries or blueberries for added color and taste. You can layer the watermelon-lime mixture with a berry puree for a visually stunning and flavorful treat. Simply blend your choice of berries, pour a layer into the molds, freeze for an hour, then add the watermelon-lime mixture.
3. Creamy Coconut Layer: For a creamier texture, consider adding a layer of coconut milk. Blend coconut milk with a dash of vanilla extract and layer it with the watermelon-lime mixture. This will create a tropical flavor fusion that’s sure to impress.
4. Personalizing Sweetness: Experiment with different sweeteners, such as agave nectar, honey, or maple syrup, to suit your taste preferences. Adjusting the amount of lime zest can also change the tartness level, allowing you to create a popsicle that’s just right for you.
Storage Tips for Homemade Popsicles
To enjoy your Watermelon Lime Bliss Popsicles at their best, proper storage is essential:
1. Freezer Storage: Store leftover popsicles in an airtight container or resealable plastic bag. This will help prevent freezer burn and maintain their delightful flavor. Avoid stacking them directly on top of each other to keep their shapes intact.
2. Packaging for Gifting: If you plan to share your popsicles, consider wrapping them individually in parchment paper or placing them in decorative paper cups. This not only keeps them fresh but also makes for an attractive presentation.
3. Shelf-Life Information: Homemade popsicles can typically last in the freezer for up to 1-2 months. To determine if they have gone past their prime, check for any off-smells or ice crystals forming on the surface. If they seem to have an unusual texture or flavor, it’s best to discard them.
Conclusion
Making and enjoying Watermelon Lime Bliss Popsicles is not just a delightful culinary experience; it’s a way to savor the sweetness of summer while creating healthy treats for you and your loved ones. The refreshing combination of watermelon and lime is both invigorating and satisfying, making these popsicles an ideal snack for warm days.
By following this recipe and exploring the creative variations, you can tailor your popsicles to fit any occasion or taste preference. The joy of crafting homemade treats fosters a sense of community around cooking, and we encourage you to share your experiences, variations, and tips with others.
So grab your ingredients, unleash your creativity, and dive into the world of homemade popsicles. You’ll not only enjoy a delicious treat but also create lasting memories with each batch you make. Happy freezing!