Introduction
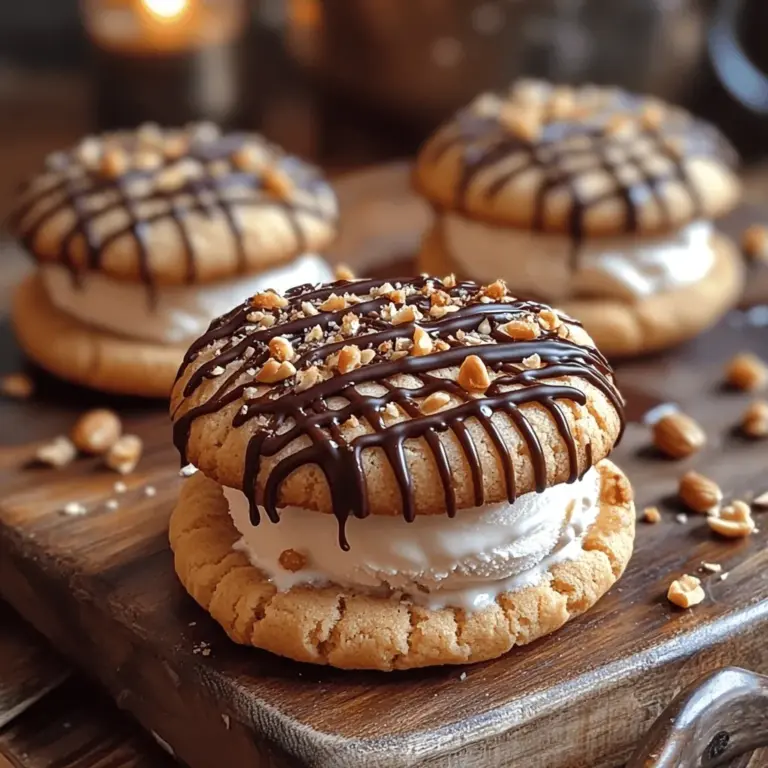
Ice cream sandwiches have long been a cherished treat, evoking nostalgic memories of summer days spent with friends and family. This delightful dessert combines two worlds: the satisfying crunch of cookies and the creamy, cold goodness of ice cream. While traditional ice cream sandwiches often feature classic chocolate or vanilla cookies, we’re taking this beloved treat to the next level with our Peanut Butter Bliss Ice Cream Sandwiches.
This delectable recipe introduces a unique twist by incorporating rich peanut butter into the cookie base, creating a flavor profile that is both indulgent and satisfying. The combination of creamy peanut butter, sweet ice cream, and the crunch of freshly baked cookies makes for an irresistible dessert that appeals to both kids and adults alike. Perfect for summer gatherings, birthday parties, or simply a cozy night in, this recipe is not only easy to make but also ensures a delightful experience with every bite.
The Appeal of Peanut Butter Bliss Ice Cream Sandwiches
What makes Peanut Butter Bliss Ice Cream Sandwiches such a crowd-pleaser? It all comes down to the delightful interplay of flavors and textures that each bite delivers. The creamy peanut butter in the cookie dough pairs wonderfully with the sweet and cold ice cream, creating a rich and satisfying contrast. Add to that the crunch of the cookies, and you have a symphony of sensations that keeps everyone coming back for more.
Another appealing aspect of this recipe is its versatility. While peanut butter is the star of the show, you can mix and match with your favorite ice cream flavors. Whether you prefer classic vanilla, rich chocolate, or a fruity sorbet, there’s no limit to the combinations you can create. For an extra layer of flavor and texture, consider adding optional toppings like chocolate chips, crushed peanuts, or sprinkles, allowing you to customize each sandwich to your liking.
In addition to being a treat that pleases the palate, Peanut Butter Bliss Ice Cream Sandwiches are also perfect for any occasion. They can be made ahead of time and stored in the freezer for impromptu dessert cravings or served as a show-stopping dessert at your next gathering. With their delightful taste and fun presentation, they’re sure to become a favorite in your household.
Gathering Your Ingredients
To create these mouthwatering Peanut Butter Bliss Ice Cream Sandwiches, you’ll need a selection of essential ingredients. Here’s what you’ll need:
Essential Ingredients:
– Peanut Butter: Opt for a high-quality, creamy peanut butter for the best flavor and texture. Look for options that contain minimal ingredients—just peanuts and salt is ideal. Avoid overly processed varieties with added sugars or oils, as they can alter the taste and consistency of your cookies.
– Granulated Sugar and Brown Sugar: A combination of both sugars enhances the flavor and provides the cookies with a chewy texture. The brown sugar adds moisture and a slight caramel undertone.
– Eggs: Eggs play a crucial role in binding the ingredients together and adding moisture to the cookie dough.
– Vanilla Extract: A splash of vanilla extract elevates the overall flavor, complementing the peanut butter beautifully.
– Baking Soda: This leavening agent helps the cookies rise, creating a softer and more tender texture.
– All-Purpose Flour: The foundation of your cookie dough, all-purpose flour provides the necessary structure for your cookies.
Optional Ingredients:
– Chocolate Chips: Adding semi-sweet or dark chocolate chips to the cookie dough introduces a delightful contrast to the peanut butter flavor, making each bite even more indulgent.
– Crushed Peanuts: For those who crave an extra crunch, sprinkling crushed peanuts into the dough or on top of the finished sandwiches adds a satisfying texture and enhances the peanut flavor.
– Ice Cream: Choose your favorite flavor of ice cream to fill the sandwiches. Classic options like vanilla or chocolate work well, but feel free to experiment with unique flavors like cookies and cream, caramel swirl, or even mint chocolate chip.
Now that you have gathered all the necessary ingredients, it’s time to get started on crafting your Peanut Butter Bliss Ice Cream Sandwiches!
Step-by-Step Instructions for Making Peanut Butter Bliss Ice Cream Sandwiches
Creating these delectable ice cream sandwiches involves several key steps, each crucial for achieving the perfect balance of flavors and textures. Follow this comprehensive guide to ensure your Peanut Butter Bliss Ice Cream Sandwiches turn out perfectly every time.
Preheating the Oven
Before you dive into mixing your ingredients, it’s essential to preheat your oven to 350°F (175°C). Preheating the oven ensures even baking, allowing your cookies to rise and set properly. While the oven is warming up, you can prepare your baking sheets. Line two baking sheets with parchment paper to prevent the cookies from sticking and to make cleanup a breeze.
Making the Cookie Dough
Once your oven is preheated, it’s time to create the cookie dough. Start by mixing the creamy peanut butter and sugars in a large mixing bowl. Using an electric mixer or a wooden spoon, blend the peanut butter until it’s smooth and creamy, then gradually add the granulated sugar and brown sugar. Beat the mixture until it’s well combined and fluffy, which will help create a lighter cookie texture.
Next, add the eggs one at a time, beating well after each addition to ensure they are fully incorporated. This step is crucial, as eggs contribute to the structure and moisture of the cookies. Finally, stir in the vanilla extract, which will add a lovely depth of flavor to the dough.
Incorporating Dry Ingredients
Now it’s time to bring the dry ingredients into the mix. In a separate bowl, whisk together the all-purpose flour and baking soda. This helps to evenly distribute the leavening agent throughout the flour. Gradually add the flour mixture to the peanut butter mixture, carefully folding it in with a spatula or wooden spoon. It’s essential to mix until just combined; overmixing can lead to tough cookies, so be gentle.
If you’re adding chocolate chips or crushed peanuts, fold them in at this stage. The chocolate chips will melt slightly during baking, creating pockets of gooey goodness, while the crushed peanuts will add an extra crunch.
Scooping and Baking the Cookies
With your cookie dough ready, it’s time to scoop and bake. Using a cookie scoop or a tablespoon, drop rounded balls of dough onto the prepared baking sheets, spacing them about 2 inches apart to allow for spreading. Flatten each ball slightly with the back of a fork or your fingers to create a more even shape.
Place the baking sheets in the preheated oven and bake for 10-12 minutes, or until the edges are lightly golden and the centers look set but still soft. Remember, the cookies will continue to cook slightly after being removed from the oven, so it’s better to err on the side of underbaking for a chewy texture.
Once baked, allow the cookies to cool on the baking sheets for a few minutes before transferring them to a wire rack to cool completely. This step is important, as it allows the cookies to firm up and makes them easier to handle when assembling your ice cream sandwiches.
As you await the cookies to cool, you can prepare your ice cream, ensuring it’s slightly softened for easy spreading. Once the cookies are ready, the fun part begins! You can assemble your Peanut Butter Bliss Ice Cream Sandwiches with your favorite ice cream flavor, creating a decadent treat that’s sure to please everyone.

Tips for Portioning Cookie Dough
When it comes to making the perfect Peanut Butter Bliss Ice Cream Sandwiches, the first step is to ensure that your cookies are uniform in size. This leads to consistent baking and a more aesthetically pleasing sandwich. To achieve this, use a cookie scoop or a measuring spoon to portion out the dough. Each cookie should be about 2 tablespoons in size, which provides a good balance between cookie and ice cream.
Spacing is equally important when placing the cookie dough on the baking sheet. Be sure to leave at least 2 inches between each ball of dough. Cookies tend to spread while baking, and proper spacing prevents them from merging into one another. This will help maintain their shape and ensure that each cookie retains its individual character.
Baking Time and Visual Cues for Perfect Cookies
The baking time for your peanut butter cookies will typically range from 8 to 10 minutes, depending on your oven and the size of your cookies. It’s crucial to keep an eye on them as they bake. You’ll want to remove the cookies from the oven when the edges start to turn a light golden brown, while the centers may still appear slightly underbaked. This is a key visual cue, as cookies will continue to firm up as they cool. Overbaking can lead to a dry cookie, which won’t hold up well against the creamy ice cream.
Cooling the Cookies
Cooling your cookies is a vital step in ensuring the structural integrity of your ice cream sandwiches. If you attempt to assemble the sandwiches while the cookies are still warm, you risk having them crumble or break apart. Allow the cookies to cool on the baking sheet for about 5 minutes before transferring them to a wire rack.
Using a wire rack for cooling is beneficial because it allows air to circulate around the cookies, ensuring that they cool down evenly and preventing any sogginess that can occur when cookies sit on a flat surface. Once cooled completely, your cookies will be ready for assembly.
Assembling the Sandwiches
Now that you have perfectly baked and cooled cookies, it’s time to assemble your Peanut Butter Bliss Ice Cream Sandwiches. Start by placing one cookie upside down on a clean surface or plate. Using an ice cream scoop, generously scoop your favorite ice cream flavor—vanilla, chocolate, or even a nutty peanut butter variety—onto the center of the cookie. Aim for about a half-cup of ice cream, depending on your preference for the amount of filling.
Next, take another cookie and gently press it down onto the ice cream. It’s important to apply enough pressure so that the ice cream spreads slightly outwards, but be careful not to squish it too hard, which could lead to a messy overflow. If ice cream begins to spill out the sides, simply run a spatula along the edges to tidy up.
Optional Garnishing
To elevate your Peanut Butter Bliss Ice Cream Sandwiches, consider rolling the edges in crushed peanuts. This not only adds a delightful crunch but also enhances the peanut flavor that complements the cookies. To do this, simply place crushed peanuts in a shallow dish and roll the sides of your assembled sandwiches in them until they are well-coated.
Other garnishing options could include mini chocolate chips, sprinkles, or even a drizzle of chocolate or caramel sauce over the top. These additional toppings not only add flavor but also visual appeal, making your dessert stand out at any gathering.
Final Freezing
Once your sandwiches are assembled, it’s crucial to freeze them to set the ice cream. Place the sandwiches on a parchment-lined baking sheet and return them to the freezer for at least 1-2 hours. This step is essential for firming up the ice cream, ensuring that your sandwiches hold together when served.
For best practices in storage, wrap each sandwich individually in plastic wrap or parchment paper to prevent freezer burn and maintain freshness. These sandwiches can be stored in an airtight container for up to two weeks, allowing you to enjoy them at your leisure.
Serving Suggestions
These Peanut Butter Bliss Ice Cream Sandwiches are perfect for sharing at gatherings or parties. Consider serving them alongside a scoop of fresh fruit or a simple salad to balance the sweetness of the dessert. They can also be paired with beverages such as cold milk, iced coffee, or even a rich stout beer for an adult twist.
For a fun presentation, serve the sandwiches on a large platter with an array of toppings available for guests to customize their sandwiches. This interactive element adds a layer of enjoyment and allows everyone to create their unique dessert experience.
Nutritional Information
When indulging in Peanut Butter Bliss Ice Cream Sandwiches, it’s helpful to consider their nutritional aspects. Each sandwich typically contains around 300-400 calories, depending on the size and type of ice cream used. The primary allergens to be aware of include peanuts, dairy, and gluten, so be sure to inform guests of these ingredients.
For those with dietary preferences, there are various ways to modify this recipe. You can create gluten-free cookies by substituting traditional flour with almond flour or a gluten-free baking blend. For a vegan option, use plant-based butter and ice cream alternatives to fit your dietary needs. This versatility allows everyone to enjoy this delightful treat without compromising on flavor.
Conclusion
Creating Peanut Butter Bliss Ice Cream Sandwiches is not just about enjoying a delicious dessert; it’s about the joy of making something special to share with friends and family. The process of baking, assembling, and garnishing these sandwiches offers an opportunity to experiment with flavors and creativity, ultimately leading to lasting memories.
Encourage readers to explore different ice cream flavors and cookie combinations, fostering a sense of adventure in the kitchen. The satisfaction of crafting a homemade treat that everyone can enjoy is unparalleled. So gather your loved ones, whip up a batch of these delightful ice cream sandwiches, and celebrate the simple pleasures of life with this indulgent dessert.