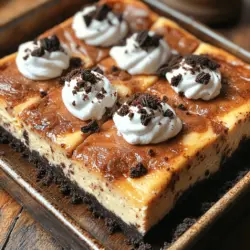
In the realm of desserts, few treats capture the hearts and taste buds of chocolate lovers quite like Oreo cheesecake bars. These delightful sweets combine the rich, creamy texture of cheesecake with the iconic flavor of Oreo cookies, making them a perfect indulgence for any occasion. Whether you’re hosting a gathering, celebrating a special event, or simply craving something sweet, this recipe offers an irresistible combination of flavors and textures.
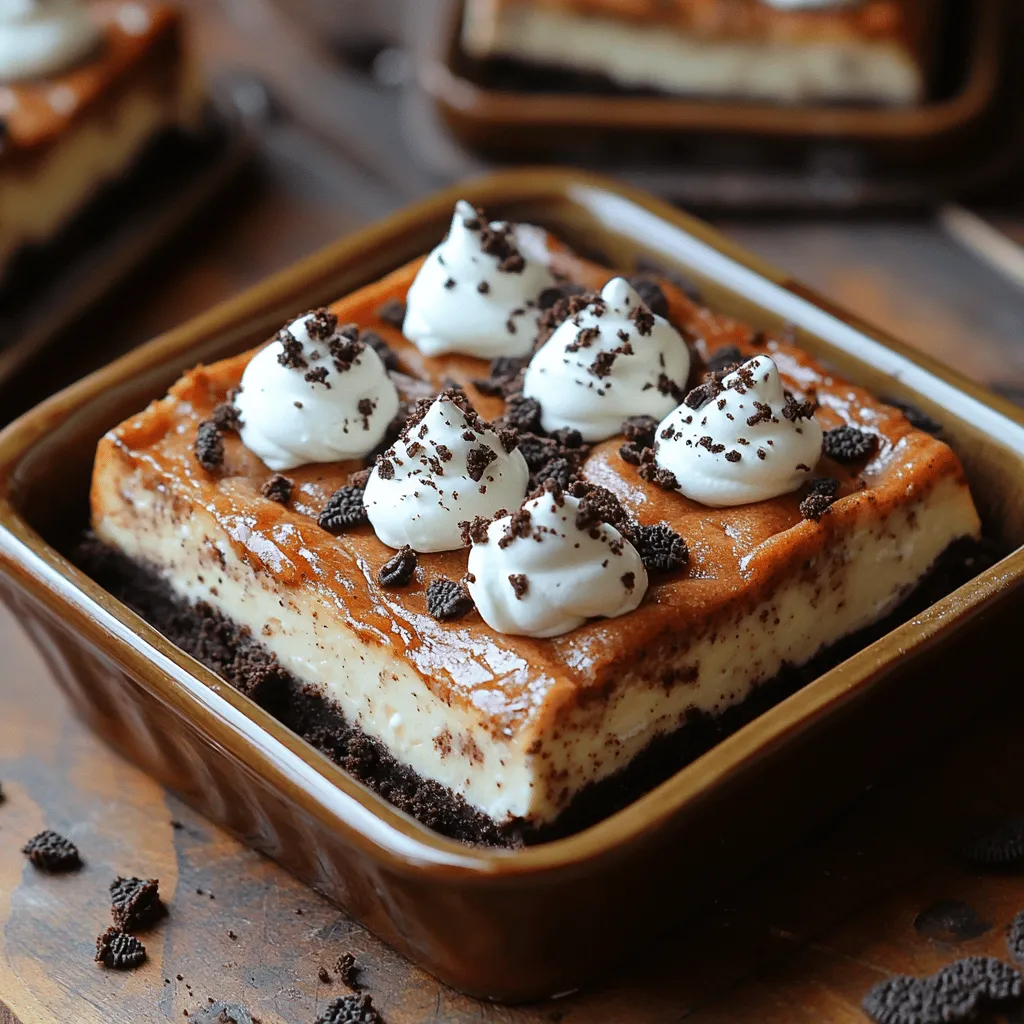
This creamy, decadent dessert is not just a feast for the palate; it’s also visually appealing, with its contrasting layers of dark chocolatey crust and smooth, creamy filling. The blend of these two popular components creates a unique dessert that is sure to impress anyone who takes a bite. In this article, we will guide you through the step-by-step process of making these delectable Oreo cheesecake bars while also delving into the background of the ingredients, tips for perfecting your recipe, and ways to elevate your dessert experience.
Understanding the Ingredients
To create the perfect Oreo cheesecake bars, it’s essential to understand the key ingredients that contribute to their delightful flavor and texture. Let’s take a closer look at the main components of this recipe.
The Foundation: Oreo Cookies
Oreo cookies are a staple in the world of desserts, beloved for their distinctive flavor and crunchy texture. The classic combination of chocolate wafer cookies and sweet cream filling has made Oreos an iconic treat for generations. Their versatility shines in various dessert recipes, from milkshakes to cakes, and they shine particularly well in cheesecake bars.
In this recipe, Oreo cookies serve as the foundation for our crust, providing a rich chocolatey base that complements the creamy cheesecake filling. The flavor profile of Oreos is not only delicious but also adds a nostalgic element to the dessert, as many people have fond memories associated with this treat. When used in baking, crushed Oreos lend their unique taste and texture, creating a crust that is both firm and crumbly.
Cream Cheese: The Heart of Cheesecake
Cream cheese is the star ingredient of any cheesecake, providing the creamy, smooth texture that makes this dessert so irresistible. Its rich flavor and velvety mouthfeel create the perfect canvas for the sweet and chocolatey elements in the Oreo cheesecake bars.
When selecting cream cheese for your recipe, it’s important to consider the fat content. Full-fat cream cheese is recommended for the best results, as it contributes to a richer texture and a more indulgent flavor. Low-fat or non-fat cream cheese may result in a cheesecake that lacks the creaminess and richness that makes traditional cheesecake so delightful. Additionally, using room temperature cream cheese is crucial. It blends more easily and helps to create a smooth filling without lumps.
The Sweetness Factor: Sugar and Vanilla
Sugar plays a vital role in balancing the flavors of the cheesecake filling. Granulated sugar is the most common choice, as it dissolves easily into the cream cheese and contributes to the overall sweetness of the dessert. The amount of sugar you use can be adjusted according to your taste preferences, but it’s essential to maintain a balance so that the sweetness complements rather than overwhelms the other flavors.
Vanilla extract is another key ingredient that elevates the overall taste of the cheesecake. Its natural sweetness and aromatic qualities enhance the flavors of the cream cheese and Oreos, creating a harmonious blend. When selecting vanilla extract, opt for pure vanilla for the best flavor. While imitation vanilla can be used in a pinch, it lacks the depth and complexity of pure vanilla.
Preparing the Crust
The crust is an essential component of the Oreo cheesecake bars, providing a solid foundation for the creamy filling. Let’s explore how to prepare the perfect crust for your dessert.
Selecting the Right Baking Dish
Choosing the right baking dish is crucial for achieving the ideal texture and size for your Oreo cheesecake bars. A 9×9-inch square baking dish is typically recommended for this recipe, as it allows the bars to bake evenly and be cut into manageable squares. If you prefer thicker bars, you could use an 8×8-inch dish, but keep in mind that the baking time may need to be adjusted slightly.
Make sure to line your baking dish with parchment paper for easy removal and cleanup. This step is especially important for cheesecake bars, as they can be delicate and might stick to the pan if not lined properly.
Creating the Perfect Oreo Crust
Now, let’s dive into the process of making the Oreo crust. This step is simple and straightforward, yet it sets the stage for the entire dessert.
1. Crushing the Oreos: Start by taking about 24 Oreo cookies (adjust based on the size of your baking dish) and placing them in a food processor. Pulse until they reach a fine crumb consistency. If you don’t have a food processor, you can place the cookies in a sealed plastic bag and crush them with a rolling pin.
2. Mixing with Butter: In a medium bowl, combine the crushed Oreos with 5 tablespoons of melted unsalted butter. The butter acts as a binding agent, helping the crust hold its shape once baked. Mix until the crumbs are evenly coated and the mixture resembles wet sand.
3. Achieving the Ideal Texture: The key to a great crust is finding the right texture. It should be moist enough to hold together when pressed but not too wet. If the mixture feels too dry, you can add a little more melted butter, one teaspoon at a time, until you reach the desired consistency.
Baking the Crust
Once your Oreo crust mixture is ready, it’s time to bake it. Here are the steps to ensure your crust turns out perfectly:
1. Pressing the Mixture: Pour the Oreo crust mixture into the prepared baking dish. Using the back of a measuring cup or your hands, firmly press the mixture into an even layer along the bottom of the dish. Make sure to pack it tightly to create a solid base for the cheesecake filling.
2. Optimal Baking Temperature and Time: Preheat your oven to 350°F (175°C). Place the baking dish in the oven and bake the crust for about 10 minutes. This step helps to set the crust and adds a nice texture.
3. Signs that Indicate the Crust is Ready: You’ll know the crust is ready when it looks slightly darker around the edges and feels firm to the touch. Once baked, remove it from the oven and let it cool while you prepare the cheesecake filling. This cooling step is essential, as adding the filling to a hot crust can lead to undesirable textures.
Crafting the Cheesecake Filling
With your crust prepared, it’s time to move on to the cheesecake filling. This is where the magic happens, and the creamy goodness comes together.
Mixing Techniques for Creamy Cheesecake
Achieving a smooth and creamy cheesecake filling requires proper mixing techniques. Here are some best practices to ensure your filling is lump-free and delicious:
1. Beating the Cream Cheese: In a large mixing bowl, add 16 ounces of room temperature cream cheese. Using an electric mixer, beat the cream cheese on medium speed until it’s smooth and creamy, about 2-3 minutes. Be sure to scrape down the sides of the bowl periodically to ensure even mixing.
2. Adding Sugar and Vanilla: Gradually add in 2/3 cup of granulated sugar and 1 teaspoon of pure vanilla extract to the cream cheese. Continue to beat the mixture until it’s fully incorporated and smooth, about another minute. The sugar will help to sweeten the filling while the vanilla adds depth to the flavor.
3. Incorporating Eggs: To make your cheesecake filling airy and light, add 2 large eggs, one at a time, mixing on low speed until just combined. Avoid overmixing, as this can introduce air bubbles that may cause cracking during baking.
4. Optional Additions: For an extra layer of flavor, consider folding in some chopped Oreo pieces into the filling. This adds texture and enhances the Oreo flavor throughout the cheesecake.
Ensuring a Smooth Mixture
The key to a successful cheesecake filling lies in the temperature and mixing technique. Always ensure that your cream cheese and eggs are at room temperature before mixing. Cold ingredients can lead to lumps and a less creamy texture. If your filling still has lumps after mixing, you can use a spatula to press it through a fine mesh sieve for an ultra-smooth consistency.
With these steps in place, you’re well on your way to creating the perfect Oreo cheesecake bars. In the next part of this article, we will guide you through the final steps of assembling and baking your bars, as well as share tips for serving and storing your delicious creation. Stay tuned!
Folding in the Oreos
Incorporating the Oreos into your cheesecake mixture is a crucial step that can significantly affect the final texture and flavor of your Oreo cheesecake bars. To ensure a perfectly blended mixture without overmixing, follow these simple steps:
1. Chop the Oreos: Start by coarsely chopping your Oreos. You can use a knife, a food processor, or even place them in a zip-top bag and crush them with a rolling pin. Aim for uneven pieces to create texture, as larger chunks will add delightful bites of cookie throughout the bars.
2. Folding Technique: Once your cheesecake mixture is well combined, gently fold in the chopped Oreos using a spatula. Start by adding a third of the Oreos to the mixture, and use a gentle lifting and turning motion to incorporate them. Repeat this until all the Oreos are mixed in. The key is to be gentle to avoid deflating the cheesecake batter, which can lead to a denser texture.
3. Variations on Oreo Additions: To add a unique twist to your Oreo cheesecake bars, consider mixing in other flavors or types of Oreos. For instance, using mint Oreos can give a refreshing twist, while peanut butter Oreos lend a nutty sweetness. You can also add a swirl of chocolate or caramel sauce for added depth and flavor complexity.
Assembling and Baking the Bars
Pouring and Spreading the Filling
Once your Oreo mixture is ready, it’s time to assemble your cheesecake bars. Properly pouring and spreading the filling is essential for ensuring even baking and a beautiful presentation.
1. Pour the Filling: Carefully pour the cheesecake mixture over the prepared crust. Start from the center and let it naturally spread towards the edges. This method minimizes air bubbles and ensures a smooth surface.
2. Spreading the Mixture: Using an offset spatula, gently spread the mixture evenly across the crust. The goal is to create a uniform layer that reaches all corners of the baking dish. If necessary, tap the dish lightly on the counter to encourage the filling to settle and eliminate any air pockets.
3. Smooth Surface: Achieving a smooth surface is crucial for even baking. If you notice any lumps or uneven spots, gently smooth them out with your spatula. A well-distributed mixture will help your cheesecake bars bake evenly, preventing any cracks or uneven texture.
Baking the Cheesecake Bars
Baking the cheesecake bars requires careful attention to temperature and timing to achieve the perfect creamy texture.
1. Baking Temperature: Preheat your oven to 325°F (160°C). This moderate temperature allows the cheesecake to bake evenly without cracking.
2. Ideal Baking Time: Bake the bars for about 25 to 30 minutes. The edges should be set, but the center may still have a slight wobble. This slight jiggle is a sign that the cheesecake will firm up as it cools.
3. Checking for Doneness: To check if your cheesecake bars are done without compromising their texture, gently shake the baking dish. If the center jiggles slightly but isn’t liquidy, it’s time to take them out. Avoid opening the oven door too often, as this can cause temperature fluctuations that may lead to cracks.
Cooling and Chilling Process
Understanding Chill Time
Once the baking is complete, the cheesecake bars need to cool and chill to develop their full flavor and achieve the desired texture.
1. Importance of Chilling: Chilling is crucial for cheesecake, allowing the flavors to meld and the texture to firm up. When cheesecake bars are properly chilled, they become denser and creamier, enhancing the overall taste experience.
2. Recommended Chilling Times: Allow the bars to cool in the baking dish at room temperature for about 30 minutes. After that, transfer them to the refrigerator and chill for at least 4 hours, although overnight is preferred for the best results. The longer they chill, the more cohesive the flavors will become.
Storage Tips
Proper storage of your Oreo cheesecake bars is essential for maintaining their freshness and flavor.
1. Best Practices for Storing: Once fully chilled, cover the baking dish tightly with plastic wrap or aluminum foil. This will prevent the bars from absorbing any odors from the fridge and keep them moist.
2. Refrigeration Impact: Storing your cheesecake bars in the refrigerator allows the flavors to continue developing. The chilling process helps the cheesecake set, making it easier to cut into neat squares without crumbling. If you plan to keep them for longer than a few days, consider freezing them for up to 2 months. Just ensure they are wrapped well to prevent freezer burn.
Serving Suggestions
Presentation Ideas
How you serve your Oreo cheesecake bars can make a significant difference in their appeal. Here are some creative ideas to elevate your presentation:
1. Plating: Cut your cheesecake bars into squares or rectangles, and place them on a decorative platter. For a more elegant touch, use a cake stand to elevate your display.
2. Enhancements: Consider garnishing your bars with a dollop of whipped cream on top, followed by a sprinkle of crushed Oreos or a drizzle of chocolate sauce. These additions not only enhance the visual appeal but also add extra flavor and texture.
3. Chocolate Shavings: For a more sophisticated look, shave some chocolate and sprinkle it over the tops of the bars. Dark chocolate complements the sweetness of the cheesecake and adds an inviting touch.
Pairing with Beverages
To complement the rich flavors of Oreo cheesecake bars, consider serving them with a carefully chosen beverage.
1. Coffee: A rich cup of coffee is an excellent pairing, as the bitterness of the coffee balances the sweetness of the cheesecake. You might opt for a classic espresso or a creamy latte.
2. Milk: For a nostalgic touch, serve your bars with a glass of cold milk. The classic pairing of cookies and milk is always a crowd-pleaser.
3. Dessert Wines: If you’re in the mood for something a little more sophisticated, try a dessert wine such as a sweet Riesling or a rich Port. These wines can beautifully complement the creamy texture and chocolatey notes of the bars.
Conclusion
Oreo cheesecake bars are a delightful fusion of creamy cheesecake and beloved Oreo cookies, making them a crowd-pleasing dessert option. This detailed guide has walked you through the entire process, from selecting the right ingredients to serving your finished creation. By following these steps, you can create a dessert that not only satisfies your sweet tooth but also impresses your friends and family.
With a combination of rich flavors, a smooth texture, and the beloved crunch of Oreos, these cheesecake bars are sure to become a favorite in your dessert repertoire. Enjoy the delightful experience of making and sharing these Oreo cheesecake bars, as they are sure to become a favorite in your dessert repertoire. Whether for a special occasion or a casual get-together, these bars will bring joy to any gathering. Happy baking!