Introduction
Heavenly Nun’s Puffs, also known as *Puffs de Nun*, are a delightful pastry that has captured the hearts and palates of dessert lovers around the globe. These airy, light pastries boast a unique texture that is both crispy on the outside and soft on the inside, making them the perfect treat for any occasion. The name “Nun’s Puffs” is thought to originate from the nuns of France, who are often credited with creating this indulgent dessert. While the exact history remains somewhat shrouded in mystery, it is widely believed that these treats were first made in the kitchens of convents, where simplicity and flavor were paramount.
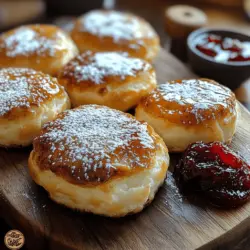
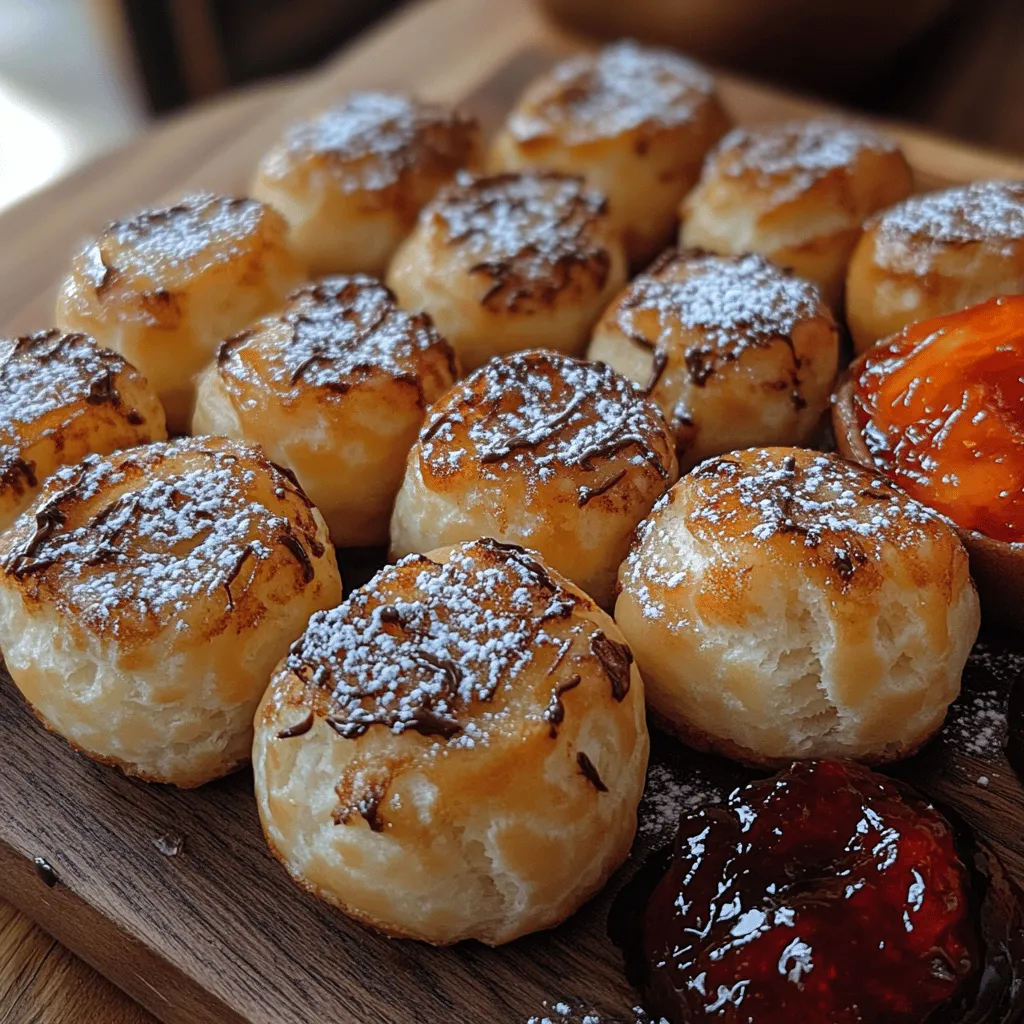
The appeal of Nun’s Puffs lies not only in their delightful taste but also in their remarkable versatility. They can be enjoyed plain, dusted with powdered sugar, or dressed up with an array of toppings, such as rich chocolate sauce or fresh fruit preserves. The recipe is deceptively simple, making it accessible for both novice bakers and seasoned professionals alike. Whether you’re hosting a gathering, celebrating a special occasion, or simply treating yourself, Heavenly Nun’s Puffs are sure to impress with their exquisite flavor and elegant presentation.
Understanding the Ingredients
To create the perfect Heavenly Nun’s Puffs, it’s essential to understand the role of each ingredient in the recipe. Each component contributes to the overall texture, flavor, and structure of these decadent pastries.
– Water: The foundation of any successful pastry begins with water. In this recipe, water is crucial for adding moisture and creating steam during the baking process. This steam is what helps the puffs rise, resulting in their airy texture. It is important to use fresh, cold water for the best results.
– Unsalted Butter: The use of unsalted butter is vital in this recipe, as it allows for better control over the flavor. Unsalted butter provides richness and depth without adding unnecessary saltiness. Additionally, the fat content in butter contributes to the flaky texture of the Nun’s Puffs, ensuring they are both tender and flavorful.
– All-Purpose Flour: Flour is the backbone of any pastry, providing the necessary structure and texture. All-purpose flour strikes the right balance between strength and tenderness, allowing the Nun’s Puffs to rise while maintaining a delicate crumb. It’s important to measure the flour accurately to achieve the perfect consistency in the dough.
– Eggs: Eggs play a crucial role in this recipe, serving multiple functions. They act as a binding agent, holding the ingredients together while also providing leavening. The proteins and fats in eggs contribute to the richness and stability of the pastry. When beaten into the dough, eggs help create a light and airy texture that is characteristic of Nun’s Puffs.
– Vanilla Extract: To elevate the flavor profile of the pastries, vanilla extract is added. This ingredient brings a warm, sweet aroma that complements the richness of the butter and the sweetness of the pastries. Opt for pure vanilla extract for the best flavor experience.
– Salt: A pinch of salt is essential in balancing the sweetness of the dough. It enhances the overall flavor, allowing the other ingredients to shine through. Just a small amount can make a significant difference in the final taste of the Nun’s Puffs.
– Optional Toppings: While Heavenly Nun’s Puffs are delightful on their own, various optional toppings can enhance their appeal. Dusting them with powdered sugar adds a touch of sweetness and elegance, while drizzling chocolate sauce or serving with fruit preserves can take the experience to a whole new level. These toppings allow for creativity and personalization, making each batch unique.
Step-by-Step Guide to Making Heavenly Nun’s Puffs
Now that we understand the ingredients, let’s dive into the step-by-step process of making Heavenly Nun’s Puffs. Following these instructions carefully will ensure your pastries turn out perfectly every time.
Preheating the Oven
The first step in creating your Heavenly Nun’s Puffs is to preheat your oven. Setting the right temperature is crucial for achieving the desired results. Preheat your oven to 425°F (220°C). This high temperature is essential for creating the steam needed to puff up the pastries. A hot oven will allow the dough to rise quickly, resulting in light and airy treats.
For optimal baking, it is recommended to place an oven thermometer inside to ensure that the temperature remains consistent. An adequately preheated oven is one of the keys to successful baking, so don’t skip this step!
Preparing the Dough
Once your oven is preheated, it’s time to prepare the dough. Start by combining the water and unsalted butter in a medium saucepan over medium heat. Allow the butter to melt completely, stirring occasionally to ensure it does not burn. This step is vital, as the melted butter will mix seamlessly with the water, creating a rich base for the dough.
As the mixture comes to a gentle boil, remove the saucepan from the heat. At this point, add the all-purpose flour all at once. Using a wooden spoon or spatula, stir vigorously until the dough comes together and forms a ball. This process is known as “pâte à choux” or choux pastry, which is the foundation for Nun’s Puffs. The mixture should be smooth and cohesive, with no lumps of flour remaining.
Return the saucepan to low heat for about one minute. This step allows the dough to cook slightly, helping to eliminate excess moisture. This is crucial for achieving the perfect texture in your Nun’s Puffs. You’ll know it’s ready when you see a slight film forming on the bottom of the pan.
Next, transfer the dough to a mixing bowl and allow it to cool for a few minutes. Once it’s warm but not hot, it’s time to incorporate the eggs. Crack the eggs into a separate bowl and whisk them lightly. Gradually add the eggs to the dough, one at a time, mixing well after each addition. This step is essential for achieving the desired consistency; the dough should be smooth, glossy, and slightly sticky but should hold its shape when piped.
Once all the eggs are incorporated, add the vanilla extract and a pinch of salt. Mix until combined. The dough is now ready for piping and baking, setting the stage for the delightful transformation that will occur in the oven.
By following these initial steps diligently, you are well on your way to creating a batch of Heavenly Nun’s Puffs that are sure to delight anyone who tries them. Stay tuned for the next part of this recipe, where we will cover the piping, baking, and finishing touches that will elevate your pastries to the next level.
Adding Flour: Techniques for Achieving the Perfect Dough Consistency
When making Heavenly Nun’s Puffs, the flour you incorporate plays a significant role in achieving the desired light and airy texture. Begin by measuring your flour accurately; using a kitchen scale can ensure precision. For this recipe, you will typically need about 1 cup of all-purpose flour. To prevent the dough from becoming too dense, use the spoon-and-level method: spoon the flour into your measuring cup and then level it off with a straight edge.
Once you have your flour measured, gradually add it to the butter and milk mixture. Stir gently with a wooden spoon or rubber spatula, incorporating the flour until you see a cohesive dough forming. The goal is to create a mixture that is smooth and slightly sticky but not overly wet. If the dough feels too moist, you can sprinkle in a little extra flour, one tablespoon at a time, until you reach the right consistency. Remember, the dough should be soft enough to pipe but firm enough to hold its shape when baked.
Incorporating Eggs: Tips for Ensuring a Smooth and Glossy Mixture
The key to achieving a perfect batter for your Heavenly Nun’s Puffs lies in how you incorporate the eggs. After your flour and butter mixture has cooled slightly, it is time to add the eggs. Using room temperature eggs is essential, as they will blend more easily into the dough and contribute to a smooth texture.
Crack the eggs into a separate bowl and whisk them lightly. This step helps to break down the egg structure and ensures a more uniform mixture. Gradually add the eggs to the cooled dough, mixing thoroughly after each addition. The dough may initially appear to separate, but continue mixing until it becomes a glossy, cohesive batter. This process not only adds richness but also assists in creating that signature puffiness when baked.
Shaping the Puffs: Techniques for Even Sizing and Spacing
Shaping your Heavenly Nun’s Puffs is an important step to ensure they cook evenly and achieve the perfect rise. Once your batter is ready, transfer it to a piping bag fitted with a large round tip. If you don’t have a piping bag, a zip-top bag with a corner snipped off can work just as well.
To shape the puffs, pipe small mounds—about 1 to 1.5 inches in diameter—onto a lined baking sheet. To maintain consistency, you can use a cookie scoop or a tablespoon to portion out the batter before piping. Space the mounds at least 2 inches apart, as they will expand during baking. This spacing prevents them from merging and ensures each puff has enough room to rise properly.
Baking Process: Understanding the Importance of Oven Temperature and Timing
Baking Heavenly Nun’s Puffs requires precise temperature control. Preheat your oven to 400°F (200°C) to create an environment that promotes puffing. A hot oven is crucial for the initial rise of the pastry, as the steam created by the moisture in the dough expands rapidly, leading to airy puffs.
Once your puffs are in the oven, avoid opening the door for the first 15 minutes of baking. This allows the heat to remain consistent, which is essential for achieving the desired rise. After the initial baking time, check for doneness; the puffs should be golden brown and firm to the touch. Bake for an additional 5 to 10 minutes if necessary, but keep a close watch to prevent them from over-baking.
Cooling: What to Do Post-Baking for the Best Texture
Once your Heavenly Nun’s Puffs are beautifully baked, it’s time to cool them properly. Remove them from the oven and transfer the puffs to a wire rack to allow air circulation around them. This step is vital to prevent them from becoming soggy due to trapped steam.
Let the puffs cool at room temperature for about 10 to 15 minutes. If you plan to fill them with cream or other fillings, it’s best to let them cool completely. You can also poke a small hole in the side of each puff to allow steam to escape, ensuring a light texture without the risk of becoming dense.
Serving Suggestions
Presentation Ideas for Serving Heavenly Nun’s Puffs
When it comes to serving Heavenly Nun’s Puffs, presentation can elevate the experience. Arrange the puffs on a decorative platter or cake stand, dusting them lightly with powdered sugar for a touch of elegance. You can also serve them in individual portions, placing a puff in each small dessert cup, garnished with fresh berries or mint leaves for added color and freshness.
Pairing Options: Chocolate Sauce vs. Fruit Preserves
Heavenly Nun’s Puffs are incredibly versatile and can be paired with a variety of sauces. For a rich and indulgent treat, serve them drizzled with warm chocolate sauce. The contrast of the warm sauce with the airy puff creates a delightful mouthfeel.
Alternatively, consider pairing them with fruit preserves or compote, such as raspberry or strawberry. The tartness of the fruit complements the sweetness of the puffs beautifully, offering a refreshing balance.
Creative Twists: Flavor Variations and Additional Toppings
While traditional Heavenly Nun’s Puffs are delightful on their own, feel free to experiment with flavors and toppings. Consider infusing the dough with citrus zest or vanilla extract for added depth. You can also mix in chocolate chips or chopped nuts for an unexpected crunch.
For toppings, whipped cream or a light mascarpone filling can be a luscious addition. Alternatively, a light dusting of cocoa powder or a sprinkle of crushed pistachios can add both flavor and texture.
Nutritional Information
Understanding the nutritional value of your Heavenly Nun’s Puffs can help you enjoy them with mindfulness. Each puff, depending on size, generally contains around 100-150 calories. The macronutrient breakdown typically consists of approximately 5 grams of fat, 10 grams of carbohydrates, and 2 grams of protein per serving.
If you’re looking for healthier alternatives, consider using whole wheat flour instead of all-purpose flour for added fiber. You could also substitute part of the butter with applesauce or Greek yogurt to reduce the overall fat content while maintaining moisture.
For those with dietary restrictions, these puffs can be adapted. A gluten-free flour blend can replace all-purpose flour, and egg substitutes like flaxseed meal mixed with water can work for vegans.
Conclusion
Making Heavenly Nun’s Puffs is not just about baking; it’s a delightful experience that brings joy to both the baker and those who enjoy the treats. With their light, airy texture and endless customization possibilities, these puffs are sure to impress at any gathering or celebration.
Don’t hesitate to experiment with different flavors and fillings, or even try out various serving methods. The joy of baking lies in creativity and sharing delicious moments with loved ones. Dive into the process, enjoy the delightful aromas that fill your kitchen, and relish in the satisfaction of creating something truly special—Heavenly Nun’s Puffs that are sure to become a beloved favorite.