Introduction
Scones have long held a beloved place in the hearts and kitchens of many. These delightful baked goods, often associated with tea time in British culture, offer a perfect blend of crumbly texture and rich flavor. Whether enjoyed as a sweet breakfast item or a savory afternoon treat, scones are incredibly versatile, making them a staple in many households. Among the myriad of scone variations, almond scones stand out for their unique nutty flavor and satisfying texture, elevating this classic treat to new heights.
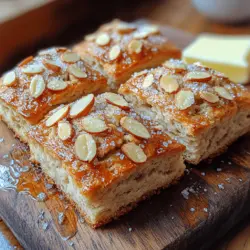
In this recipe for Heavenly Almond Scones, we will explore a delightful twist that centers around the rich, aromatic flavor of almonds. Infusing these scones with almond extract and incorporating both all-purpose and almond flour not only enhances their taste but also contributes to a wonderfully moist and tender crumb. The result is a baked good that is both comforting and sophisticated, ideal for any occasion — from a casual breakfast with friends to a formal afternoon tea.
When it comes to baking, using quality ingredients is paramount. Each component plays a significant role in achieving the perfect scone, influencing everything from texture to flavor. In this recipe, we emphasize selecting fresh, high-quality ingredients for the best results. This attention to detail ensures that your almond scones will emerge from the oven golden-brown, fragrant, and irresistibly delicious.
The versatility of almond scones is another appealing aspect. They can be served warm from the oven, perhaps with a pat of butter or a dollop of jam, or enjoyed later in the day as a sweet snack or dessert. Whether paired with coffee in the morning or tea in the afternoon, these scones are a delightful addition to any meal or gathering.
Understanding Scones
To truly appreciate the beauty of almond scones, it is essential to delve into the history and evolution of this beloved baked good. Scones are believed to have originated in Scotland, with their roots tracing back to the early 1500s. Initially, they were made from oats and baked on a griddle, resembling what we would now call a biscuit. The name “scone” is thought to derive from the Stone of Scone, where Scottish kings were once crowned.
As time progressed, scones evolved significantly. By the 19th century, they were being made with wheat flour instead of oats, leading to the lighter, fluffier texture we associate with modern scones today. Different regions and cultures have put their own spin on scones, resulting in a wide array of recipes that vary in sweetness, texture, and flavor. In England, for example, scones are often served with clotted cream and jam, while in other cultures, they may be enjoyed alongside hearty stews or soups.
The essence of a perfect scone lies in its texture and flavor. A well-made scone should be light and flaky, with a melt-in-your-mouth quality. The balance of ingredients is crucial; too much liquid can lead to a dense and heavy scone, while too little can result in a dry and crumbly texture. The use of a leavening agent, such as baking powder, is essential for achieving that desirable lift, creating pockets of air that contribute to the scone’s lightness.
Flavor is equally important, and this is where our almond scone recipe shines. The incorporation of almond flour lends a distinct nuttiness, while almond extract intensifies this flavor, creating a beautiful harmony that appeals to the senses. The addition of sliced almonds not only enhances the taste but also provides a lovely crunch, making each bite a delightful experience.
Ingredients Breakdown
The success of our Heavenly Almond Scones hinges on the careful selection and combination of ingredients. Each element has a specific purpose, contributing to the scone’s overall flavor, texture, and appearance. Let’s take a closer look at the key ingredients that make these scones truly heavenly.
All-Purpose Flour
All-purpose flour serves as the backbone of our scone recipe, providing structure and texture. It has a moderate protein content, which allows for the formation of gluten, giving the scones the necessary stability and chewiness without becoming tough. When measuring flour, it’s important to do so accurately to ensure the right texture. Over-measuring can lead to dense scones, while under-measuring may result in a too-tender product.
Almond Flour
Almond flour is a key player in this recipe, adding not just flavor but also moisture. Made from finely ground almonds, this ingredient introduces a subtle sweetness and a rich, nutty taste that complements the overall flavor profile beautifully. It also contributes to a softer texture, enhancing the tenderness of the scone. When using almond flour, it’s essential to ensure it is finely ground to avoid a gritty texture.
Granulated Sugar
Sugar plays a crucial role in balancing sweetness and enhancing browning. In our almond scone recipe, granulated sugar adds just the right amount of sweetness without overpowering the delicate almond flavor. It also aids in the caramelization process during baking, resulting in a beautifully golden exterior. For those who prefer a less sweet scone, the amount of sugar can be adjusted to taste.
Baking Powder
As a leavening agent, baking powder is responsible for giving our scones the lift they need to achieve that light and airy texture. It works by producing carbon dioxide gas when mixed with wet ingredients, creating small bubbles that expand in the heat of the oven. Using fresh baking powder is essential for ensuring the scones rise properly, so be sure to check the expiration date before starting your baking adventure.
Salt
Though it may seem like a small addition, salt is vital for enhancing flavor. It acts to elevate the natural sweetness of the scones while balancing the other ingredients. A pinch of salt can make a significant difference in the overall taste, ensuring that every bite is well-rounded and delicious.
Unsalted Butter
Butter is a key ingredient that contributes to the flakiness and richness of the scones. Using unsalted butter allows you to control the amount of salt in the recipe while providing the necessary fat content to create a tender crumb. When incorporating the butter into the flour, it’s important to work quickly to ensure it remains cold, which helps create those desirable flaky layers.
Heavy Cream
Heavy cream adds richness and moisture to the scone dough, resulting in a tender and flavorful final product. It also contributes to a golden crust when baked. For the best results, use fresh heavy cream, as it will enhance the overall flavor and texture of the scones.
Eggs
Eggs serve as a binding agent, helping to hold the ingredients together while adding richness and moisture. They also contribute to the scone’s structure, helping it rise and maintain its shape during baking. For this recipe, using large eggs is recommended to ensure the right balance of liquid to dry ingredients.
Almond Extract
To achieve that intense almond flavor, almond extract is an essential ingredient in this recipe. A small amount goes a long way in infusing the scones with a delightful aroma and taste. It beautifully complements the almond flour and sliced almonds, creating a cohesive flavor profile that is both comforting and indulgent.
Sliced Almonds and Coarse Sugar
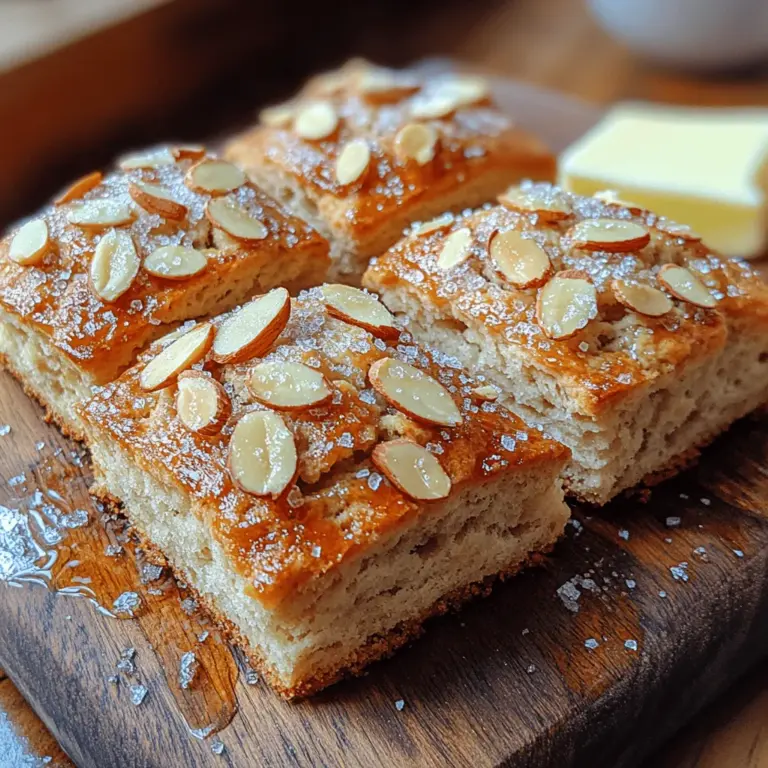
For added texture and visual appeal, we will incorporate sliced almonds into the dough and sprinkle coarse sugar on top before baking. The sliced almonds provide a delightful crunch, while the coarse sugar adds a touch of sweetness and a sparkling finish to the scones. These finishing touches elevate the presentation and make the scones even more inviting.
Step-by-Step Instructions
Now that we’ve gathered our ingredients and understand their importance, it’s time to dive into the step-by-step instructions for creating these Heavenly Almond Scones. Following these directions will ensure that your scones turn out perfectly every time.
1. Preheat Your Oven: Begin by preheating your oven to 400°F (200°C). This high temperature is essential for creating a beautifully browned exterior while keeping the inside soft and tender.
2. Prepare Your Baking Sheet: Line a baking sheet with parchment paper or a silicone baking mat. This will prevent sticking and ensure easy cleanup.
3. Mix the Dry Ingredients: In a large mixing bowl, whisk together the all-purpose flour, almond flour, granulated sugar, baking powder, and salt. Make sure there are no lumps and the ingredients are evenly combined.
4. Cut in the Butter: Using a pastry cutter or your fingers, cut the cold unsalted butter into the dry mixture until it resembles coarse crumbs. The goal is to incorporate the butter without fully melting it, as this will create those sought-after flaky layers in the scones.
5. Combine Wet Ingredients: In a separate bowl, whisk together the heavy cream, eggs, and almond extract until well combined. Make sure the mixture is smooth and homogenous, which will help it blend seamlessly with the dry ingredients.
6. Form the Dough: Pour the wet ingredients into the dry mixture, stirring gently with a spatula or wooden spoon until just combined. Be careful not to overmix, as this can lead to tough scones. The dough should be a little shaggy but hold together.
7. Add Sliced Almonds: Gently fold in the sliced almonds, distributing them evenly throughout the dough. This adds both flavor and texture to the scones.
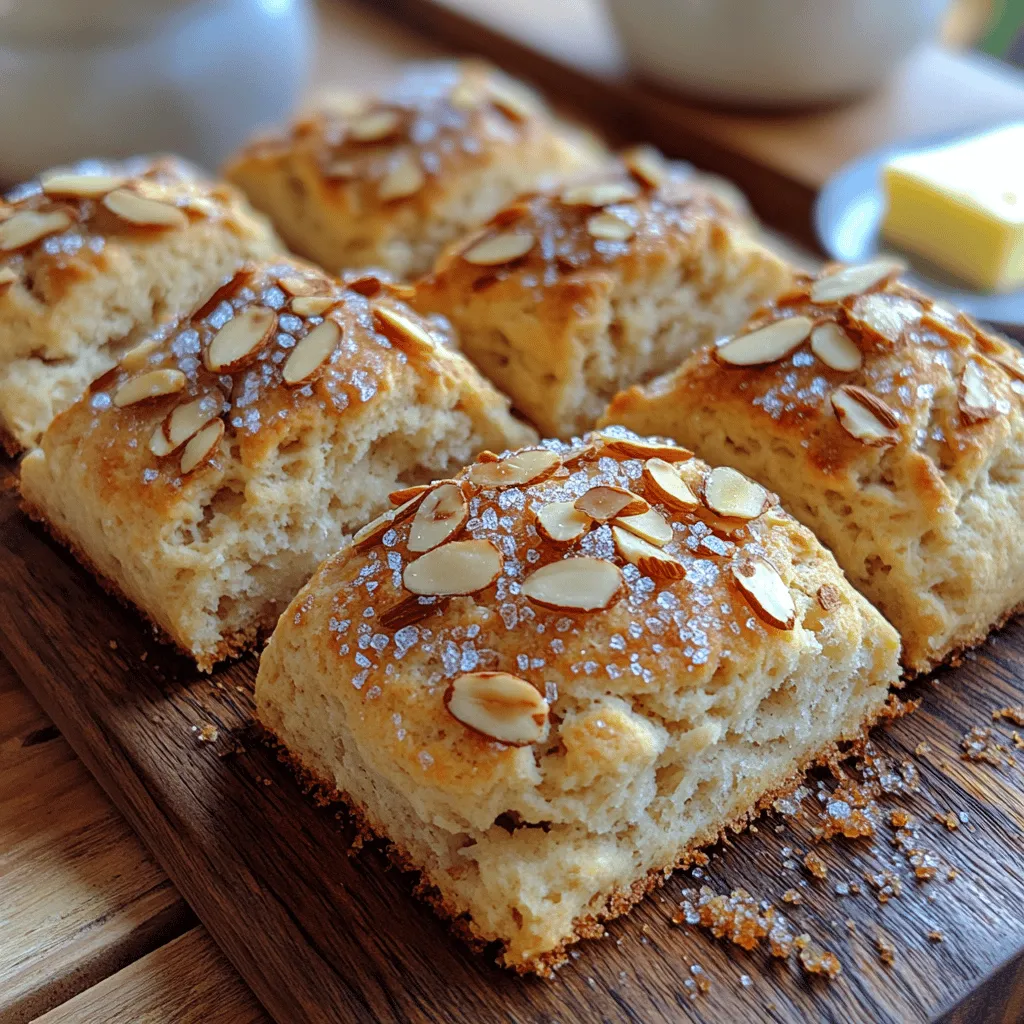
8. Shape the Scones: Turn the dough out onto a lightly floured surface. Pat it into a circle about 1-inch thick. Using a sharp knife or a bench scraper, cut the dough into 8 equal wedges. Alternatively, you can use a round cutter to create circular scones.
9. Prepare for Baking: Transfer the scone wedges to the prepared baking sheet, leaving space between each one to allow for expansion during baking. Brush the tops with a little extra heavy cream and sprinkle coarse sugar over them for a touch of sweetness and sparkle.
10. Bake: Place the baking sheet in the preheated oven and bake for 15-20 minutes, or until the scones are golden brown on top and a toothpick inserted into the center comes out clean.
At this point, your kitchen will be filled with the heavenly aroma of freshly baked almond scones, enticing everyone nearby. These delightful treats are just about ready to be enjoyed, and the anticipation will surely make them taste even better.
Stay tuned for the next part of our article, where we will explore additional tips for achieving the best results with your almond scones, as well as address some common questions that arise when baking this delightful treat.
Prepping the Oven
Before diving into the preparation of your Heavenly Almond Scones, it’s essential to get your oven ready. Preheating your oven to the correct temperature is crucial because it ensures that your scones will rise properly and develop a lovely golden brown crust. Set your oven to 400 degrees Fahrenheit (200 degrees Celsius) and allow it to preheat for at least 15-20 minutes. This step is vital because an adequately heated oven promotes even baking, preventing scones from being doughy on the inside while perfectly browned on the outside. While your oven is preheating, you can move on to mixing your dry ingredients.
Mixing Dry Ingredients
In a mixing bowl, combine the all-purpose flour, almond flour, baking powder, salt, and any other dry ingredients specified in your recipe. To achieve an even mixture, it’s recommended to use a whisk or a sifter. This method helps to aerate the flour and evenly distribute the baking powder and salt, which are essential for the scones’ rise and flavor. Mixing dry ingredients thoroughly ensures that each bite of your scone will have a balanced taste and texture. Aim for a uniform look; there should be no visible clumps of baking powder or salt.
Cutting in the Butter
Next, it’s time to cut in the butter. This process is key to achieving the right texture in your scones. Cold, unsalted butter is ideal because it creates steam during baking, which leads to a light, flaky scone. Using a pastry cutter, two forks, or your fingertips, work the butter into the flour mixture until it resembles coarse crumbs. Be careful not to overwork the butter; you want small pea-sized pieces to remain visible. These little pockets of butter will melt during baking and create that delightful flaky texture you’re aiming for.
Combining Wet Ingredients
In a separate bowl, mix your wet ingredients, which typically include heavy cream or buttermilk, an egg, and almond extract. Whisk the mixture until it’s well combined, ensuring the egg is fully incorporated. This step is crucial for the overall consistency of your dough. When you combine the wet and dry ingredients, ensure you do it gently. Overmixing at this stage can lead to tough scones, so stir until just combined. It’s okay if there are a few lumps; they will bake out during the cooking process.
Forming the Dough
The dough should come together in a slightly sticky ball. Key signs of the right dough consistency include a smooth surface that holds together without being overly wet or dry. If the dough feels too sticky to handle, you can sprinkle a little extra flour onto your work surface and your hands as you knead it gently a few times. Remember, the dough should be slightly tacky but not overly wet. Once your dough has formed, you’re ready to shape it into scones.
Shaping the Scones
There are several methods to shape your scones, and each approach can impact the final product. For traditional round scones, pat the dough into a circle about 1-inch thick and use a sharp knife or a bench scraper to cut it into wedges. Alternatively, you can use a biscuit cutter to create perfectly round scones. The shaping method you choose can affect the baking time slightly, so keep an eye on them as they bake. Whichever shape you choose, remember to place them on a parchment-lined baking sheet for easy removal after baking.
Adding Toppings
To enhance the visual appeal and add a delightful textural contrast, consider adding toppings before baking. A sprinkle of sliced almonds or a dusting of coarse sugar can create a beautiful, crunchy top. If you’re feeling adventurous, brush the scones with a bit of cream or egg wash for a glossy finish. These toppings not only make your scones look inviting but also add an extra layer of flavor that complements the almond base perfectly.
Baking Process
Once your scones are shaped and topped, place them in the preheated oven. Bake for about 15-20 minutes or until they are golden brown and have risen beautifully. Keep an eye on them during the last few minutes of baking, as oven temperatures can vary. A good indicator of doneness is a light golden color and a firm texture when gently pressed. If you’re unsure, you can also use a toothpick; if it comes out clean, the scones are ready.
Cooling and Serving
After baking, allow your scones to cool on the baking sheet for a few minutes before transferring them to a wire rack. This cooling step helps maintain their texture and prevents them from becoming soggy. For the best experience, serve your scones warm or at room temperature. The delightful aroma and buttery flavor will be irresistible! Pair them with clotted cream, jam, or even a drizzle of honey for a decadent treat.
Flavor Enhancements and Variations
While the basic almond flavor is delicious on its own, there are numerous ways to enhance your scone experience. Consider adding a teaspoon of lemon zest or vanilla extract to the wet mixture to introduce a refreshing citrus note. For those who enjoy a bit of indulgence, chocolate chips or dried fruits like cranberries or apricots can be mixed into the dough for added sweetness and texture.
If you’re catering to dietary restrictions, adapting this recipe for gluten-free diets is quite simple. Substitute all-purpose flour with a gluten-free blend and ensure that your baking powder is gluten-free. The result will still be delicious while accommodating those with gluten sensitivities.
Serving Suggestions
Pair your almond scones with various accompaniments for an elevated experience. A dollop of clotted cream or a smear of your favorite jam adds a luxurious touch. For a morning treat, serve them alongside a steaming cup of coffee or tea. Consider presenting your scones on a beautiful platter, garnished with fresh fruit or edible flowers, to impress guests during gatherings or special occasions. Seasonal beverages like spiced cider in the fall or iced tea in the summer can also complement the flavors beautifully.
Storing and Reheating Scones
To keep your leftover scones fresh, store them at room temperature in an airtight container for up to two days. If you want to keep them longer, consider refrigerating them, where they can last for about a week. For the best texture, reheating is recommended—this can be done in an oven at a low temperature for 5-10 minutes or in a microwave for just a few seconds. This quick reheating helps to restore their fresh-baked quality, making them just as delightful as the day they were made.
Conclusion
Baking Heavenly Almond Scones is not just about following a recipe; it’s about creating an experience that delights the senses. From the first whiff of almond essence to the warm, flaky texture that meets your palate, each bite tells a story of culinary love and creativity. Experimenting with flavors and personal touches can lead to endless variations that suit your taste or the occasion.
Sharing these homemade treats with loved ones fosters a sense of community and warmth, making any gathering feel special. So roll up your sleeves, preheat your oven, and let the joy of baking almond scones fill your kitchen with delightful aromas. Your journey into the world of scone baking promises to be rewarding, delicious, and a source of cherished memories.