
Delightful No-Bake Oreo Cheesecake Cups: A Sweet Indulgence for Every Occasion
In recent years, no-bake desserts have surged in popularity, capturing the hearts of dessert lovers around the world. The allure of these treats lies in their simplicity and convenience, allowing you to whip up delicious desserts without the need for an oven. Among the myriad of no-bake recipes, the Delightful No-Bake Oreo Cheesecake Cups stand out as a fan favorite. This dessert combines the rich flavors of creamy cheesecake with the beloved crunch of Oreo cookies, creating a delightful treat that is both easy to make and irresistibly delicious.
The Delightful No-Bake Oreo Cheesecake Cups are perfect for a variety of occasions, whether you’re hosting a birthday party, preparing for a holiday gathering, or simply treating yourself to something sweet at home. Their individual servings make them a hit at potlucks and family gatherings, allowing guests to enjoy a portion without the fuss of slicing a larger cake. Plus, the process of making these cheesecake cups is incredibly straightforward, making them an ideal choice for both novice bakers and seasoned chefs alike.
Understanding the Ingredients
To create the perfect Delightful No-Bake Oreo Cheesecake Cups, it’s essential to understand the key ingredients that contribute to their flavor and texture. Each component plays a vital role in crafting this delicious dessert:
1. Oreo Cookies: The star of the show, these iconic cookies not only provide a rich chocolatey flavor but also serve as the base for the dessert crust. Their crunch complements the smoothness of the cheesecake, creating a delightful contrast in every bite.
2. Unsalted Butter: This ingredient is crucial for binding the Oreo crust together. When mixed with crushed Oreos, melted butter ensures that the crust holds its shape while providing a rich flavor that enhances the overall dessert.
3. Cream Cheese: As the foundation of the cheesecake filling, cream cheese lends a creamy texture and tangy taste that balances the sweetness of the other ingredients. It’s important to use softened cream cheese to achieve the desired smoothness in the filling.
4. Powdered Sugar: This fine sugar is used to sweeten the cheesecake filling while also contributing to its silky texture. Unlike granulated sugar, powdered sugar blends seamlessly into the cream cheese, ensuring a lump-free mixture.
5. Vanilla Extract: A splash of vanilla extract adds depth to the flavor profile of the cheesecake. It complements the sweetness of the powdered sugar and the richness of the cream cheese, creating a well-rounded taste.
6. Heavy Whipping Cream: This ingredient is essential for achieving a light and fluffy texture in the cheesecake filling. Whipped cream not only aerates the mixture but also gives it a luxurious mouthfeel.
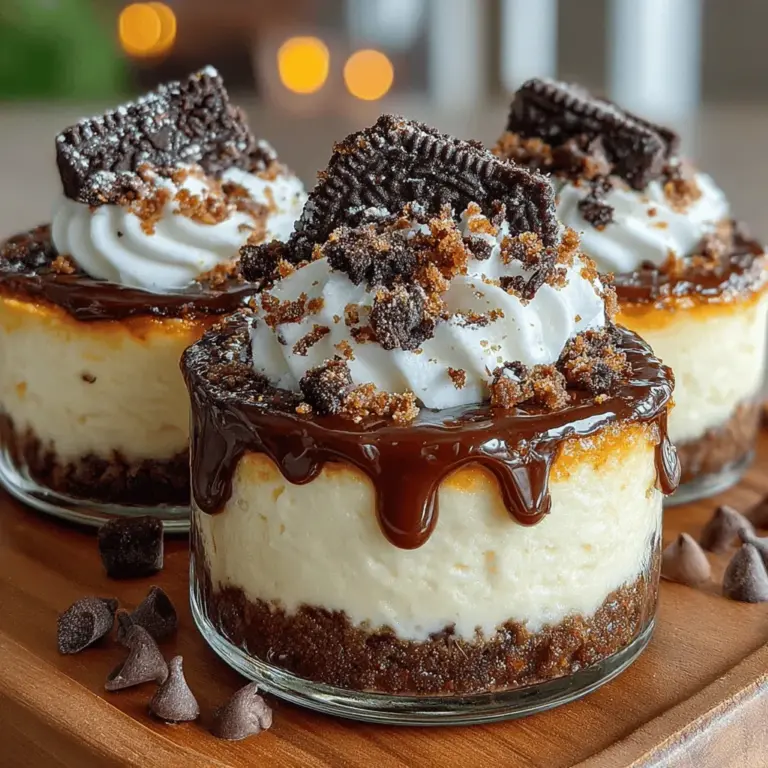
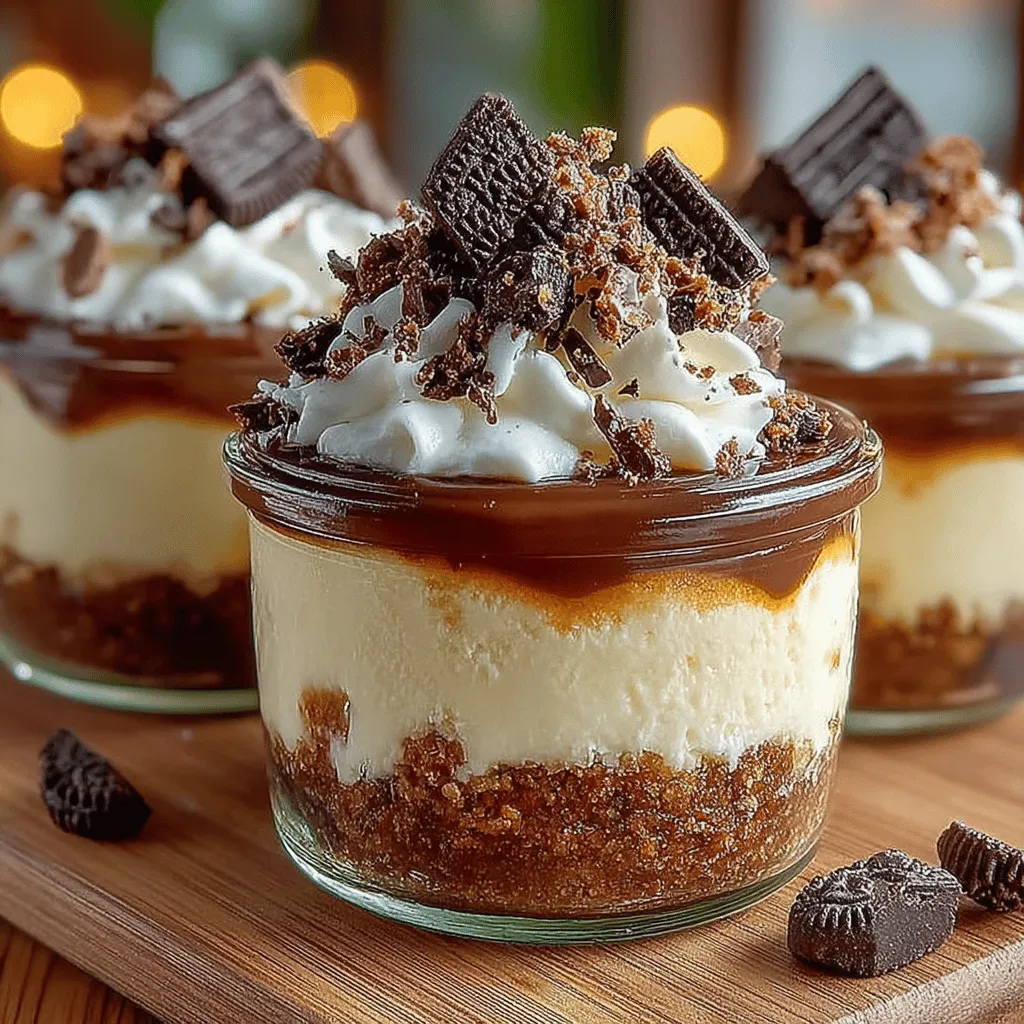
7. Optional Garnishes: To elevate the presentation and flavor of your Oreo cheesecake cups, consider adding optional garnishes such as whipped cream, crushed Oreos, or chocolate drizzle. These finishing touches not only enhance the visual appeal but also provide additional layers of flavor.
Step-by-Step Guide to Making No-Bake Oreo Cheesecake Cups
Now that you’re familiar with the ingredients, let’s dive into the step-by-step process of making these delightful no-bake Oreo cheesecake cups. The following instructions will guide you through preparing the crust and crafting the creamy filling, ensuring your dessert turns out perfectly every time.
Preparing the Base
1. Crushing the Oreos: Start by taking a package of Oreo cookies and crushing them into fine crumbs. You can achieve this using a food processor for efficiency or by placing the cookies in a resealable plastic bag and using a rolling pin. The goal is to create a texture that resembles sand, which will help form a sturdy crust.
2. Mixing with Butter: In a mixing bowl, combine the crushed Oreos with melted unsalted butter. The typical ratio is about 1/4 cup of butter for every 2 cups of crushed cookies. Stir the mixture until the crumbs are evenly coated with butter. The consistency should be damp, yet crumbly, similar to wet sand.
3. Achieving the Right Consistency: It’s important to ensure that your crust mixture holds together. If it feels too dry, you can add a little more melted butter, a tablespoon at a time, until the desired consistency is reached. This step is crucial for ensuring that your crust will maintain its shape once set.
Layering the Base
1. Dividing the Mixture: Once your crust mixture is ready, it’s time to divide it among your serving cups. Depending on the size of your cups, aim for about 2-3 tablespoons of the crumb mixture for each cup.
2. Pressing the Mixture: Using the back of a spoon or your fingers, press the mixture firmly into the bottom of each cup. Make sure to pack it down well to create a solid base. This will help prevent the crust from crumbling when you add the cheesecake filling.
3. Chilling for a Firm Structure: After layering the crust, place the cups in the refrigerator for at least 15-20 minutes. Chilling the crust allows it to firm up, making it easier to layer the cheesecake filling on top without disturbing the base.
Crafting the Cheesecake Filling
1. Beating the Cream Cheese: In a large mixing bowl, beat the softened cream cheese using an electric mixer until it’s smooth and creamy. This step is vital, as overbeating can introduce too much air, leading to a less dense filling.
2. Adding Sweetness: Gradually add the powdered sugar to the cream cheese, beating until fully incorporated. The mixture should be sweet but balanced, so taste as you go to ensure it meets your preference.
3. Incorporating Vanilla: Add vanilla extract to the cream cheese mixture and blend until well combined. The vanilla will enhance the flavor, adding warmth and depth to the filling.
4. Whipping the Cream: In a separate bowl, whip the heavy cream until stiff peaks form. This adds volume and lightness to your cheesecake filling. Be careful not to overwhip, as this can lead to a grainy texture.
5. Folding in the Cream: Gently fold the whipped cream into the cream cheese mixture using a spatula. This technique helps maintain the airy texture of the whipped cream while ensuring that the filling is smooth and creamy.
With these steps, you’re well on your way to creating your Delightful No-Bake Oreo Cheesecake Cups. The next segment of the article will guide you through the final assembly and presentation of this delectable dessert. Stay tuned for tips on how to make your cheesecake cups visually stunning and utterly delicious!
Incorporating Powdered Sugar and Vanilla Extract for Flavor
To elevate the flavor profile of your Delightful No-Bake Oreo Cheesecake Cups, the addition of powdered sugar and vanilla extract is essential. Powdered sugar not only sweetens the cheesecake filling but also provides a smooth texture, ensuring that your dessert is creamy and delightful. Vanilla extract enhances the overall taste, adding a hint of warmth that complements the richness of cream cheese and the crunchiness of Oreo cookies.
When incorporating these ingredients, it’s crucial to mix them well into the cream cheese mixture to ensure an even distribution of flavors throughout the cheesecake cups.
Whipping the Cream
Whipping the cream is a key step in creating the light and fluffy texture that characterizes a great cheesecake. Start with cold heavy cream, as this whips better and faster. Using a large mixing bowl, pour in the heavy cream and begin beating it on medium speed. As it thickens, gradually increase the speed to high.
Techniques for Achieving Stiff Peaks for the Whipped Cream
To achieve stiff peaks, continue whipping until the cream forms peaks that stand upright when the beaters are lifted. This process typically takes around 3-5 minutes. Be cautious not to over-whip the cream, as it can turn grainy and eventually become butter. The goal is to have a smooth, thick cream that will provide the structure needed to hold your cheesecake filling together.
Importance of Gentle Folding to Maintain Lightness in the Filling
Once your whipped cream reaches stiff peaks, it’s time to incorporate it into the cream cheese mixture. This step requires a gentle folding technique. Using a spatula, carefully lift and fold the whipped cream into the cream cheese mixture. The key here is to be gentle; vigorous mixing can deflate the whipped cream, resulting in a denser filling. By folding, you maintain the airiness of the whipped cream, which contributes to the light texture of the cheesecake.
Filling the Cups
Now that your filling is ready, it’s time to fill those cups! You have two main methods for doing this: spooning or piping the filling.
Methods for Spoon or Pipe Filling into the Cups
For spooning, simply take a large serving spoon and scoop the filling into each cup, making sure to fill them generously. If you want a cleaner and more professional look, consider using a piping bag fitted with a large round tip. This method allows for more control and precision, enabling you to create beautiful swirls or layers in your cups.
Tips for Smoothing the Tops for a Professional Finish
Regardless of your filling method, you’ll want to ensure the tops are smooth for a polished look. After filling, use a small offset spatula or the back of a spoon to gently smooth the surface of the filling. This step not only enhances the visual appeal but also prepares your cheesecake cups for the final touches—garnishing!
Chilling for Perfection
Once filled, the cheesecake cups need to chill. This step is crucial for achieving the perfect texture and ensuring that the filling sets properly.
Recommended Chilling Time and Its Significance in Setting the Cheesecake
It is recommended to chill the cheesecake cups for at least 4 hours, though overnight is ideal. Chilling allows the flavors to meld and the filling to firm up, making it easier to serve and enhancing the overall taste experience. Skipping this step may result in a runny filling that doesn’t hold its shape.
Serving Suggestions
When it’s time to serve your Delightful No-Bake Oreo Cheesecake Cups, the presentation matters just as much as the flavor. Here are some creative ideas for garnishing:
– Crushed Oreos: Sprinkle crushed Oreos on top of each cup for added texture and visual appeal.
– Cocoa Powder: A light dusting of cocoa powder can add a touch of elegance and enhance the chocolate flavor.
– Chocolate Shavings: Use a vegetable peeler to create shavings from a chocolate bar for a gourmet touch.
– Mini Chocolate Chips: Scatter mini chocolate chips on top for extra sweetness and a fun texture.
Importance of Serving Chilled for the Best Taste Experience
Serving these cheesecake cups chilled is essential for the best taste. The cool temperature enhances the creamy texture and allows the flavors to shine.
Nutritional Insights
Understanding the nutritional content of your dessert can help you enjoy it guilt-free. Each serving of the Delightful No-Bake Oreo Cheesecake Cups typically contains a balance of carbohydrates, fats, and proteins.
Overview of the Nutritional Content of the Dessert
While these cheesecake cups are indulgent, they can be enjoyed in moderation. A single serving usually contains around 300 calories, with a good portion coming from the rich cream cheese and Oreo cookies.
Discussion of the Balance of Indulgence and Portion Control
The beauty of these cheesecake cups is their portion size. By serving them in individual cups, you can control your serving size while still enjoying a rich dessert. This makes them perfect for parties or gatherings where you want to indulge without overdoing it.
Suggestions for Modifications for Dietary Preferences (e.g., Gluten-Free Options)
For those with dietary restrictions, modifications can be made. Gluten-free Oreo cookies are available, allowing you to cater to gluten-sensitive guests without sacrificing flavor. You can also explore using low-fat cream cheese or sugar substitutes for a lighter version of this dessert.
The Appeal of No-Bake Desserts
No-bake desserts like our Delightful No-Bake Oreo Cheesecake Cups have gained popularity for several reasons.
Discussion of the Benefits of No-Bake Desserts
– Time-Saving Aspect: No-bake desserts require no baking time, making them quicker to prepare. This is ideal for those who want a delicious treat without the hassle of traditional baking.
– Minimal Cooking Skills Required: Even novice cooks can successfully make no-bake desserts. The straightforward steps make it easy for anyone to join in on the fun of dessert-making.
– Versatility in Flavors and Presentations: No-bake desserts can be adapted to include various flavors and ingredients, allowing for creative expression. From chocolate to fruit-based recipes, the options are endless.
Conclusion
In conclusion, the Delightful No-Bake Oreo Cheesecake Cups are not only a testament to the joy of easy dessert-making but also a rich and satisfying treat that everyone will love. With their creamy filling, crunchy Oreo base, and customizable toppings, these cups are perfect for any occasion.
We encourage you to try making this easy and delicious dessert for your next gathering or as a special treat at home. The simplicity of the recipe combined with the joy of sharing delightful treats with loved ones makes this dessert a must-try. Embrace the joy of creating and enjoy the smiles your cheesecake cups will bring!
