
Introduction
Chocolate doughnut holes are a delightful treat that brings joy to both children and adults alike. These small, round bites of heaven are a perfect combination of rich chocolate flavor and a soft, tender texture. Whether enjoyed as an afternoon snack, served at a party, or simply indulged in during a quiet evening at home, chocolate doughnut holes are a versatile dessert that can suit any occasion. The best part? Making them from scratch not only allows you to control the ingredients but also fills your kitchen with the irresistible aroma of freshly baked goods.
There’s something truly special about baking at home; it’s a creative process that brings a sense of accomplishment and satisfaction. Imagine pulling a tray of warm, chocolatey doughnut holes from the oven, ready to be coated in a dusting of powdered sugar or dunked in a rich glaze. The joy of sharing your homemade treats with friends and family amplifies the experience, making every bite even sweeter.
In this recipe, we will explore the decadence of chocolate doughnut holes and their adaptability. You can serve these delicious morsels at birthday parties, holiday gatherings, or simply as a delightful end to a cozy family dinner. With endless possibilities for customization, including the addition of chocolate chips or different toppings, these doughnut holes can easily become a staple in your baking repertoire.
Understanding the Ingredients
To create the perfect chocolate doughnut holes, it is essential to understand the role of each ingredient. This knowledge not only enhances your baking skills but also allows you to make adjustments based on dietary preferences or availability of ingredients. Here’s a detailed breakdown of what you will need for this recipe:
All-Purpose Flour
All-purpose flour serves as the foundation of the doughnut holes, providing structure and stability. Its gluten content allows the dough to rise and hold its shape during baking, resulting in a light and airy texture. For best results, it’s advisable to sift the flour before measuring to avoid any lumps and ensure an even distribution in the batter.
Unsweetened Cocoa Powder
Unsweetened cocoa powder is the star ingredient that imparts a deep, rich chocolate flavor to the doughnut holes. It not only contributes to the taste but also enhances the color, giving the doughnut holes their signature dark hue. Using high-quality cocoa powder can significantly elevate the flavor profile of your treats.
Baking Soda and Baking Powder
These two leavening agents are crucial for achieving a light and fluffy texture. Baking soda, a base, reacts with the acidity in the buttermilk to produce carbon dioxide, which helps the doughnut holes rise. Baking powder, which contains both an acid and a base, ensures that the dough rises properly during baking. Using both together guarantees the perfect balance for a tender crumb.
Salt
Despite being a small component, salt plays a vital role in enhancing the overall flavor of the doughnut holes. It balances the sweetness and brings out the chocolate flavor, making each bite more enjoyable. A pinch of salt can elevate your baked goods from good to exceptional.
Granulated and Brown Sugar
In this recipe, both granulated and brown sugar are used to provide sweetness and moisture. Granulated sugar contributes to the overall sweetness, while brown sugar adds a hint of caramel flavor and moisture due to its molasses content. This combination results in doughnut holes that are not only sweet but also soft and tender.
Egg
The egg serves as a binding agent, bringing the ingredients together and adding richness to the doughnut holes. It also contributes to the structure, ensuring that the doughnut holes hold their shape during baking. For those following a vegan diet, alternatives such as flaxseed meal or applesauce can be used to replace the egg.
Buttermilk
Buttermilk is a key ingredient that adds moisture and a slight tang to the doughnut holes. Its acidity helps to activate the baking soda, resulting in a light and fluffy texture. If you don’t have buttermilk on hand, you can easily make a substitute by mixing regular milk with a splash of vinegar or lemon juice and letting it sit for a few minutes.
Vegetable Oil
Vegetable oil is used in this recipe to keep the doughnut holes moist and tender. Unlike butter, which can create a denser texture, oil helps to produce a lighter, more delicate crumb. You can also experiment with other oils, such as coconut or canola oil, depending on your preference.
Vanilla Extract
Vanilla extract adds depth of flavor and a wonderful aroma to the doughnut holes. It enhances the overall taste, making the chocolate flavor even more pronounced. For an extra twist, consider using flavored extracts such as almond or hazelnut to complement the chocolate.
Semi-Sweet Chocolate Chips
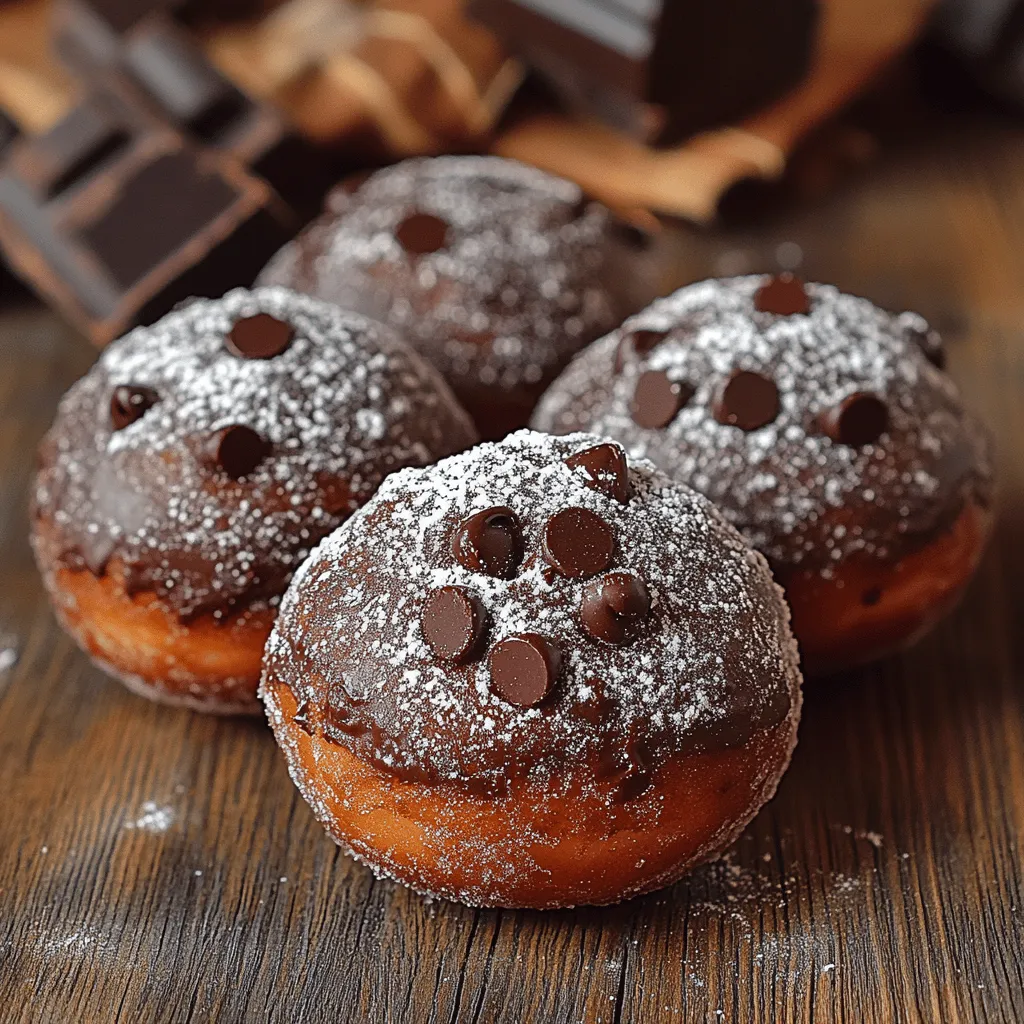
While optional, semi-sweet chocolate chips can elevate your doughnut holes to a whole new level of indulgence. Adding chocolate chips to the batter creates pockets of melted chocolate that ooze with every bite, providing an extra layer of richness and a delightful surprise. Choose high-quality chocolate chips for the best results.
Powdered Sugar
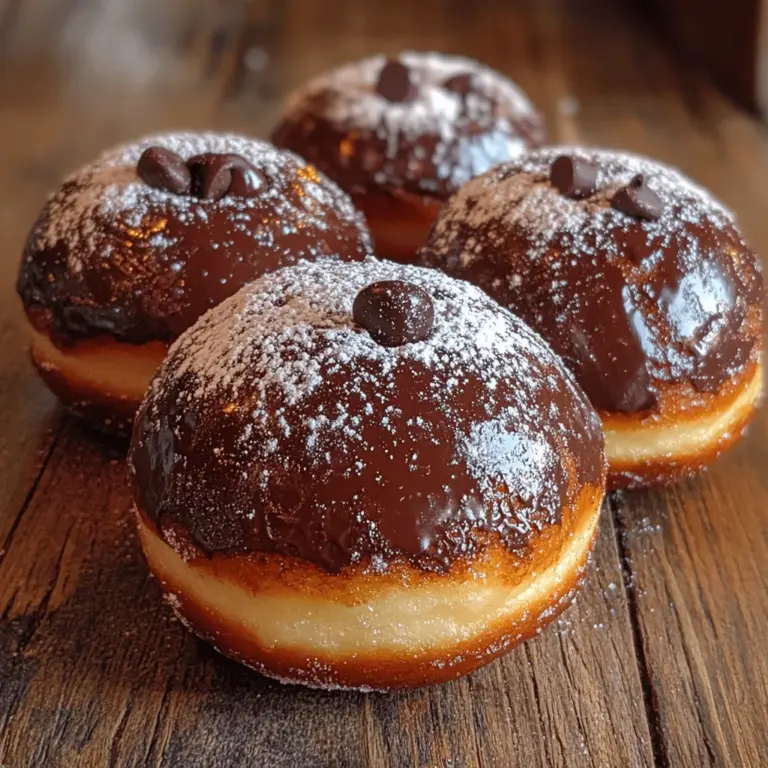
Finally, powdered sugar serves as the finishing touch, providing a light dusting that adds sweetness and visual appeal to the doughnut holes. You can adjust the amount based on your sweetness preference or experiment with different toppings such as a chocolate glaze or sprinkles.
Preparation Steps
Now that you have a solid understanding of the ingredients, let’s dive into the preparation steps for creating these decadent chocolate doughnut holes. Following these steps carefully will ensure that your doughnut holes turn out perfectly every time.
Step 1: Preheat the Oven
Before you begin mixing your ingredients, it’s essential to preheat your oven to 350°F (175°C). Preheating is a crucial step in baking, as it ensures that the doughnut holes start cooking immediately upon entering the oven. This helps to create a nice rise and prevents them from becoming dense or gummy.
Step 2: Prepare Your Baking Pan
While the oven is preheating, prepare your doughnut hole pan by greasing it lightly with cooking spray or oil. This will prevent the doughnut holes from sticking and make for easy removal once they are baked. If you don’t have a doughnut hole pan, you can use a mini muffin tin as an alternative.
Step 3: Mix the Dry Ingredients
In a large mixing bowl, combine the all-purpose flour, unsweetened cocoa powder, baking soda, baking powder, and salt. Whisk the dry ingredients together until they are well combined. This step is crucial for ensuring even distribution of the leavening agents, which promotes consistent rising throughout the doughnut holes.
Step 4: Mix the Wet Ingredients
In a separate bowl, whisk together the granulated sugar, brown sugar, and vegetable oil until well blended. Then, add the egg, buttermilk, and vanilla extract, and mix until the ingredients are fully incorporated. The mixture should be smooth and creamy, free of any lumps.
Step 5: Combine Wet and Dry Ingredients
Gradually add the wet ingredients to the dry ingredients, stirring gently until just combined. Be careful not to overmix—doing so can lead to tough doughnut holes. If you are adding chocolate chips, fold them in at this stage, ensuring they are evenly distributed throughout the batter.
Step 6: Fill the Pan
Using a spoon or a piping bag, fill each cavity of the doughnut hole pan about two-thirds full with the batter. This allows room for the doughnut holes to rise without overflowing. Smooth the tops gently with the back of a spoon if needed.
Step 7: Bake the Doughnut Holes
Once your pan is filled, place it in the preheated oven and bake for 10-12 minutes, or until a toothpick inserted into the center comes out clean. Keep a close eye on them, as baking times may vary depending on your oven and the specific pan used. You want the doughnut holes to be springy to the touch and slightly domed.
Step 8: Cool and Dust
After baking, remove the doughnut holes from the oven and let them cool in the pan for about 5 minutes. Then, gently transfer them to a wire rack to cool completely. Once cooled, dust them with powdered sugar for a sweet finishing touch, or drizzle with a chocolate glaze if you prefer an extra indulgent experience.
Now that you have prepared your decadent chocolate doughnut holes, you are well on your way to enjoying these delightful treats. In the next section, we will delve deeper into tips for achieving the best results and answering some common questions about this beloved recipe. So, roll up your sleeves and get ready to indulge in the sweet pleasure of homemade chocolate doughnut holes!
Combining Wet and Dry Ingredients
When it comes to baking, the technique of combining wet and dry ingredients plays a crucial role in the final texture and flavor of your chocolate doughnut holes. To achieve the perfect balance, follow these best practices to avoid overmixing, which can lead to tough doughnuts.
1. Prepare Ingredients Separately: Before mixing, ensure all your ingredients are measured and ready. This organization minimizes mixing time, which is key to keeping your doughnut holes tender.
2. Use the Right Mixing Tools: A spatula or a wooden spoon is ideal for mixing your batter. These tools allow for gentle folding, which helps to maintain the airiness of your mixture.
3. Mix in Stages: Start by adding the dry ingredients into the wet ingredients gradually. This technique reduces the likelihood of clumping and allows for better incorporation without the need for excessive stirring.
4. Stop When Just Combined: As soon as you see no dry flour remaining, stop mixing. The batter should be slightly lumpy; this is perfectly normal. Overmixing can lead to gluten development, resulting in a chewy texture instead of the desired soft and airy consistency.
Filling the Pan
Filling the pan correctly is essential for achieving evenly shaped doughnut holes. Here are some techniques to ensure your batter is evenly distributed:
1. Use a Piping Bag or Cookie Scoop: For precise control, transfer your batter into a piping bag or use a cookie scoop. This allows for easy filling of each cavity in the doughnut hole pan without making a mess.
2. Fill to the Right Level: Aim to fill each cavity about two-thirds full. This space allows the dough to rise without overflowing, ensuring that your doughnut holes maintain a perfect dome shape.
3. Tap the Pan: After filling, gently tap the pan on the countertop. This action helps to release any air bubbles trapped in the batter, promoting even cooking and a smooth surface.
Baking Process
Knowing when your chocolate doughnut holes are perfectly baked is key to achieving that melt-in-your-mouth goodness. Here’s how to ensure they come out just right:
1. Check the Time: Start with the recommended baking time in your recipe. For chocolate doughnut holes, this typically ranges from 8 to 10 minutes, depending on your oven.
2. The Toothpick Test: Insert a toothpick into the center of a doughnut hole. If it comes out clean or with just a few moist crumbs attached, they are ready to come out of the oven. If it comes out wet with batter, they need more time.
3. Observe the Color: Your doughnut holes should be golden brown on the outside. This visual cue, combined with the toothpick test, is a reliable sign of doneness.
Cooling Tips
Cooling your doughnut holes properly is essential for both texture and flavor. Here are some cooling tips to keep in mind:
1. Remove from the Pan: After baking, allow the doughnut holes to cool in the pan for about 5 minutes. This brief period helps them firm up slightly, making them easier to remove without breaking.
2. Use a Wire Rack: Transfer the doughnut holes to a wire rack to cool completely. This method allows air to circulate around them, preventing sogginess and ensuring they maintain their delightful texture.
3. Avoid Covering Too Soon: Resist the temptation to cover your doughnut holes immediately after cooling. Covering them too soon can trap moisture and make them soggy. Let them cool completely for the best flavor development.
The Art of Coating
Once your doughnut holes are baked and cooled, it’s time to coat them. The coating not only enhances their flavor and appearance but also adds an extra layer of indulgence.
Explanation of the Powdered Sugar Coating
Rolling your chocolate doughnut holes in powdered sugar creates a sweet, melt-in-your-mouth exterior. This classic coating is easy to apply and complements the rich chocolate flavor beautifully.
Why Rolling in Powdered Sugar Enhances Flavor and Appearance
The powdered sugar coating serves multiple purposes:
– Flavor Enhancement: The sweet sugar balances the rich chocolate, giving you a delightful contrast that elevates the overall taste experience.
– Visual Appeal: The snowy white coating is visually striking against the dark chocolate, making the doughnut holes look even more tempting.
Variations: Suggestions for Other Coatings
For those looking to experiment or add some flair to their chocolate doughnut holes, here are a few delicious coating alternatives:
– Chocolate Glaze: Melt chocolate with a bit of coconut oil or butter to create a glossy glaze. Dip each doughnut hole into the warm glaze and allow it to set for a decadent finish.
– Cinnamon Sugar: Combine granulated sugar with cinnamon for a warm, spiced coating. This option adds a lovely flavor twist and gives your doughnut holes a cozy feel.
– Nut Coatings: Finely chop nuts like pistachios or hazelnuts and roll your doughnut holes in them for a crunchy texture and a nutty flavor.
Serving Suggestions
Now that your chocolate doughnut holes are baked, coated, and ready to enjoy, here are some creative serving suggestions:
1. Pairing with Coffee or Milk: These chocolate treats pair beautifully with a cup of freshly brewed coffee or a glass of cold milk. The rich flavors complement each other, making for a perfect afternoon snack or breakfast treat.
2. Presentation Ideas for Special Occasions: For gatherings or special occasions, arrange your doughnut holes on a decorative platter. You could drizzle some chocolate glaze over them for added flair or sprinkle with colorful sprinkles to make them festive.
3. Incorporating into Dessert Platters or Gift Baskets: Include them in dessert platters alongside other treats like cookies, brownies, or fruit tarts. They also make excellent additions to gift baskets, providing a personal touch that friends and family will love.
Storage and Shelf Life
To ensure your chocolate doughnut holes remain fresh and delicious, proper storage is essential.
Best Practices for Storing Doughnut Holes
1. Use Airtight Containers: Store your cooled doughnut holes in an airtight container to keep them fresh. This prevents moisture from getting in and keeps them from becoming stale.
2. Layering with Parchment Paper: If you have multiple layers of doughnut holes, place parchment paper between layers to avoid sticking.
Recommended Storage Duration
When stored correctly, your chocolate doughnut holes can stay fresh at room temperature for up to 3 days. For longer shelf life, consider refrigerating them, where they can last for about a week. If you want to store them longer, they can be frozen for up to 2 months. Just be sure to let them thaw at room temperature before enjoying.
Nutritional Insights
While chocolate doughnut holes are undoubtedly an indulgent treat, they can still fit into a balanced lifestyle with some mindful choices.
Overview of the Nutritional Aspects
Chocolate doughnut holes typically feature ingredients that provide energy and satisfaction. However, it’s essential to acknowledge their indulgent nature.
Acknowledgment of Indulgence versus Enjoyment
These treats are meant to be enjoyed in moderation. The rich chocolate flavor and soft texture are best savored as a special delight rather than an everyday snack.
Suggestions for Healthier Ingredient Swaps
If you’re looking to lighten up the recipe without sacrificing flavor, consider these healthier ingredient swaps:
– Whole Wheat Flour: Swap out all-purpose flour for whole wheat flour for added fiber and nutrients.
– Natural Sweeteners: Use honey or maple syrup instead of refined sugar to add sweetness while introducing some additional flavor complexity.
– Cocoa Powder: Opt for unsweetened cocoa powder to control sugar content while still enjoying the rich, chocolatey taste.
Conclusion
Making and enjoying decadent chocolate doughnut holes is a delightful experience that brings joy to both the baker and the taster. The combination of rich chocolate flavor with a soft, airy texture makes these treats a favorite for any occasion. Whether you’re indulging on your own or sharing them with friends and family, these delightful bites are sure to please.
So gather your ingredients, follow the steps, and create your own batch of chocolate doughnut holes. Don’t forget to share this recipe with others so they too can experience the sweet joy of baking and enjoying these delicious treats. Happy baking!
