Introduction
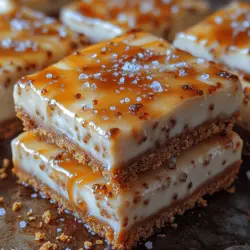
If you’re in search of a dessert that combines indulgence with sophistication, look no further than decadent caramel cheesecake bars. These treats are a harmonious blend of creamy cheesecake and luscious caramel, making them a showstopper at any gathering. The rich, velvety texture of the cheesecake perfectly complements the sweet, buttery notes of caramel, creating a mouthwatering experience that’s hard to resist.
Whether you’re hosting a lively party, celebrating a holiday with family, or simply indulging in a casual gathering with friends, these caramel cheesecake bars are the perfect dessert for any occasion. Their elegant appearance and delightful flavor will impress your guests, while their ease of preparation ensures you can whip them up without fuss.
In this article, we will guide you through the process of making these decadent bars, discussing the essential components and providing step-by-step instructions to help you achieve dessert perfection.
Understanding the Components of Decadent Caramel Cheesecake Bars
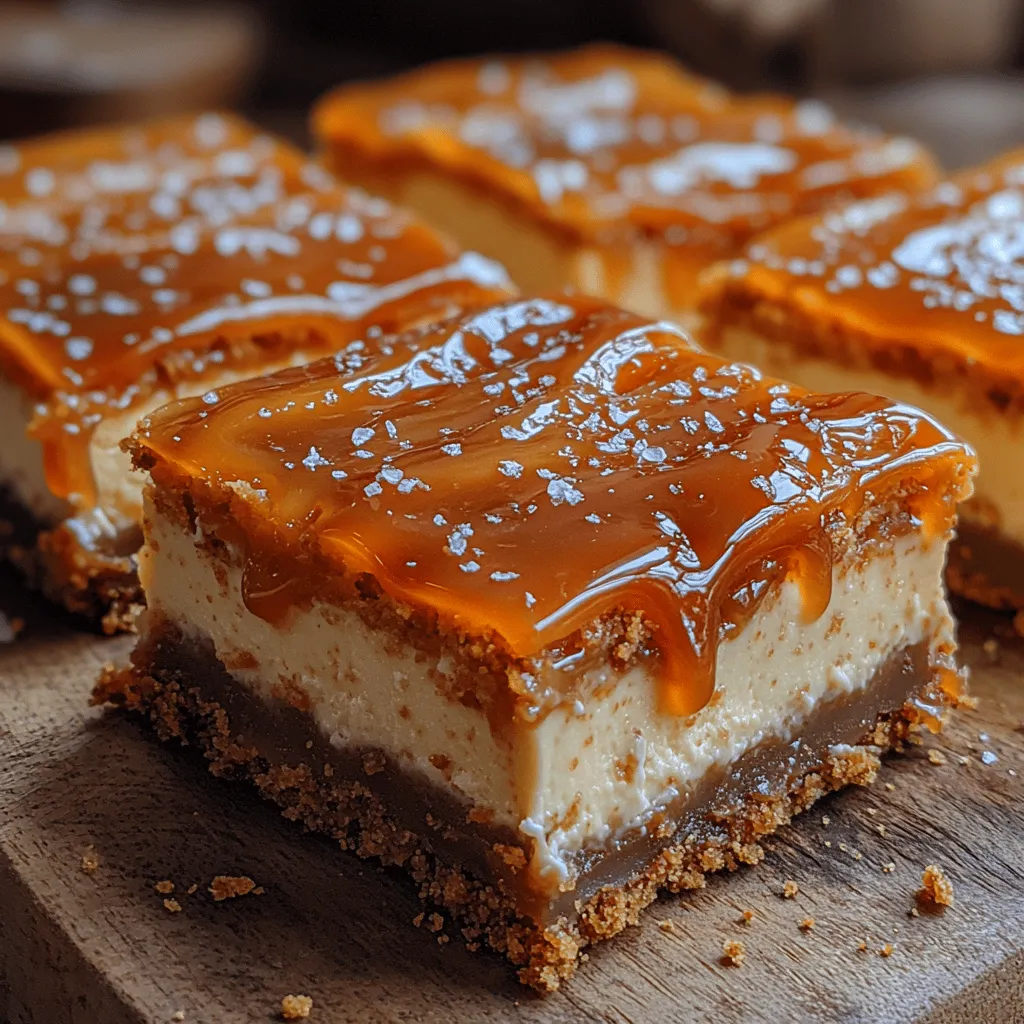
To truly appreciate the magic of caramel cheesecake bars, it’s essential to understand the key components that contribute to their deliciousness: the crust, the cheesecake layer, and the caramel topping. Each element plays a vital role in delivering a balanced flavor and texture that will keep you coming back for seconds.
The Crust
The crust serves as the foundation for your cheesecake bars, providing a crunchy texture that contrasts beautifully with the smooth filling. Traditionally, a graham cracker crust is used, offering a sweet and slightly nutty flavor that pairs well with the rich cheesecake. When making your crust, it’s important to use high-quality graham crackers and butter to ensure optimal flavor and texture.
The Cheesecake Layer
Next comes the star of the show: the cheesecake layer. This part of the recipe is where the creamy goodness shines through. Made primarily from cream cheese, sugar, eggs, and vanilla extract, this layer should be rich and smooth. The key to achieving the perfect cheesecake filling lies in using room temperature cream cheese, which blends easily and minimizes the risk of lumps.
The Caramel Topping
Finally, the caramel topping adds a sweet, gooey finish that elevates these bars to a whole new level. Homemade caramel is the best option, as it allows you to control the sweetness and texture. A well-prepared caramel sauce will be thick and glossy, drizzled generously over the cheesecake layer to create a luxurious topping.
Using quality ingredients in each of these components is crucial for achieving the best flavor and texture. Remember, the combination of creamy cheesecake, buttery crust, and rich caramel is what makes these bars truly decadent.
Crafting the Perfect Crust
Creating the crust is the first step in making your caramel cheesecake bars. Here’s a breakdown of the ingredients you’ll need and a step-by-step guide to ensure your crust is both delicious and visually appealing.
Ingredients Breakdown for the Crust
To prepare the crust, you will need the following ingredients:
– 1 ½ cups graham cracker crumbs
– ½ cup unsalted butter, melted
– ¼ cup granulated sugar
– A pinch of salt
Each ingredient plays a specific role:
– Graham cracker crumbs: Provide the base and texture.
– Unsalted butter: Binds the crumbs together and adds richness.
– Granulated sugar: Enhances the sweetness of the crust.
– Salt: Balances the sweetness and enhances the flavors.
Step-by-Step Instructions for Preparing the Graham Cracker Crust
1. Preheat Your Oven: Start by preheating your oven to 350°F (175°C). This ensures that the crust bakes evenly and achieves a golden color.
2. Combine Dry Ingredients: In a medium bowl, mix together the graham cracker crumbs, granulated sugar, and a pinch of salt. Stir until well combined, ensuring that there are no clumps.
3. Add Melted Butter: Pour the melted butter into the crumb mixture. Using a fork or your hands, mix until the crumbs are evenly coated and the mixture resembles wet sand.
4. Press into the Baking Pan: Line a 9×9-inch baking pan with parchment paper for easy removal. Press the crust mixture firmly into the bottom of the pan, making sure it’s evenly distributed and compact. Use the bottom of a measuring cup to help pack it down tightly.
5. Bake the Crust: Place the pan in the preheated oven and bake for 8-10 minutes, or until the crust is lightly golden and set. Keep an eye on it to avoid overbaking, as a dry crust will detract from the overall texture of your bars.
6. Cool Before Filling: Once baked, remove the crust from the oven and allow it to cool completely before adding the cheesecake layer. This step is crucial to prevent the filling from melting into the crust.
Tips for Achieving the Ideal Texture
– Firmness: Ensure your crust is pressed firmly into the pan. A well-packed crust will hold together better when cut into bars.
– Flavor Balance: Adjust the sugar in your crust based on your personal preference. If you prefer a less sweet crust, reduce the sugar slightly.
– Alternative Crust Options: For those with dietary restrictions, consider using gluten-free graham crackers or almond flour mixed with melted coconut oil as a substitute. This creates a delicious alternative that still compliments the cheesecake flavor.
Creating the Creamy Cheesecake Layer
Now that your crust is ready, it’s time to focus on the luscious cheesecake layer that will make these bars truly decadent. The cheesecake filling is the heart of the dessert and requires careful attention to detail.
Overview of the Ingredients Used in the Cheesecake Layer
For the cheesecake layer, you will need the following ingredients:
– 16 oz (2 packages) cream cheese, softened to room temperature
– ½ cup granulated sugar
– 2 large eggs
– 1 teaspoon vanilla extract
– ¼ cup sour cream (optional, for extra creaminess)
These ingredients work together to create a smooth and creamy filling that sets beautifully once baked.
Detailed Instructions on How to Prepare the Cheesecake Filling
1. Beat the Cream Cheese: In a large mixing bowl, use an electric mixer to beat the softened cream cheese until it is smooth and creamy. This step is crucial for achieving a lump-free filling.
2. Add Sugar and Vanilla: Gradually add the granulated sugar and vanilla extract, mixing until well combined. Scrape down the sides of the bowl as needed to ensure everything is evenly incorporated.
3. Incorporate the Eggs: Add the eggs one at a time, mixing on low speed after each addition. Be careful not to overmix, as this can incorporate too much air, leading to cracks in your cheesecake.
4. Mix in Sour Cream: If you choose to use sour cream, fold it into the mixture at this stage for an added layer of creaminess. This ingredient can enhance the flavor and texture of your cheesecake.
5. Pour Over Crust: Once your filling is smooth and well mixed, pour it over the cooled graham cracker crust. Use a spatula to spread it evenly across the surface.
Importance of Room Temperature Cream Cheese for a Smooth Texture
Using cream cheese that is at room temperature is essential for achieving a smooth filling. Cold cream cheese can lead to lumps that are difficult to mix out, resulting in an uneven texture. Allowing your cream cheese to sit out for at least 30 minutes prior to mixing will make a significant difference in the final outcome.
Discussion on Avoiding Common Mistakes
– Overmixing: While it’s important to mix until smooth, overmixing can introduce excess air into the batter, causing the cheesecake to rise and fall during baking, leading to cracks.
– Underbaking: To ensure that your cheesecake sets properly, avoid underbaking. The center should be slightly jiggly but not liquid; it will continue to firm up as it cools.
With the crust and cheesecake layer well on their way, the next step to complete your decadent caramel cheesecake bars will be mastering the art of the caramel topping. This sweet layer will bring the entire dessert together, adding a touch of indulgence that is simply irresistible.
Stay tuned as we dive into the process of creating the perfect caramel topping in the next section of this article.
Caramel Sauce Options
When it comes to caramel cheesecake bars, the choice of caramel sauce can significantly impact the final flavor and texture. You have two primary options: store-bought and homemade.
Store-bought Caramel Sauce: This is a convenient option for those short on time. High-quality brands offer rich and flavorful sauces that can save you time and effort. Look for sauces made with natural ingredients for the best taste.
Homemade Caramel Sauce: If you have a little extra time, making your own caramel sauce can elevate your cheesecake bars to new heights. The process involves melting sugar, adding cream, and butter, resulting in a velvety sauce that you can customize to your liking. Homemade caramel allows you to control the sweetness and consistency, making it a favorite among many home bakers.
Step-by-Step Instructions for Drizzling the Caramel Topping
Once your cheesecake bars are baked and cooled, it’s time to add that luscious caramel drizzle. Here’s how to do it perfectly:
1. Prepare the Caramel: If you’re using homemade caramel, make it ahead of time and let it cool slightly so it thickens just enough for drizzling. If you’re using store-bought, warm it gently in a saucepan over low heat or microwave it in short bursts until it’s pourable.
2. Drizzle Technique: Use a spoon or a squeeze bottle to drizzle the caramel over the cooled cheesecake bars. Start from one edge of the pan and move your way across, creating a zigzag pattern. For a more artistic look, you can make circular motions or create a crosshatch pattern.
3. Let it Set: Allow the caramel to set slightly before slicing the bars. This will help keep the caramel from running off the sides when you cut them.
The Impact of Sea Salt as a Garnish
Adding a sprinkle of sea salt over the caramel topping not only enhances the visual appeal but also elevates the flavor profile of your cheesecake bars. The contrast of the sweet caramel with the salty notes creates a complex taste experience that takes each bite to another level.
The type of sea salt you choose can also make a difference. Flaky sea salts like Maldon or fleur de sel provide a light crunch and dissolve beautifully on the warm caramel. For a more intense flavor, you can opt for a coarser sea salt that will provide little bursts of salty goodness.
Suggestions for Variations
While the classic caramel cheesecake bars are undeniably delicious, you can easily switch things up to suit your taste or occasion. Here are some ideas:
– Chocolate Drizzle: For chocolate lovers, consider drizzling melted chocolate over the caramel for a decadent twist.
– Nut Toppings: Add crushed pecans, walnuts, or almonds on top of the caramel for added crunch and flavor.
– Fruit Infusions: Incorporate a layer of fruit preserves or fresh fruit (like sliced strawberries or raspberries) between the cheesecake and the crust for a fruity contrast.
– Flavor Infusions: Experiment with different flavors by adding extracts to the cheesecake mixture, like almond or coconut, for a unique twist.
Baking and Cooling the Cheesecake Bars
Baking your cheesecake bars correctly is crucial to achieving the right texture. Here are some guidelines to ensure your bars turn out perfectly.
Correct Baking Temperature and Time: Preheat your oven to the specified temperature in your recipe, typically around 325°F (160°C). Bake the cheesecake bars for 25-30 minutes or until the edges are set, and the center has a slight jiggle. Remember, they will continue to firm up as they cool.
Knowing When the Bars are Perfectly Baked: The key to knowing when your cheesecake bars are done is to look for a slight puff around the edges and a firm center. If the surface begins to crack, it may be overbaked.
Cooling Process: Once baked, turn off the oven and crack the door open. Allow the bars to cool gradually in the oven for about 10-15 minutes. This helps prevent cracking due to sudden temperature changes.
Chilling for the Best Taste Experience: After cooling in the oven, transfer the cheesecake bars to a wire rack until they reach room temperature, then refrigerate them for at least 4 hours or overnight. Chilling allows the flavors to meld and the texture to set, resulting in a firmer and creamier bite.
Serving Suggestions and Presentation Ideas
When it comes time to serve your decadent caramel cheesecake bars, presentation can make a big difference in the overall experience. Here are some creative ways to cut, serve, and present them:
– Cutting Shapes: Use a sharp, warm knife to cut the bars into squares or rectangles. For a more elegant presentation, consider using cookie cutters to create fun shapes.
– Garnishing Ideas: Top each bar with a dollop of whipped cream, a sprinkle of crushed nuts, or an extra drizzle of caramel for a beautiful finish.
– Pairing Suggestions: These cheesecake bars pair wonderfully with coffee, tea, or dessert wines. For an additional dessert option, serve with a side of fresh fruit or a scoop of vanilla ice cream.
– Presentation for Gatherings: Arrange the bars on a decorative platter, and consider adding some fresh berries or mint leaves for a pop of color. If serving at a party, label them with a small sign to let guests know they are enjoying homemade caramel cheesecake bars.
Storing and Leftover Tips
If you find yourself with leftover cheesecake bars, here are some best practices for storing them:
– Best Practices for Storing: Store your cheesecake bars in an airtight container in the refrigerator. Ensure they are well covered to prevent them from absorbing any fridge odors.
– Duration for Freshness: Properly stored, your cheesecake bars can last up to one week in the refrigerator. For longer storage, consider freezing them.
– Repurposing Leftovers: If you have leftover cheesecake bars, consider crumbling them over a bowl of ice cream or incorporating them into a trifle. They can also be used as a crust for other desserts or enjoyed as a snack on their own.
Conclusion
In summary, these decadent caramel cheesecake bars are not only a treat for the taste buds but also a simple and rewarding baking project. From the rich cheesecake filling to the luscious caramel drizzle, every bite is a burst of flavor that’s sure to impress. The versatility of this recipe allows you to customize it to your liking, making it perfect for any occasion.
We encourage you to try this recipe and experience the joy of crafting your own indulgent dessert. Sharing homemade treats like these caramel cheesecake bars with friends and family brings warmth and happiness to any gathering. So gather your ingredients, preheat your oven, and get ready to delight in the sweet success of your baking endeavors!