Frozen Yogurt Coconut Chocolate Pops Recipe
As the sun begins to shine brighter and temperatures rise, the craving for refreshing frozen treats becomes almost irresistible. Whether it’s a hot summer afternoon or a festive gathering, frozen desserts have a way of bringing joy and satisfaction. While store-bought options are often laden with sugars and artificial ingredients, there’s something special about creating your own frozen treats at home. Homemade frozen yogurt pops not only provide a healthier alternative but also allow you to customize flavors and ingredients to suit your preferences.
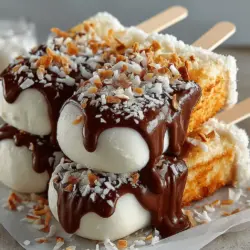
Today, we are excited to share a delightful recipe for Frozen Yogurt Coconut Chocolate Pops. This treat is the perfect blend of creamy, tropical coconut and rich chocolate, making it an indulgent yet guilt-free dessert. With its simple preparation process and wholesome ingredients, this recipe can easily become a staple in your summer dessert repertoire.
Understanding the Ingredients
To create these delicious Frozen Yogurt Coconut Chocolate Pops, it’s essential to understand the main components and their benefits. Each ingredient plays a vital role in achieving the perfect flavor and texture while also providing nutritional advantages.
Greek Yogurt
At the heart of this recipe is Greek yogurt, renowned for its thick, creamy texture. Unlike regular yogurt, Greek yogurt is strained, resulting in a product that is denser and richer. Besides its delightful consistency, Greek yogurt is also packed with protein, making it a fantastic option for a healthy treat. Protein is essential for muscle repair and growth, and it helps keep you feeling full longer. Additionally, Greek yogurt contains probiotics, which can support digestive health.
Coconut Milk
To enhance the creaminess of the pops, we incorporate coconut milk. This dairy-free alternative not only adds a rich texture but also infuses the pops with a subtle tropical flavor. Coconut milk is derived from the flesh of coconuts and is known for its high content of medium-chain triglycerides (MCTs), which can provide quick energy and support metabolism. Moreover, it’s a great source of essential vitamins and minerals, including potassium and magnesium.
Sweeteners
When it comes to sweetening our pops, we have options. Honey and maple syrup are both natural sweeteners that can be used to suit individual tastes. Honey brings a floral sweetness and has antibacterial properties, while maple syrup offers a rich, caramel-like flavor and is packed with antioxidants. Both sweeteners can be easily adjusted based on personal preference, allowing for a customized sweetness level that complements the other ingredients perfectly.
Shredded Coconut
The addition of shredded coconut not only enhances the flavor profile but also adds texture to the pops. This ingredient provides a delightful chewiness that contrasts beautifully with the creamy yogurt base. Nutritionally, shredded coconut is a good source of dietary fiber, which aids in digestion, and it contains healthy fats that can promote heart health.
Dark Chocolate
No dessert is complete without a touch of chocolate, and in this recipe, we use dark chocolate. Known for its rich flavor and health benefits, dark chocolate is packed with antioxidants that can help reduce inflammation and improve heart health. Additionally, it contains minerals such as iron, magnesium, and zinc. By choosing dark chocolate, you can enjoy the indulgence of chocolate while reaping potential health benefits.
Coconut Oil
To ensure the chocolate adheres smoothly to the pops, coconut oil is added when melting the chocolate. This oil is not only a healthy fat but also helps in achieving a glossy finish on the chocolate coating. Coconut oil contains MCTs, which can boost energy and support weight management, making it a beneficial addition to this recipe.
Sea Salt
Lastly, a pinch of sea salt is included to elevate the overall flavor of the pops. Salt enhances sweetness and balances flavors, creating a more complex and enjoyable taste experience. Just a small amount can make a significant difference in how the other flavors shine through.
Step-by-Step Instructions
Now that we’ve explored the ingredients, let’s dive into the step-by-step instructions for preparing these Frozen Yogurt Coconut Chocolate Pops. This process is straightforward and allows for some creativity along the way.
Combining the Yogurt Mixture
Begin by combining the Greek yogurt and coconut milk in a mixing bowl. It’s important to mix these ingredients thoroughly until they reach a smooth and creamy consistency. A blender or food processor can be particularly useful for this step, ensuring that the mixture is uniform and free of lumps. Depending on your taste preferences, you can add your chosen sweetener (honey or maple syrup) at this stage, adjusting the amount to achieve your desired level of sweetness.
Preparing Molds
Once your yogurt mixture is ready, it’s time to prepare the molds. Choose popsicle molds that suit your preference; silicone molds are particularly easy to work with and allow for easy removal of the pops once frozen. Carefully pour the yogurt mixture into the molds, filling them about three-quarters full to prevent overflow during freezing. If you have leftover mixture, consider pouring it into small cups for an immediate treat!
Freezing Base
After filling the molds, place them in the freezer. The ideal freezing time is typically around 4-6 hours, but for best results, it’s recommended to freeze them overnight. This ensures that the pops are solid and easy to remove from the molds. Once fully frozen, you can gently run warm water over the outside of the molds for a few seconds to help release the pops without breaking them.
Stay tuned for the next part of the article, where we will cover the delicious chocolate coating and additional tips to make your Frozen Yogurt Coconut Chocolate Pops even more delightful!
Melting Chocolate
Achieving the perfect chocolate coating for your Frozen Yogurt Coconut Chocolate Pops is crucial for both taste and presentation. Here are some techniques to ensure your chocolate melts smoothly without burning:
1. Choose the Right Chocolate: Use high-quality chocolate, whether it’s dark, milk, or white, as this will impact the flavor and melting quality. Opt for chocolate chips or bars that are specifically labeled for melting.
2. Double Boiler Method: Fill a saucepan with a couple of inches of water and bring it to a gentle simmer. Place a heatproof bowl on top of the saucepan, ensuring it does not touch the water. Add your chocolate to the bowl and stir continuously until melted and smooth. This method prevents direct heat from burning the chocolate.
3. Microwave Method: If you prefer a quicker method, you can melt chocolate in the microwave. Place chopped chocolate in a microwave-safe bowl and heat in 30-second intervals at medium power. Stir between intervals to ensure even melting. Be cautious not to overheat as this can lead to a gritty texture.
4. Add Oil for Smoothness: For an extra glossy finish, add a teaspoon of coconut oil or vegetable oil to the melted chocolate. This not only enhances the sheen but also makes it easier to dip your pops.
Dipping Pops
Once your chocolate is melted and ready, it’s time to dip your frozen yogurt pops. Here are some best practices for coating them evenly:
1. Prepare Your Workspace: Set up a clean, flat surface with parchment paper laid out to place the dipped pops. This will prevent them from sticking and makes for easy cleanup.
2. Dip with Care: Hold the popsicle stick and dip the frozen yogurt pop into the melted chocolate. Twirl the pop gently to ensure an even coating. Avoid submerging the entire pop to maintain the yogurt’s integrity.
3. Allow Excess to Drip: After dipping, lift the pop out of the chocolate and let the excess chocolate drip back into the bowl. This will prevent the coating from becoming too thick or dripping down the stick.
4. Work Quickly: Chocolate sets fast, especially in a cold environment. If the chocolate starts to thicken, reheat it gently to maintain a smooth consistency.
Coating with Coconut
Adding shredded coconut to your pops not only enhances flavor but also adds a delightful texture. Timing is essential for ensuring the coconut adheres properly:
1. Timing is Key: Immediately after dipping the pops in chocolate, sprinkle shredded coconut over the chocolate coating. The chocolate should still be wet to allow the coconut to stick effectively.
2. Press Gently: After sprinkling, gently press the coconut onto the chocolate to ensure it adheres well. This will help create a more uniform coating that doesn’t fall off when you take a bite.
3. Use Unsweetened Coconut: For a healthier option, opt for unsweetened shredded coconut. This avoids adding extra sugar while still providing that tropical flavor.
Final Freeze
The final freeze is crucial for setting the chocolate coating properly:
1. Place in Freezer: Once coated, place the pops back onto the parchment paper and return them to the freezer for at least 30 minutes. This ensures that the chocolate hardens completely.
2. Check for Firmness: Before serving, make sure the chocolate coating is firm to the touch. If it’s still soft, give it additional time in the freezer.
Serving Suggestions and Variations
These Frozen Yogurt Coconut Chocolate Pops are versatile and can be served in various delightful ways:
Ideas for Serving the Pops
– Pair with Fresh Fruits: Serve the pops alongside fresh fruits like strawberries, mango, or pineapple for a refreshing contrast. Not only does this add color to your plate, but it also enhances the tropical flavor profile.
– Add Extra Toppings: Consider drizzling with melted chocolate, caramel, or a fruity sauce. You could also sprinkle nuts, seeds, or granola over the pops for an added crunch.
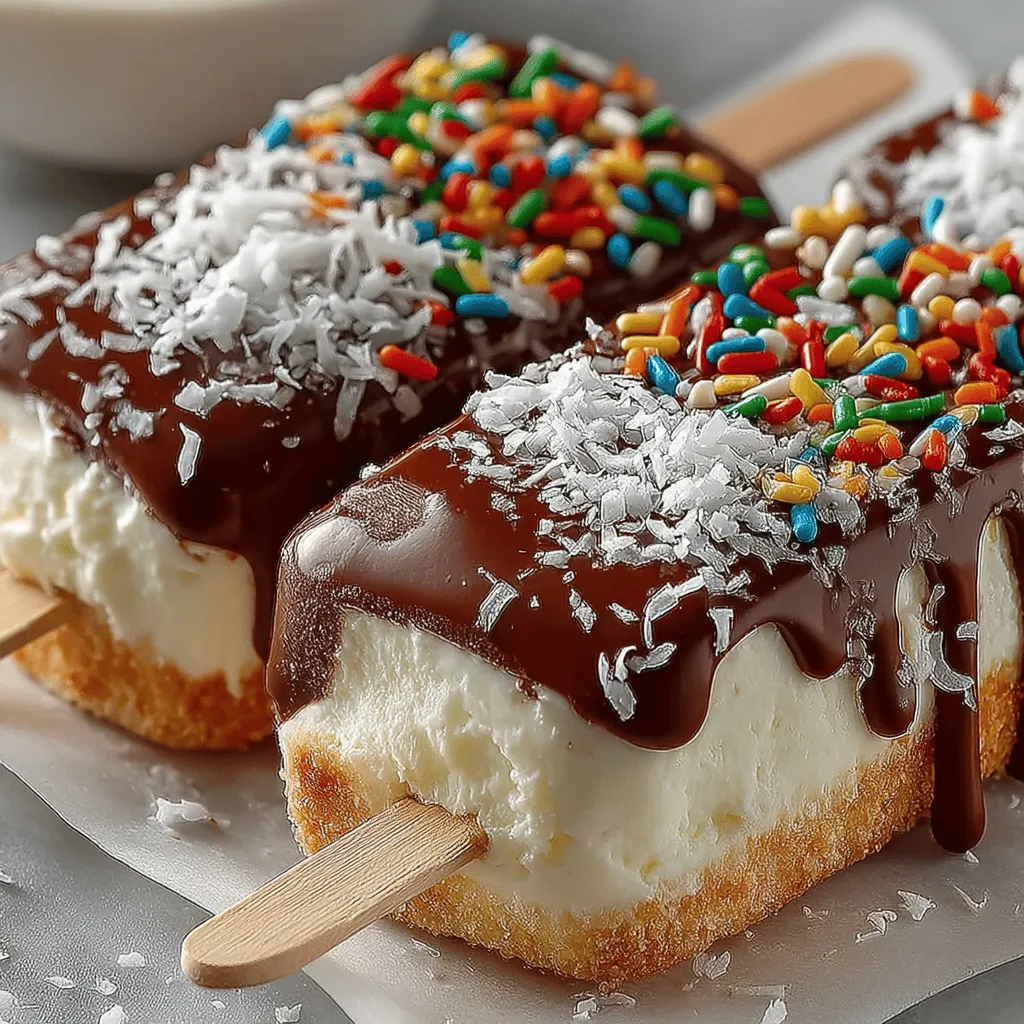
Suggestions for Alternative Coatings
– Crushed Nuts or Sprinkles: Instead of coconut, you can roll the dipped pops in crushed nuts like almonds or pistachios, or colorful sprinkles for a fun twist.
– Granola Coating: Try rolling the pops in granola for a nutritious boost, making them perfect for an energizing snack.
Variations on the Base Recipe
– Incorporating Other Flavors: Experiment with adding fruit purees to your yogurt base. For instance, swirl in raspberry or strawberry puree for a fruity twist, or mix in peppermint extract for a chocolate mint flavor.
– Vegan-Friendly Options: To make this recipe vegan, substitute regular yogurt with coconut yogurt or almond yogurt. Use dairy-free chocolate chips or bars to keep everything plant-based.
Nutritional Information
Understanding the nutritional benefits of your homemade pops can help you appreciate their role in a balanced diet. Here’s a breakdown of what you might expect per serving:
– Calories: Approximately 150-200 calories per pop, depending on the yogurt and chocolate used.
– Protein: Yogurt provides a good source of protein, making these pops a satisfying snack.
– Healthy Fats: The coconut offers healthy fats, while the chocolate can provide antioxidants, particularly if you use dark chocolate.
Dietary Lifestyles
– Gluten-Free: This recipe is naturally gluten-free, making it a suitable option for those with gluten sensitivities.
– Vegan Options: As mentioned earlier, by using plant-based yogurt and chocolate, these pops can easily fit into a vegan lifestyle.
Comparison with Store-Bought Frozen Treats
When compared to store-bought frozen treats, these homemade pops typically contain less sugar and avoid artificial additives. Many commercial frozen desserts are loaded with preservatives and sweeteners, while your homemade pops allow you to control the ingredients, making them a healthier choice.
Conclusion
Making Frozen Yogurt Coconut Chocolate Pops at home is not only a fun activity but also a rewarding culinary experience. These pops offer a delicious blend of creamy yogurt, rich chocolate, and tropical coconut, providing a guilt-free treat that is perfect for hot days. By preparing them at home, you can customize flavors, adjust sweetness, and avoid unwanted additives, making them a healthier alternative to store-bought options.
Not only do these pops satisfy your sweet tooth, but they also bring joy and creativity into your kitchen. Whether you are serving them at a summer gathering, enjoying them as a refreshing snack, or experimenting with variations, these pops are sure to impress. So gather your ingredients, unleash your creativity, and dive into this delightful treat that will cool you down and keep you coming back for more. Enjoy the process of making these pops and relish the satisfaction of a homemade dessert!