
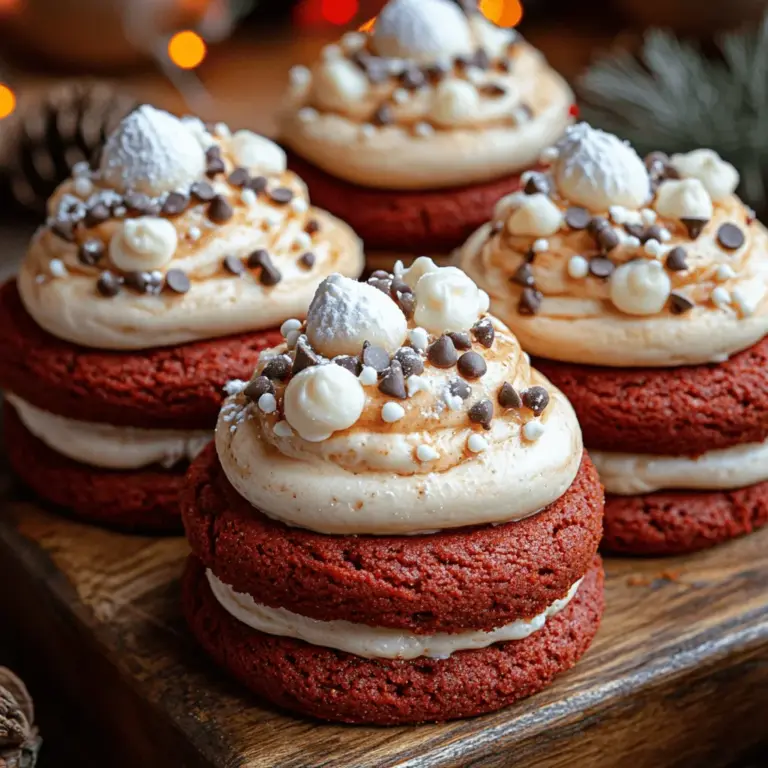
If you’re looking for a dessert that embodies the spirit of celebration and indulgence, look no further than the captivating Red Velvet Cookie Cake. This delightful treat pairs the rich and decadent flavors of traditional red velvet cake with the chewy texture of cookies, creating a dessert that is not only visually stunning but also incredibly delicious. The vibrant red color and cream cheese frosting make it a showstopper for any occasion, from birthdays to holidays, or even just a sweet treat to brighten your day.
Red velvet desserts have soared in popularity over the past few decades, becoming a staple in bakeries and home kitchens alike. The unique combination of rich cocoa, buttermilk, and a hint of tanginess gives red velvet its signature taste, making it a favorite among dessert enthusiasts. The Red Velvet Cookie Cake is a delightful twist on the classic cake, offering a unique texture and flavor that is sure to impress your family and friends.
In this article, we will take you through the journey of creating your very own Red Velvet Cookie Cake, providing detailed instructions, helpful tips, and a deeper understanding of the ingredients that make this dessert so special. Whether you’re an experienced baker or a beginner looking to try something new, this recipe is designed to guide you through the process step by step.
Understanding Red Velvet: A Culinary Classic
The origins of red velvet cake can be traced back to the early 20th century, with its roots in the Southern United States. Originally, red velvet cake was a simple cocoa-flavored cake with a slight reddish hue, attributed to the reaction of cocoa powder with acidic ingredients such as buttermilk and vinegar. However, it wasn’t until the 1920s, when a recipe from the Waldorf-Astoria Hotel in New York gained popularity, that red velvet cake became a celebrated dessert, often associated with luxury and elegance.
As the years passed, red velvet cake evolved, gaining its iconic vibrant red color thanks to the addition of food coloring. This transformation not only enhanced its visual appeal but also solidified its status as a festive dessert, often featuring prominently at special occasions like weddings, anniversaries, and Valentine’s Day. The cake’s unique flavor, characterized by a balance of cocoa, tanginess from buttermilk, and a touch of sweetness, makes it a favorite indulgence for many.
The Red Velvet Cookie Cake takes this beloved flavor profile and presents it in a new form. By transforming the classic cake into a cookie cake, you not only get the rich taste of red velvet but also the chewy, satisfying texture of a cookie. This innovative dessert is perfect for those who enjoy the fun and casual nature of cookies but still want the elegance of a cake.
Ingredients Breakdown
Creating a scrumptious Red Velvet Cookie Cake requires a careful selection of ingredients, each contributing to the final product’s texture, flavor, and appearance. Let’s break down the essential components of this delightful dessert.
Main Ingredients for the Cookie Cake
– All-Purpose Flour: The backbone of your cookie cake, all-purpose flour provides structure and stability. The right amount of flour ensures that your cookie cake holds its shape while still remaining soft and chewy.
– Cocoa Powder: This ingredient is key to achieving the distinct flavor and color of red velvet. Unsweetened cocoa powder adds a rich chocolatey taste, balancing the sweetness of the cake while enhancing the overall flavor profile.
– Baking Soda and Salt: These leavening agents play an essential role in the baking process. Baking soda reacts with the acidity of the buttermilk and vinegar, creating carbon dioxide bubbles that help the cookie cake rise. A pinch of salt enhances the flavors, making the sweetness more pronounced.
– Butter and Sugar: These two ingredients work together to create a moist and flavorful cookie cake. Butter adds richness and depth, while sugar contributes to sweetness and browning during baking. The creaming process of butter and sugar is crucial for achieving a light and fluffy texture.
– Red Food Coloring: To achieve that iconic red hue associated with red velvet desserts, red food coloring is a must. It not only enhances the visual appeal of the cookie cake but also complements the flavor profile, making the dessert even more enticing.
– Optional White Chocolate Chips: For those looking to elevate their cookie cake experience, adding white chocolate chips can provide a delightful contrast in flavor. The creamy sweetness of white chocolate pairs beautifully with the rich cocoa base, creating a harmonious balance in every bite.
Ingredients for the Cream Cheese Frosting
No Red Velvet Cookie Cake is complete without a generous layer of cream cheese frosting. This frosting adds an essential tangy sweetness that beautifully complements the rich flavors of the cookie cake. Here’s a breakdown of the ingredients needed for the frosting:
– Cream Cheese and Butter: The base of the frosting, cream cheese adds a rich, tangy flavor, while butter contributes creaminess and structure. Together, they create a smooth and luscious frosting that is easy to spread.
– Powdered Sugar: For sweetness and texture, powdered sugar is used in frosting recipes. It dissolves easily, allowing for a smooth consistency that spreads beautifully over the cookie cake.
– Vanilla Extract: A splash of vanilla extract enhances the overall flavor of the frosting, rounding out the sweetness and adding depth to the taste.
– Milk: To achieve the desired consistency for spreading, a small amount of milk is added to the frosting. This allows for a creamier texture that can be easily adjusted to your preference.
With a clear understanding of these key ingredients, you are ready to embark on your baking journey. In the following sections, we will delve into the step-by-step instructions for making your Red Velvet Cookie Cake, along with tips to ensure your baking experience is enjoyable and successful. Stay tuned for the detailed process that will guide you in creating this festive and delicious dessert!
Step-by-Step Instructions
Preparing to Bake
Before diving into the delicious world of baking, it’s crucial to prepare your workspace and oven. Start by preheating your oven to 350°F (175°C). Preheating ensures that your cookie cake bakes evenly, resulting in a perfect texture and flavor. While the oven warms up, prepare your baking pans. For this recipe, you will need two 9-inch round cake pans. Grease them generously with butter or non-stick cooking spray, and then line the bottoms with parchment paper. This step is essential to prevent sticking and ensure easy removal of the cookie cake later on.
Mixing Dry Ingredients
The next step involves mixing your dry ingredients, which is essential for a well-integrated dough. In a medium-sized bowl, whisk together 2 ½ cups of all-purpose flour, 1 teaspoon of baking soda, and 1 teaspoon of salt. Sifting the flour is a beneficial technique that aerates it and removes any lumps, ensuring an even distribution of baking soda and salt throughout the flour. This is a key step in achieving a light, fluffy cookie cake. Set the dry mixture aside as you focus on the wet ingredients.
Creaming Butter and Sugar
In a large mixing bowl, use an electric mixer to cream together 1 cup of unsalted butter (softened at room temperature) and 1 ½ cups of granulated sugar until the mixture is light and fluffy. This process typically takes about 3-5 minutes. Creaming is a crucial step that incorporates air into the mixture, which helps create a tender texture in your cookie cake. Be sure to scrape the sides of the bowl occasionally to ensure all ingredients are thoroughly combined.
Incorporating Eggs and Color
Once you have a fluffy butter and sugar mixture, it’s time to add the eggs. Incorporate two large eggs, one at a time, mixing well after each addition. This gradual addition aids in proper emulsification, allowing the mixture to bind together smoothly. Next, add 1 tablespoon of vanilla extract and 2 tablespoons of red food coloring. The vibrant color is what gives this cake its signature appearance and enhances its appeal. Mix until the ingredients are fully combined, and the batter has a uniform color.
Combining Ingredients
Now, it’s time to combine the wet and dry ingredients. Gradually add the dry mixture to the wet mixture, mixing on low speed. It’s important to avoid overworking the dough at this stage; overmixing can lead to a dense cookie cake. Mix just until the flour is incorporated, and you no longer see dry bits. At this point, the dough will be thick and slightly sticky, which is perfect for your cookie cake.
Baking Process
Pour the cookie batter evenly into the prepared cake pans. Use a spatula to smooth the tops, ensuring an even surface that will bake uniformly. Place the pans in the preheated oven and bake for 20-25 minutes. To check if the cookie cake is done, insert a toothpick into the center; if it comes out clean or with a few moist crumbs, it’s ready. Avoid opening the oven door too frequently, as this can cause fluctuations in temperature. Once baked, remove the pans from the oven and let them cool in the pans for about 10 minutes before transferring them to a wire rack to cool completely.
Making Cream Cheese Frosting
While the cookie cakes are cooling, prepare the cream cheese frosting. In a large mixing bowl, beat together 8 ounces of softened cream cheese and ½ cup of unsalted butter until smooth and creamy. Gradually add 4 cups of powdered sugar, mixing on low speed to prevent a sugary cloud from forming. Once incorporated, add 1 teaspoon of vanilla extract and a pinch of salt to balance the sweetness. Continue mixing until the frosting is fluffy and holds its shape. If the frosting seems too thick, you can add a tablespoon of milk to achieve your desired consistency.
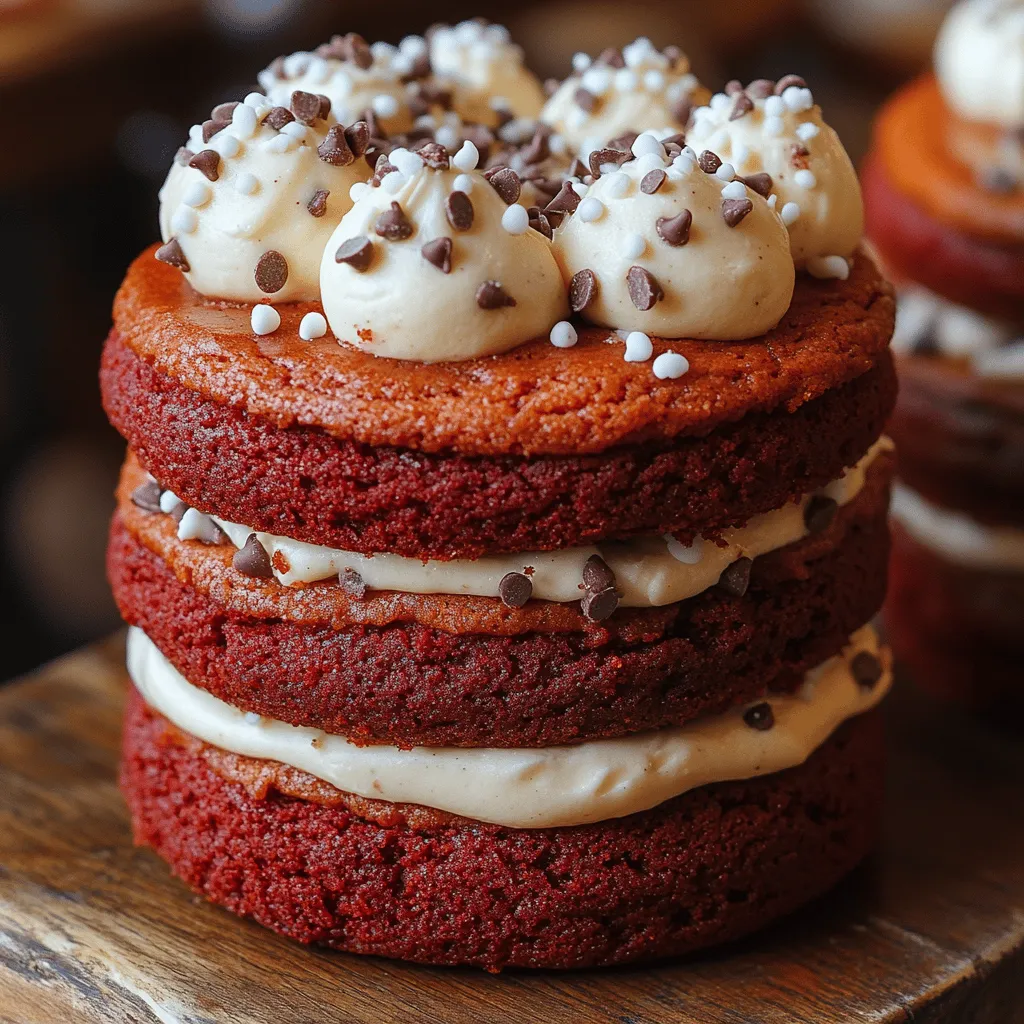
Assembling the Cookie Cake
Once your cookie cakes have completely cooled, it’s time to assemble them. Place one layer of the cookie cake on a serving plate or cake stand. Generously spread a layer of cream cheese frosting on top. Place the second layer on top of the frosted first layer, and use the remaining frosting to cover the top and sides of the cookie cake. For a professional finish, use an offset spatula to create smooth edges.
To enhance the visual appeal of your Red Velvet Cookie Cake, consider adding decorative touches. Fresh berries, chocolate shavings, or edible glitter can add a festive flair. Alternatively, you can pipe additional frosting on top for a more ornate look.
Serving Suggestions
The Red Velvet Cookie Cake is a delightful centerpiece for various occasions. It’s perfect for birthdays, anniversaries, or holiday gatherings, bringing a touch of elegance to any celebration. Consider pairing this cake with a side of vanilla ice cream or whipped cream for an extra indulgent treat. For beverages, a glass of cold milk, coffee, or a festive cocktail complements the flavors beautifully. You might also serve it alongside a light dessert, such as fruit salad or a scoop of sorbet, to create a balanced dessert spread.
Storing and Reheating
To maintain the freshness of any leftover cookie cake, store it in an airtight container at room temperature for up to three days. If you prefer, you can keep it in the refrigerator for longer shelf life, but be sure to let it come to room temperature before serving, as this enhances the flavor and texture. If you want to enjoy a warm slice, gently reheat it in the microwave for about 10-15 seconds. Be cautious not to overheat, as this can cause the cookie cake to dry out.
Conclusion
Baking the Red Velvet Cookie Cake is not just about creating a delicious dessert; it’s about the joyful experience that brings family and friends together. This recipe can become a beloved tradition in your kitchen, creating lasting memories with every slice. Whether you stick to the classic red velvet flavor or experiment with variations like adding chocolate chips or nuts, this cookie cake will surely impress everyone.
Encourage yourself to personalize the recipe with your favorite decorations or flavors, making it uniquely yours. The versatility and charm of the Red Velvet Cookie Cake make it a timeless treat that will be cherished for years to come. Happy baking!
