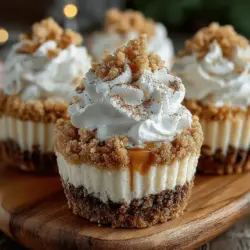
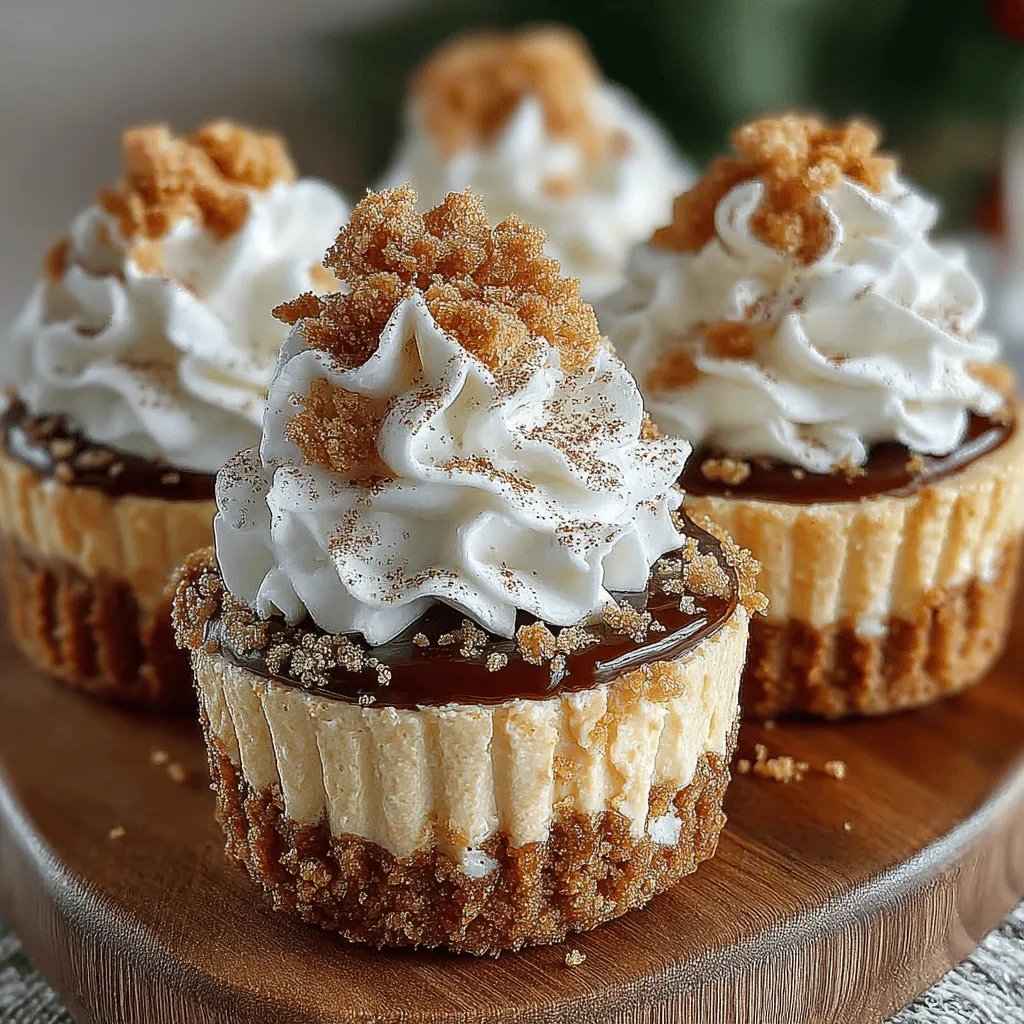
Frosty Pumpkin Cheesecake Cookie Cups Recipe
As the leaves begin to change and the air turns crisp, fall beckons us to embrace its seasonal flavors. Among the many delights this time of year brings, pumpkin-flavored treats reign supreme. One such indulgence that perfectly encapsulates the essence of autumn is the Frosty Pumpkin Cheesecake Cookie Cups. This delectable dessert combines the rich, creamy texture of cheesecake with the warm spices of pumpkin, all nestled in a soft, chewy cookie cup. Whether you’re hosting a Thanksgiving gathering, a cozy get-together, or simply seeking a sweet treat to enjoy at home, these cookie cups are sure to impress.
The appeal of Frosty Pumpkin Cheesecake Cookie Cups lies not only in their delightful flavor combination but also in their versatility. They can be served as a charming dessert at a festive gathering or enjoyed as an afternoon snack with a cup of coffee. The layers of flavor—from the spiced cookie base to the luscious pumpkin cheesecake filling—create a harmonious blend that captures the spirit of the season. As you bake these treats, the aroma of cinnamon, nutmeg, and ginger will fill your kitchen, inviting everyone to come and share in the joy of fall.
Understanding the Ingredients
To create the perfect Frosty Pumpkin Cheesecake Cookie Cups, it’s essential to understand the role of each ingredient involved in this recipe. A well-crafted dessert begins with quality components that work together to produce the desired taste and texture.
Cookie Base Ingredients
The foundation of our cookie cups starts with all-purpose flour, which provides the necessary structure. This versatile ingredient is a staple in baking, contributing to the cookies’ chewiness while allowing them to hold their shape during baking.
Next, we have baking soda and salt. Baking soda acts as a leavening agent, helping the cookies rise and achieve a soft texture. Salt, on the other hand, enhances the overall flavor profile, balancing the sweetness and allowing the other flavors to shine through. Both ingredients play a crucial role in achieving the perfect taste and texture.
Unsalted butter is another key player in our cookie base. Its creamy richness adds depth to the flavor and ensures a tender crumb. When creamed with sugars, butter helps to create air pockets, which contribute to the lightness of the cookie.
Speaking of sugars, this recipe utilizes both brown and granulated sugar. Granulated sugar provides sweetness and helps the cookies spread, while brown sugar, which contains molasses, adds a hint of caramel flavor and moisture. This combination results in a cookie that is not only sweet but also complex in flavor.
Spices are the stars of the show when it comes to flavor development in our cookie base. Cinnamon, nutmeg, and ginger are traditional fall spices that add warmth and depth. They evoke the essence of pumpkin pie, making them the perfect complement to our cookie cups.
Pumpkin Cheesecake Filling Ingredients
Now, let’s turn our attention to the creamy pumpkin cheesecake filling. The primary ingredient here is cream cheese, which is essential for achieving that velvety texture. When blended with other ingredients, cream cheese creates a rich and indulgent filling that pairs beautifully with the spiced cookie base.
Pumpkin puree is another vital component. For the best results, it’s important to use real pumpkin puree rather than canned pumpkin pie filling, which often contains added sugars and spices. Pure pumpkin puree provides a natural sweetness and a slightly earthy flavor that enhances the overall profile of the cheesecake filling.
To sweeten the filling, we again use sugar, along with a touch of spices to elevate the flavor. Just like the cookie base, the combination of cinnamon, nutmeg, and ginger in the filling creates a delightful harmony that resonates with the season.
Lastly, the egg serves as a binder, helping to hold the filling together while providing stability during baking. This ensures that each cookie cup maintains its shape and offers a satisfying texture.
Preparation Steps
Preheating the Oven
Before diving into the mixing and baking process, it’s crucial to preheat your oven. Preheating ensures that the cookies bake evenly and develop the right texture. An oven that is too cool can lead to flat, undercooked cookies, while an overly hot oven can cause them to burn on the outside while remaining raw inside. Setting your oven to the appropriate temperature before you start preparing your dough is an essential step that should not be overlooked.
Making the Cookie Dough
With your oven preheated, it’s time to prepare the cookie dough. Start by creaming together the unsalted butter, granulated sugar, and brown sugar in a large mixing bowl. This process incorporates air into the mixture, resulting in a lighter cookie. Mix until the mixture is smooth and fluffy.
Next, add the eggs and vanilla extract, stirring until fully combined. In a separate bowl, whisk together the all-purpose flour, baking soda, salt, and spices. Gradually add the dry ingredients to the wet mixture, mixing until just combined. Be careful not to overmix, as this can lead to tough cookies. The dough should be slightly sticky and hold together when pressed.
If you find the dough too soft to handle, you can refrigerate it for about 30 minutes. Chilling the dough will make it easier to form into cups while also enhancing the flavors.
Forming the Cookie Cups
Once the dough is ready, it’s time to shape it into cookie cups. Begin by greasing your muffin tins to prevent sticking. Using a cookie scoop or your hands, take a portion of dough and roll it into a ball. Press the dough into the bottom and up the sides of each muffin cup, creating a small well in the center for the cheesecake filling. The dough should be evenly distributed to ensure that each cookie cup bakes uniformly.
As you shape the cookie cups, be mindful of the thickness of the cookie walls. They should be thick enough to hold the filling but not so thick that they overpower the creamy pumpkin cheesecake. Once you’ve formed all the cookie cups, they are ready to be filled with the pumpkin cheesecake mixture, which will be prepared in the next stage of the recipe.
By understanding the ingredients and following these essential preparation steps, you set the foundation for a delightful dessert that embodies the flavors of fall. In the next part of this article, we will explore how to create the pumpkin cheesecake filling and the final baking process to achieve the perfect Frosty Pumpkin Cheesecake Cookie Cups.
Importance of Creating a Sturdy Wall for the Filling
One crucial aspect of making Frosty Pumpkin Cheesecake Cookie Cups is ensuring that the cookie walls are sturdy enough to hold the rich cheesecake filling. A well-formed cookie cup with adequate thickness not only provides a delightful texture but also prevents the filling from leaking or collapsing during the baking process. This sturdy wall is key to achieving the perfect balance of flavors and textures, allowing you to enjoy every bite of this delectable treat without any mess.
Preparing the Cheesecake Filling
Ensuring Cream Cheese is Adequately Softened for a Smooth Mixture
To achieve a smooth and creamy cheesecake filling, it is essential to start with properly softened cream cheese. Remove the cream cheese from the refrigerator and allow it to sit at room temperature for about 30 minutes before use. This step is critical; cold cream cheese can lead to a lumpy filling that is difficult to mix. If you’re in a hurry, you can cut the cream cheese into smaller cubes to expedite the softening process.
Mixing Tips for Achieving a Lump-Free Filling
Once the cream cheese is softened, place it in a large mixing bowl. Use an electric mixer on medium speed to blend the cream cheese until it is smooth and creamy. Gradually add in the granulated sugar and continue mixing until well combined. To incorporate the other ingredients—pumpkin puree, eggs, vanilla extract, and pumpkin spice—add them one at a time, mixing thoroughly after each addition. It is important to scrape down the sides of the bowl periodically to ensure an even mixture. The goal is to create a lump-free filling that is light and airy, contributing to the overall texture of the cheesecake.
Filling the Cups
How to Properly Fill the Cookie Cups Without Overflowing
Now that your cheesecake filling is ready, it’s time to fill the cookie cups. Using a spoon or a piping bag, carefully fill each cookie cup with the cheesecake mixture. Aim to fill each cup up to about ¾ full to allow for some rising during baking. Avoid overfilling, as this can lead to spilling over the edges and a messy outcome. If you happen to have any leftover filling, consider baking it in a small ramekin for a mini cheesecake treat!
Baking Process
Ideal Baking Times and Temperatures for Achieving Golden Edges and Set Filling
Preheat your oven to 325°F (163°C) before you start baking the cookie cups. Place the filled cookie cups on a baking sheet, ensuring they are spaced evenly apart. Bake them for approximately 18-20 minutes, or until the edges are golden brown and the filling is slightly set. The centers may still have a slight jiggle, but they will firm up as they cool.
Signs of Doneness to Look for Before Removing from the Oven
Keep an eye on your cookie cups as they bake. The outer edges should turn a beautiful golden brown, while the center should look slightly puffed and no longer glossy. A toothpick inserted into the center should come out mostly clean, with just a few moist crumbs attached. This indicates that the filling is set but still moist, ensuring a creamy texture.
Cooling and Freezing
Importance of Cooling Time for Texture and Flavor Development
After the cookie cups have finished baking, it is vital to let them cool in the pan for about 10 minutes before transferring them to a wire rack. This cooling period allows the cookie cups to firm up slightly, making them easier to remove from the pan without breaking. Once they have cooled to room temperature, refrigerate them for at least 2 hours. This chilling time helps the flavors meld together and enhances the overall taste of the cheesecake filling.
Why Freezing Enhances the Overall Experience of the Cookie Cups
For the best experience, consider freezing the cookie cups after they have cooled. Freezing them for at least 1 hour will give them a delightful frosty texture that is refreshing and indulgent. These cookie cups are perfect for serving straight from the freezer on a warm day, making them an irresistible dessert option.
Serving Suggestions
Presentation Ideas
When it comes to serving your Frosty Pumpkin Cheesecake Cookie Cups, presentation is key. Top each cup with a dollop of freshly whipped cream and a sprinkle of cinnamon or nutmeg for that quintessential fall flavor. You can also drizzle some caramel sauce on top for an extra layer of sweetness. For a more festive look, consider using decorative cupcake wrappers or serving them on a decorative platter with autumn-themed garnishes like mini pumpkins or leaves.
Creative Ways to Serve at Parties or Gatherings
These cookie cups make for an excellent party treat. Arrange them on a dessert table alongside other fall-themed desserts like apple crisp or pecan pie. You could even create a mini dessert station where guests can customize their cookie cups with toppings like chopped nuts, chocolate chips, or flavored syrups. Not only are they visually appealing, but they also cater to individual tastes, making them a hit at gatherings.
Storage Tips
Best Practices for Storing Cookie Cups in the Freezer
To maintain the freshness and quality of your Frosty Pumpkin Cheesecake Cookie Cups, proper storage is essential. After they have cooled and frozen, transfer them to an airtight container or a freezer-safe zip-top bag. Make sure to layer them with parchment paper between the layers to prevent sticking. They can be stored in the freezer for up to three months, making them a convenient treat to have on hand.
How to Maintain Freshness and Quality
When you’re ready to enjoy your frozen cookie cups, simply remove the desired amount from the freezer and let them sit at room temperature for about 15 minutes before serving. This will allow them to soften slightly while maintaining their frosty texture. Avoid refreezing once they have been thawed to preserve their quality.
Nutritional Information
Overview of Calorie Content and Nutritional Benefits of Key Ingredients
These Frosty Pumpkin Cheesecake Cookie Cups are not only delicious but can also be a reasonably healthy indulgence when enjoyed in moderation. Each mini cookie cup contains approximately 150 calories, depending on the specific ingredients used. Pumpkin puree is a star ingredient packed with vitamins A and C, fiber, and antioxidants. The cream cheese provides calcium and protein, while the cookie base adds a comforting sweetness to balance the flavors.
Discussion on Portion Control with Mini Cookie Cups
The beauty of these cookie cups lies in their portion-controlled size. Each cup is a satisfying treat that allows you to indulge without overdoing it. This makes them a great option for those looking to enjoy a dessert while keeping an eye on their portion sizes, making them perfect for sharing with friends and family.
Conclusion
In conclusion, making Frosty Pumpkin Cheesecake Cookie Cups is a delightful experience that captures the essence of fall in a fun, bite-sized treat. From the sturdy cookie base to the creamy pumpkin cheesecake filling, every component comes together beautifully to create a dessert that is both visually appealing and packed with flavor. Whether you’re serving them at a gathering or enjoying them during a cozy night in, these cookie cups are sure to impress. We encourage you to try this recipe for a taste of the season, and watch as they become a favorite in your household!