
Introduction
Chocolate chip cookies are a beloved treat around the world, often evoking memories of warm kitchens and the comforting aroma of freshly baked goods. Their popularity spans generations, transcending age and culture to become a quintessential part of many people’s lives. From school lunches to holiday gatherings, chocolate chip cookies are a universal symbol of love and comfort. Baking these delightful cookies at home not only allows you to enjoy them fresh out of the oven but also brings a sense of joy and satisfaction that store-bought alternatives simply can’t match.
In this article, we will dive deep into the art of making the perfect chocolate chip cookie. Whether you’re a novice baker or a seasoned pro, our comprehensive guide will provide you with all the information you need to create cookies that are chewy, gooey, and utterly irresistible. We’ll explore the history behind this iconic treat, discuss why homemade cookies reign supreme, and break down the essential ingredients that will help you achieve cookie perfection. Finally, we will guide you through each step of the baking process, from preparing your workspace to mixing the dough, ensuring that you have a foolproof recipe at your fingertips.
Understanding the Basics of Chocolate Chip Cookies
The History of Chocolate Chip Cookies
The history of chocolate chip cookies dates back to the 1930s when Ruth Wakefield, the owner of the Toll House Inn in Massachusetts, invented this delightful treat. Ruth initially created a simple butter cookie recipe and decided to add chopped chocolate bars, expecting them to melt into the dough. To her surprise, the chocolate held its shape, creating delightful pockets of chocolate in each cookie. This innovation led to the creation of the Toll House Cookie, which was later published in a cookbook and gained immense popularity. Today, chocolate chip cookies are a staple in American households and have inspired countless variations across the globe.
Why Homemade Cookies Are Better Than Store-Bought
While store-bought cookies offer convenience, they often fall short in terms of flavor, texture, and freshness. Homemade cookies allow for customization, enabling you to control the ingredients and tailor the recipe to your taste preferences. Freshly baked cookies have a unique texture that is difficult to replicate in commercially produced varieties. By making cookies at home, you can achieve that perfect chewy center and crispy edge that many crave. Plus, the act of baking can be a therapeutic and rewarding experience, allowing you to connect with the joy of cooking and share delicious creations with loved ones.
Key Ingredients That Make the Difference
When it comes to chocolate chip cookies, the quality of your ingredients plays a crucial role in the final product. Understanding how each ingredient contributes to the overall texture and flavor will help you create cookies that are truly exceptional. The key ingredients include butter, sugar, flour, eggs, vanilla extract, baking soda or baking powder, and, of course, chocolate chips. Each component serves a specific purpose in the cookie-making process, and the right balance will ensure your cookies turn out perfectly every time.
Essential Ingredients for Chocolate Chip Cookies
Flour: Types and Their Impact on Texture
Flour is the foundation of any cookie recipe, providing structure and stability. The type of flour you choose can significantly affect the texture of your cookies. All-purpose flour is the most common choice for chocolate chip cookies, as it strikes a balance between chewiness and tenderness. However, for a chewier cookie, you might consider using bread flour, which has a higher protein content. Alternatively, cake flour can be used for a more delicate texture. It’s essential to measure flour accurately, as too much can lead to dry cookies, while too little can cause them to spread too much during baking.
Sugars: Brown Sugar vs. Granulated Sugar
The type of sugar used in your cookie recipe can also influence the flavor and texture. Granulated sugar creates a crispier cookie, while brown sugar, which contains molasses, adds moisture and a rich, caramel-like flavor. Many recipes use a combination of both sugars to achieve a perfect balance of chewiness and crispness. The ratio of brown to granulated sugar can be adjusted based on your preference for sweetness and texture; more brown sugar will yield a softer, chewier cookie, while more granulated sugar will produce a crisper cookie.
Butter: Importance of Temperature and Type
Butter is another crucial ingredient in chocolate chip cookies, contributing to flavor and texture. The temperature of the butter is essential for achieving the desired consistency in your cookies. Room temperature butter (softened but not melted) is ideal for creaming with sugar, as it allows for the incorporation of air, leading to a lighter texture. Using unsalted butter is recommended, as it allows you to control the amount of salt in your cookies. If you prefer a richer flavor, you can substitute a portion of the butter with browned butter, which adds a nutty taste and depth to your cookies.
Eggs: Role in Structure and Moisture
Eggs play a vital role in the structure and moisture of chocolate chip cookies. They help bind the ingredients together, adding richness and contributing to the overall texture. The size of the eggs can also impact your cookies; large eggs are typically used in most recipes, so be sure to use them for consistent results. If you’re looking for an egg-free alternative, consider using flaxseed meal or applesauce, although this may alter the flavor and texture slightly.
Vanilla Extract: Enhancing Flavor
Vanilla extract is a crucial ingredient that elevates the flavor of chocolate chip cookies. It adds warmth and depth, complementing the sweetness of the sugars and the richness of the butter. For the best results, opt for pure vanilla extract over imitation vanilla, as it provides a more authentic flavor. If you’re feeling adventurous, you can experiment with different flavor extracts, such as almond or hazelnut, to create unique variations of the classic cookie.
Baking Soda vs. Baking Powder: Understanding Leavening Agents
Baking soda and baking powder are both leavening agents that help cookies rise and achieve a desirable texture. Baking soda requires an acidic ingredient (like brown sugar or molasses) to activate, while baking powder contains both an acid and a base, making it a complete leavening agent. Most chocolate chip cookie recipes call for baking soda because it enhances the spread of the cookies, resulting in a chewy texture. It’s essential to use the correct leavening agent specified in your recipe, as this will affect the final outcome.
Chocolate Chips: Types and Quality Considerations
The star of the show in chocolate chip cookies is, of course, the chocolate chips. The type and quality of chocolate you choose can greatly impact the overall flavor of your cookies. Semi-sweet chocolate chips are the classic choice, but you can also experiment with milk chocolate, dark chocolate, or even white chocolate for a different twist. When selecting chocolate chips, look for high-quality brands with a high cocoa content for the best flavor. You can also mix and match different types of chocolate to create a more complex flavor profile.
Step-by-Step Instructions for the Perfect Chocolate Chip Cookies
Preparing Your Workspace and Gathering Your Tools
Before you begin baking, it’s crucial to prepare your workspace and gather all necessary tools and ingredients. Start by preheating your oven to 350°F (175°C) and lining a baking sheet with parchment paper. This will prevent the cookies from sticking and make cleanup a breeze. Gather your mixing bowls, measuring cups and spoons, a hand mixer or stand mixer, a spatula, and a cookie scoop or spoon for portioning the dough. Having everything ready will ensure a smooth baking process and help you avoid any last-minute scrambles.
Mixing the Dry Ingredients: Flour, Baking Soda, and Salt
In a medium-sized bowl, combine your dry ingredients: flour, baking soda, and salt. Whisk these ingredients together until they are evenly mixed. This step is essential for ensuring that the leavening agent is distributed throughout the flour, preventing any clumps and ensuring consistent rising. The salt not only enhances the flavor of the cookies but also balances the sweetness of the sugars. Set the dry mixture aside while you prepare the wet ingredients.
Creaming the Butter and Sugars: Techniques for Optimal Texture
In a large mixing bowl, add your room temperature butter along with both granulated and brown sugars. Using a hand mixer or stand mixer, cream the butter and sugars together on medium speed until the mixture is light and fluffy. This process typically takes about 2-3 minutes and is crucial for incorporating air into the dough, which will result in a lighter cookie. Make sure to scrape down the sides of the bowl occasionally to ensure that all ingredients are fully combined. Once the mixture is fluffy, add in your eggs one at a time, mixing well after each addition, followed by the vanilla extract.
Stay tuned for the next steps in our ultimate guide to baking chocolate chip cookies, where we’ll walk you through the remaining instructions, tips for achieving the best results, and answers to common questions.
Incorporating Eggs and Vanilla: Tips for Proper Mixing
When preparing the Refreshingly Tangy Watermelon Feta Bites, the incorporation of eggs and vanilla is a crucial step in achieving the perfect consistency and flavor balance. Begin by cracking the eggs into a mixing bowl, ensuring that no shell fragments make their way into the mixture. Use a whisk or electric mixer to beat the eggs until they are frothy, which introduces air into the mixture. This lightness is essential for creating a delightful texture in your bites.
Next, add the vanilla extract. This step is vital as it enhances the flavor profile of the dish. When mixing the eggs and vanilla, do so at a moderate speed. Avoid over-mixing, which can lead to a dense final product. Instead, mix just until the ingredients are fully combined, creating a smooth and uniform texture. This careful mixing ensures that the flavors meld beautifully, setting the stage for the other ingredients to shine through.
Gradually Adding the Dry Ingredients: Avoiding Over-Mixing
Once your wet ingredients are well-blended, it’s time to incorporate the dry ingredients. This typically includes flour, baking powder, and any spices you wish to add to enhance the flavor of your Watermelon Feta Bites. The key to perfect bites lies in how you integrate these dry components. Gradually add the dry ingredients to the wet mixture in increments, allowing each addition to be fully absorbed before adding the next.
This gradual approach helps prevent over-mixing, which can lead to tough bites. Once all the dry ingredients are combined, stir gently using a spatula or wooden spoon. This method preserves the lightness of the mixture, ensuring that the final product remains tender and flavorful.
Folding in Chocolate Chips: Choosing the Right Chips or Chunks
While your Watermelon Feta Bites are not traditionally associated with chocolate chips, adding a hint of chocolate can create a delightful contrast to the tanginess of the watermelon and the saltiness of the feta. When selecting chocolate chips or chunks, consider the type of chocolate you prefer—dark, semi-sweet, or even white chocolate can complement the flavors beautifully.
When folding in the chocolate, use a gentle motion to incorporate them into the mixture without breaking them apart. This ensures that you maintain a nice distribution of chocolate throughout the bites. Aim for an even mix, where each bite contains a bit of that delightful chocolate flavor.
Baking Techniques for Superior Watermelon Feta Bites
Prepping the Baking Sheet: Parchment Paper vs. Silicone Mats
Choosing the right surface for baking is crucial for achieving optimal results with your Watermelon Feta Bites. You have two main options: parchment paper or silicone baking mats. Parchment paper is an excellent choice for its non-stick properties, facilitating easy removal of your baked bites. Simply line your baking sheet with parchment, ensuring it covers the entire surface.
Alternatively, silicone mats provide a reusable option that offers similar non-stick benefits. They also help distribute heat evenly, resulting in uniformly baked bites. Regardless of which option you choose, ensure that your baking sheet is clean and free from any residue before you start.
Portioning the Dough: Ideal Sizes for Even Baking
When it comes to portioning the dough for your Watermelon Feta Bites, consistency is key. Using a cookie scoop or a tablespoon, measure out uniform portions of the dough. Aim for a size that is about 1 to 1.5 inches in diameter. This size allows for even baking, ensuring that each bite has a similar texture and flavor profile.
Spacing the bites appropriately on the baking sheet is also essential. Leave enough room between each portion to allow for spreading during baking. This will help avoid any unwanted merging of bites and ensure that each one retains its distinct shape.
Chilling the Dough: Benefits of Resting Time
Chilling the dough is an often-overlooked step that can significantly enhance your Watermelon Feta Bites. Refrigerating the dough for at least 30 minutes allows the fats to solidify, leading to a firmer texture. This resting time also helps to intensify the flavors as the ingredients meld together.
If time allows, consider chilling the dough for a few hours or even overnight. The longer resting period can yield even better flavor and texture. When ready to bake, simply scoop the chilled dough onto your prepared baking sheet and proceed with baking.
Oven Temperature and Baking Time: Achieving the Perfect Bake
Preheat your oven to 350°F (175°C) for the best results. This temperature allows the Watermelon Feta Bites to bake evenly, ensuring a golden-brown exterior while keeping the inside tender and moist. Once the oven is preheated, place the baking sheet in the center of the oven, which is the hottest part for even baking.
Baking time typically ranges from 10 to 12 minutes. Start checking at the 10-minute mark. Look for a light golden color around the edges, while the centers should still appear slightly soft. Keep in mind that the bites will continue to cook slightly after being removed from the oven due to residual heat.
Checking for Doneness: Signs to Look For
Knowing when your Watermelon Feta Bites are perfectly baked is crucial. You want to look for a slight golden color on the edges and a soft, slightly puffy center. If they appear too wet or doughy in the middle, give them a couple more minutes in the oven. However, avoid over-baking, as this can lead to a dry texture.
Once they are done, remove the baking sheet from the oven and allow the bites to cool on the sheet for a few minutes. This resting time helps them set before transferring them to a wire rack to cool completely.
Variations and Customizations
Classic Variations: Nuts, Oatmeal, or Peanut Butter
To add a unique twist to your Watermelon Feta Bites, consider incorporating classic ingredients like chopped nuts, oatmeal, or even a scoop of peanut butter. Chopped walnuts or pecans can introduce a delightful crunch that complements the soft texture of the bites. Oatmeal can add heartiness and chewiness, making for a more substantial treat.
Seasonal Twists: Pumpkin Spice, Peppermint, and More
Take advantage of seasonal ingredients to customize your bites. For fall, consider adding pumpkin spice to the dough, giving your bites a warm, cozy flavor. In the winter, a hint of peppermint extract can create a refreshing contrast that pairs well with the watermelon and feta.
Dietary Alternatives: Gluten-Free and Vegan Options
For those with dietary restrictions, it’s easy to modify the recipe. To create gluten-free Watermelon Feta Bites, substitute regular flour with a gluten-free flour blend. Ensure that the other ingredients, including baking powder, are gluten-free as well.
If you’re looking for a vegan option, replace the eggs with a flaxseed meal or a commercial egg replacer. Additionally, ensure that the feta cheese used is plant-based if you’re adhering to a vegan diet.
Creative Flavor Additions: Sea Salt, Espresso, or Citrus Zest
Experimenting with flavors can elevate your bites to new heights. A sprinkle of sea salt can enhance the sweetness and balance the tanginess of the feta. Adding a touch of espresso powder can introduce a rich depth of flavor, while citrus zest (like lemon or lime) can provide a bright, refreshing note that complements the watermelon perfectly.
Storing and Enjoying Your Watermelon Feta Bites
Best Practices for Storing Cookies: Keeping Them Fresh
To keep your Watermelon Feta Bites fresh, store them in an airtight container at room temperature. If they are properly sealed, they can last for up to a week. For longer storage, consider refrigerating them, which can extend their freshness while also offering a deliciously chilled treat.
Freezing Cookie Dough for Future Baking
One of the great advantages of this recipe is its adaptability for future use. The dough can be frozen for up to three months. Simply scoop the dough balls onto a baking sheet lined with parchment paper and freeze them until solid. Once frozen, transfer the dough balls to a freezer-safe bag or container. When you’re ready to bake, there’s no need to thaw them; just add a couple of minutes to the baking time.
Serving Suggestions: Pairing with Milk or Coffee
These Watermelon Feta Bites make an excellent pairing with a variety of beverages. A chilled glass of milk complements the sweetness of the bites, while a cup of coffee or tea can enhance the flavors, offering a delightful contrast to the tangy feta.
Fun Ways to Enjoy Cookies: Ice Cream Sandwiches or Cookie Sundaes
For a fun twist, consider transforming your Watermelon Feta Bites into dessert sandwiches. Simply place a scoop of your favorite ice cream between two bites for an indulgent treat. Alternatively, crumble the bites over a bowl of ice cream or yogurt to create a cookie sundae topped with fresh fruit and drizzled with honey.
Conclusion
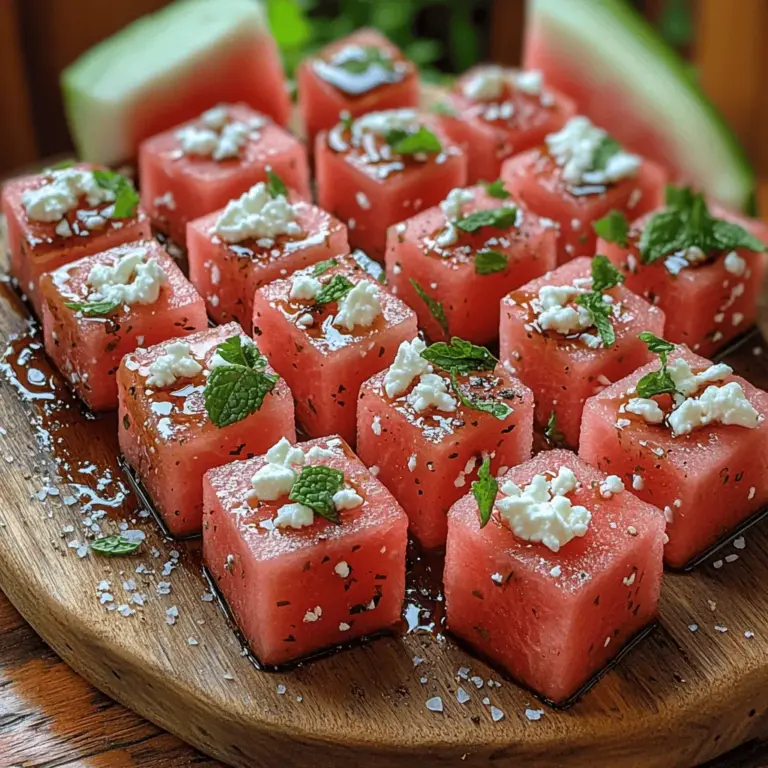
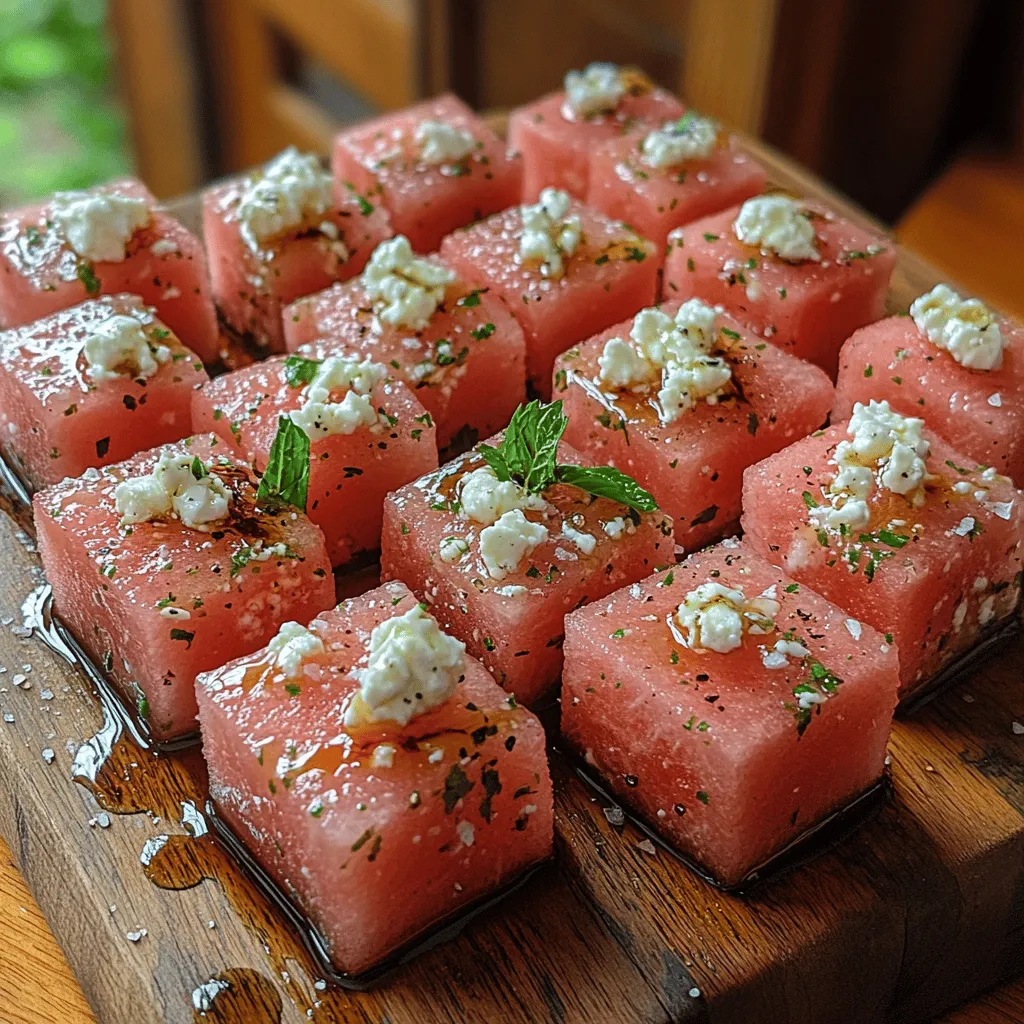
Baking Watermelon Feta Bites at home is a joyful and rewarding experience that combines simple ingredients into a delightful treat. The blend of flavors—the sweet juiciness of watermelon with the salty bite of feta—offers a refreshing snack that can be enjoyed at any time of the year. Experimenting with variations and creative additions makes this recipe highly customizable, catering to a variety of dietary needs and flavor preferences.
We encourage you to try your hand at this recipe and discover your favorite variations. The satisfaction of sharing these homemade treats with family and friends is unparalleled. So gather your ingredients, roll up your sleeves, and get ready to create a batch of Refreshingly Tangy Watermelon Feta Bites that will impress and delight!
